Scanning network with nmap
We are going to learn how to scan a network or a host using nmap, we are going to see some simple nmap commands and commands that help us to pentest, and we are going to use some nmap scripts to speed up the scanning process.
We are going to cover:
- What is nmap
- Basics commands and parameters with nmap
- Difference between TCP connect scan and SYN scan
- Nmap script
- Useful set of parameters
What is nmap?
Nmap is a very powerful tool that allows us to scan networks and hots to detect possible ports that are open or vulnerable, and also this tool will be very helpful if we are learning pentest or if you want become a hacker. we can use nmap in windows, mac and linux in my case i going to use in linux, but the commands it’s the same in others OS.
Basics commands and parameters with nmap
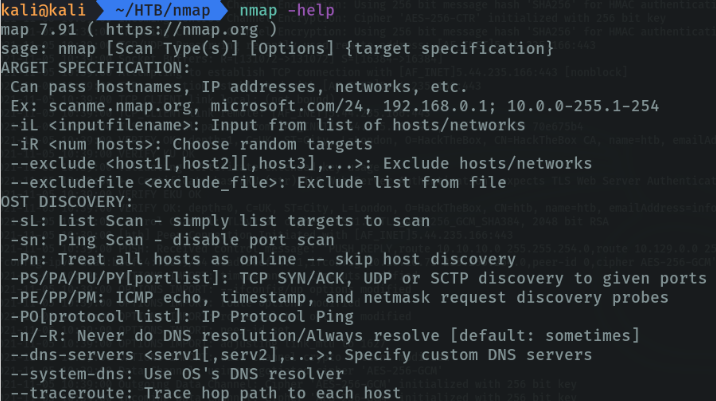
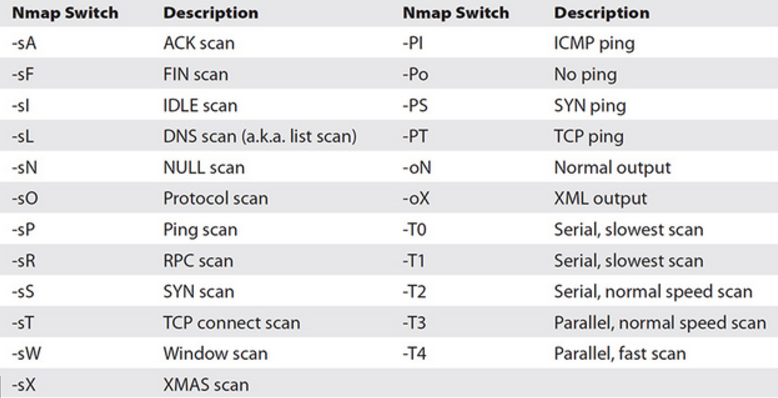
Use the command “nmap -help” to see the parameters and options offered by nmap, or you can use the command “man nmap” to see the full documentation.
Using nmap commands:
$ nmap [Scan Type(s)] [Options] {target specification}
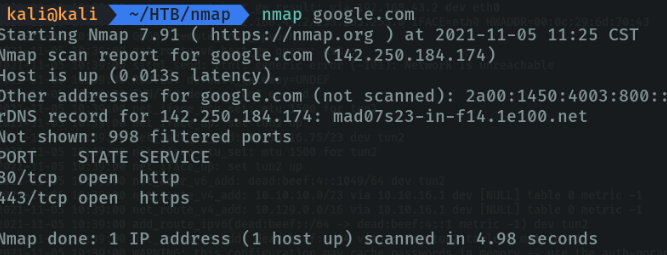
This is a basic scan to find all open ports and running services (this scan is not very good if we want to speed up the process and we will make a lot of noise on the network if we are attackers).
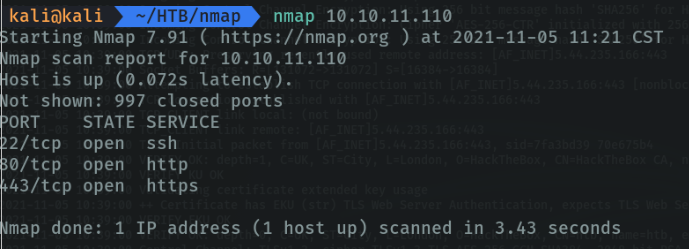
We can do the same scan with the domain name.
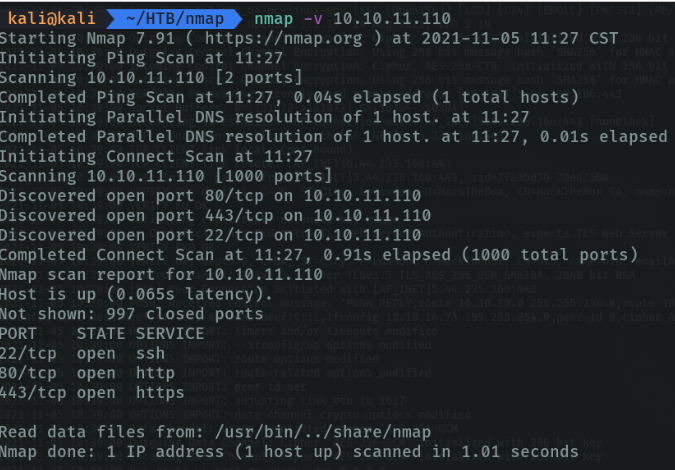
If we want to report information about the machine in the scanning process we will use the parameter “-v” (from verbose). it is advisable to use this parameter to not wait for the scan to finish and meanwhile we can speed up the work.
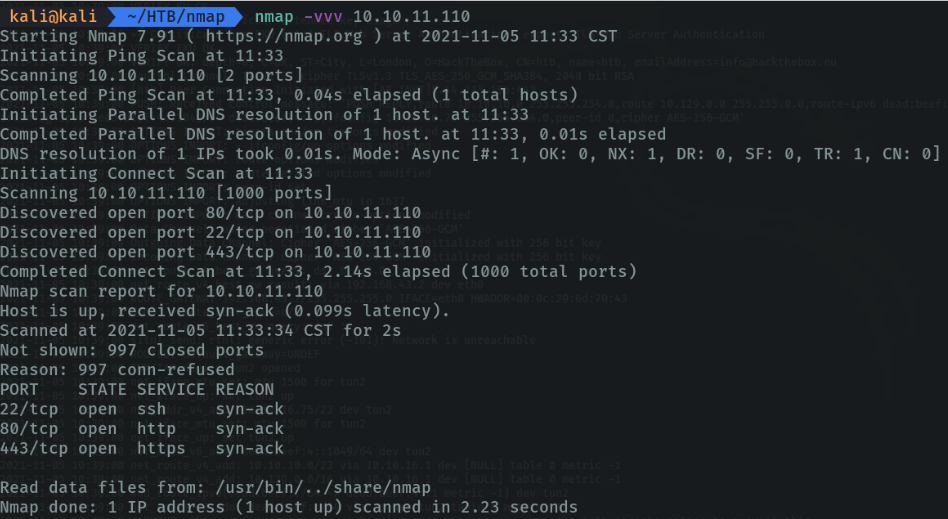
If we do a triple verbose we will get more information about the machine.
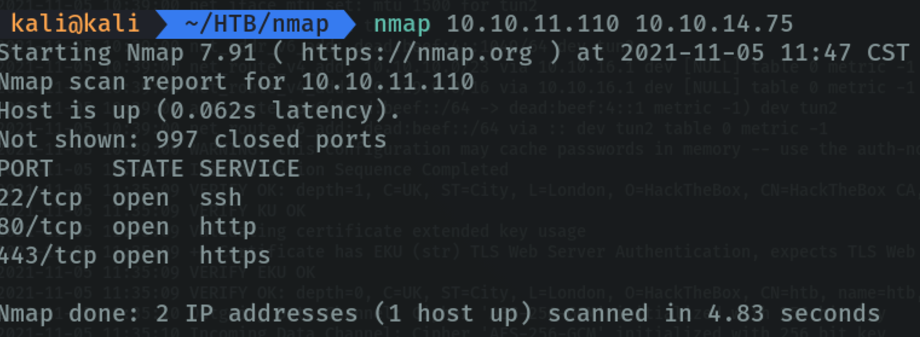
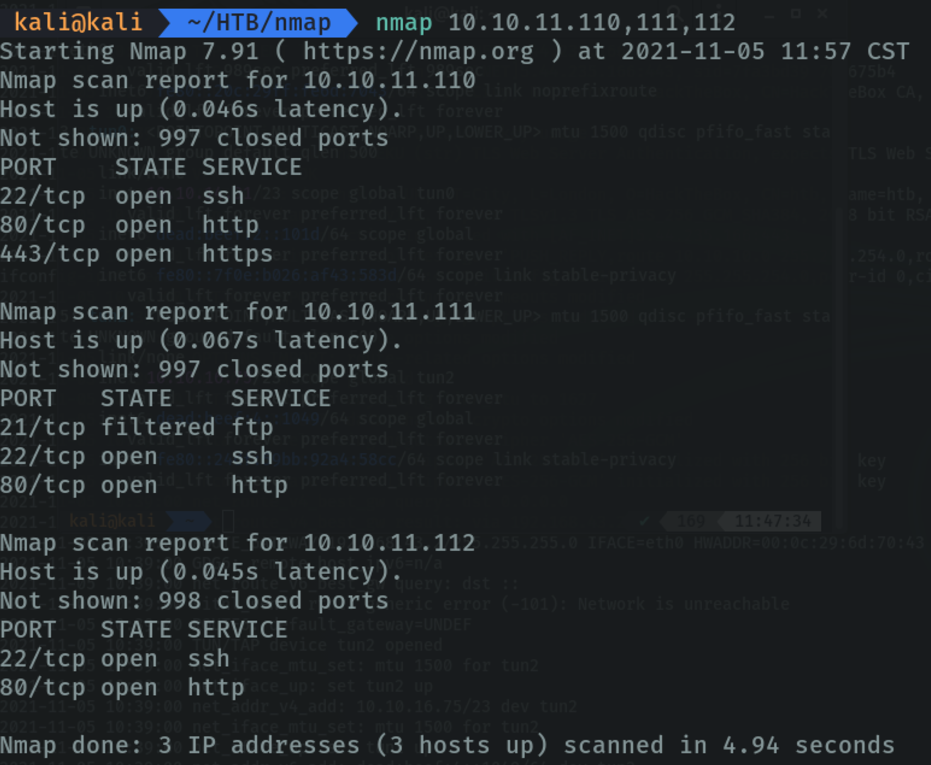
We can scan several hots by puting the ip.
We can perform the same scan of several hosts using the last octet of the ip address.
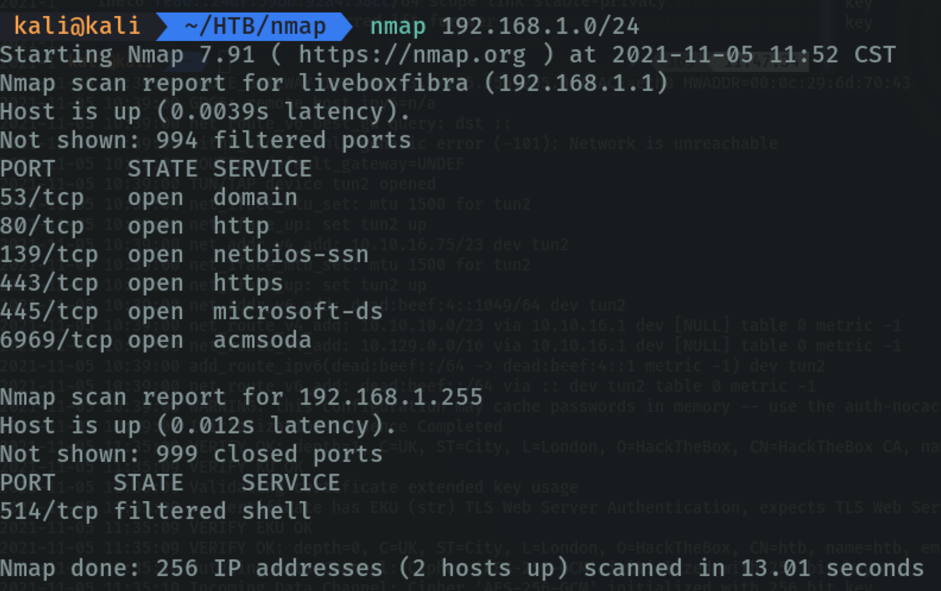
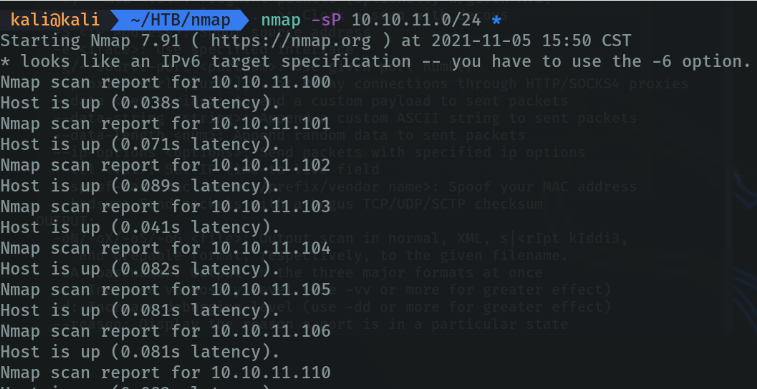
Scanning a subnet, it reports the open ports on that subnet and the machines that are active on that subnet. (remember that if we do these types of scans we will make more noise on the network).
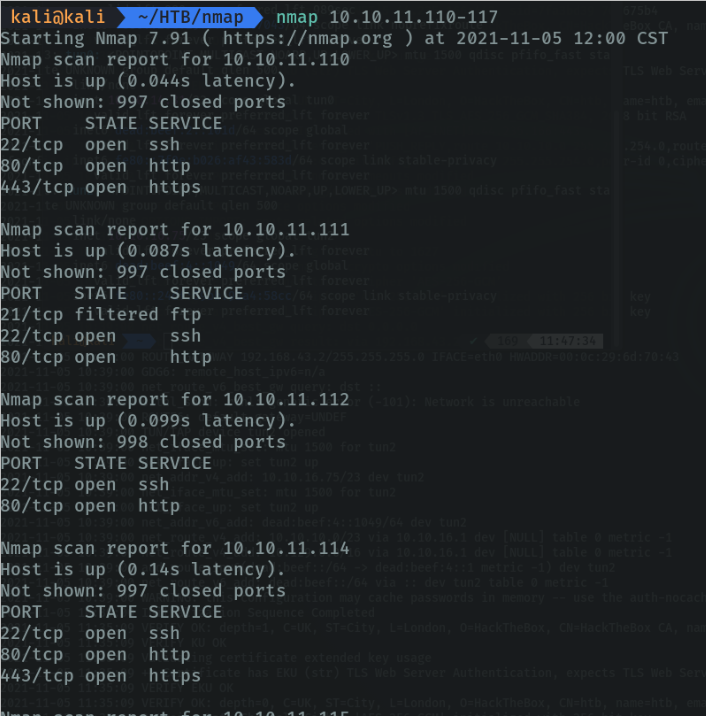
Scanning with a range of ip addresses.
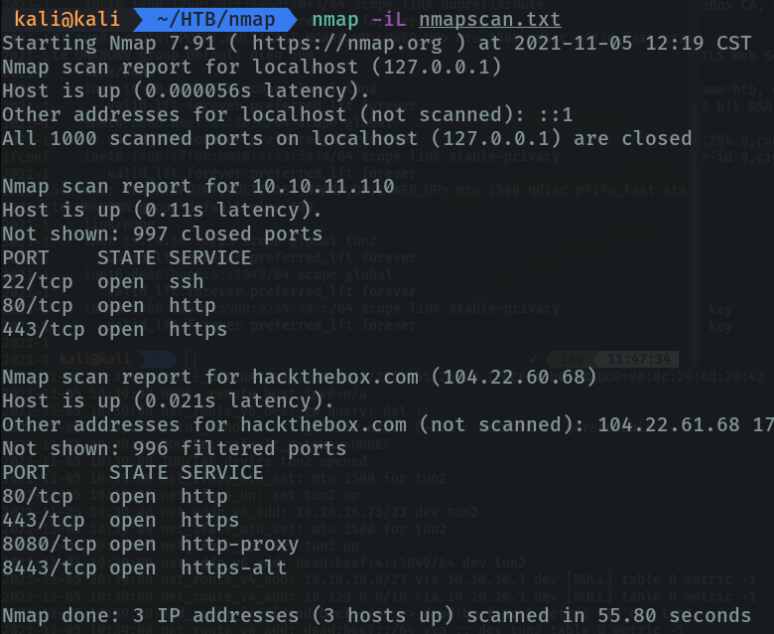
Scan the list of hosts that are in a file. In my case what i created a file and indicate the ip address, the localhost and the dns of htb.
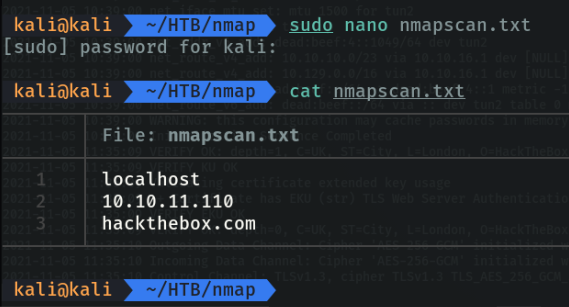
Now we will use the parameter “-iL (Input from hosts/network list)” and specify the file that we have created, to scan all IP addresses that we specify in the file.
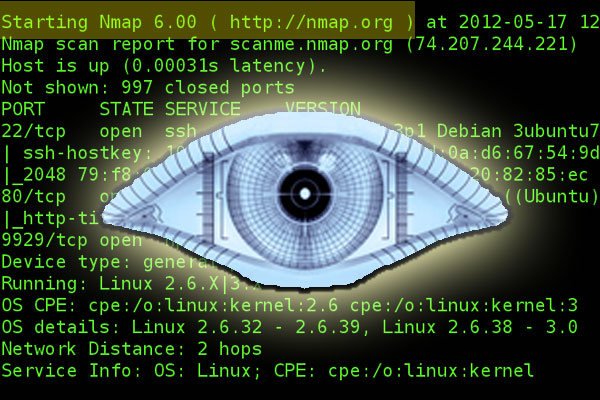
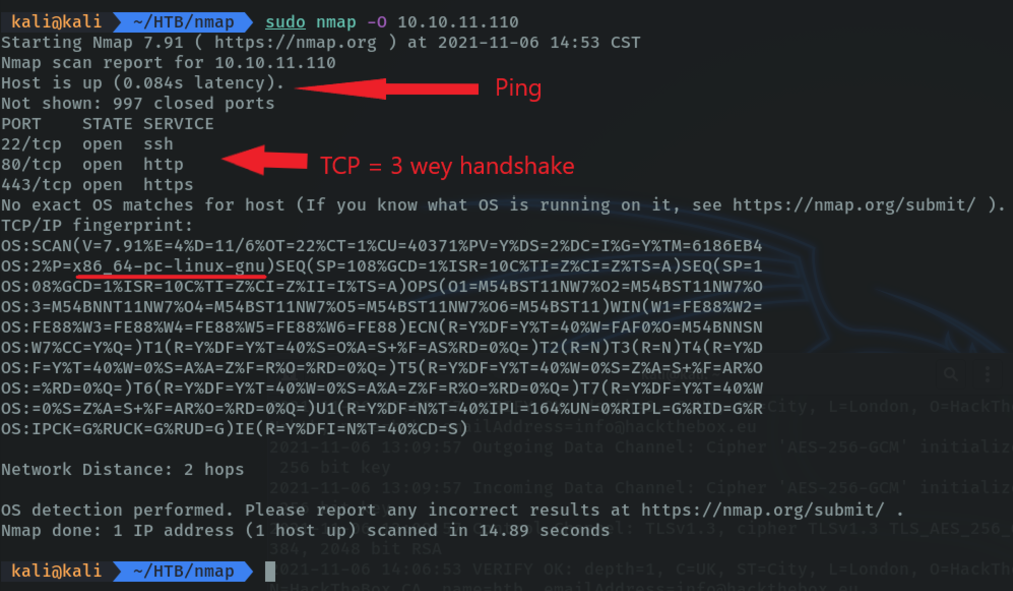
Scan the OS used by the target machine with the parameter “-O (os detection)”. First what it has done is to ping the host and then it has used the 3 wey handshake to discover the ports, and below we can see that it is a linux machine.
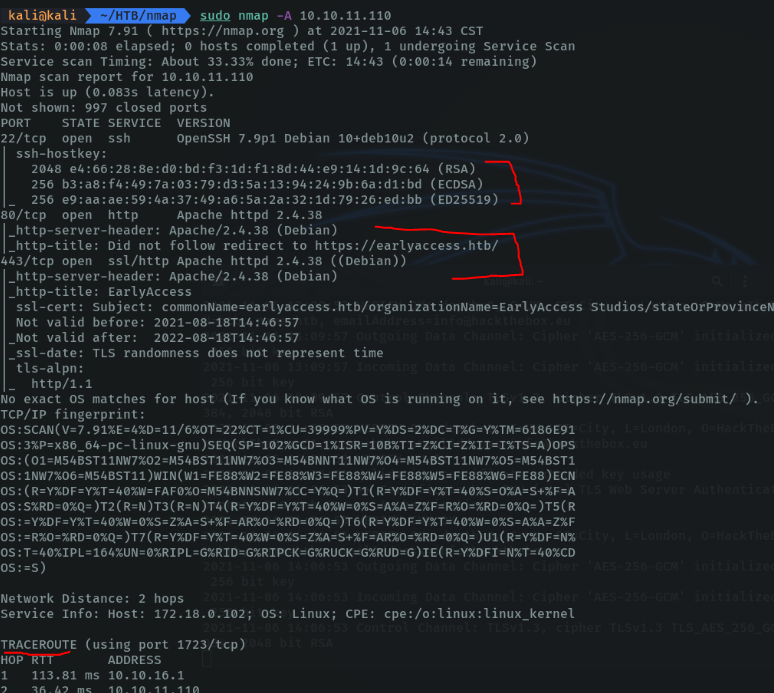
With the “-A” parameter it shows more information about the machine’s OS. this parameter is interesting because it shows us the ssh-hostkey that is to authenticate to connect in the ssh protocol, in this case this key is public. and below we can see the traceroute that would be the intermediary nodes where they have passed the packets that we have sent.
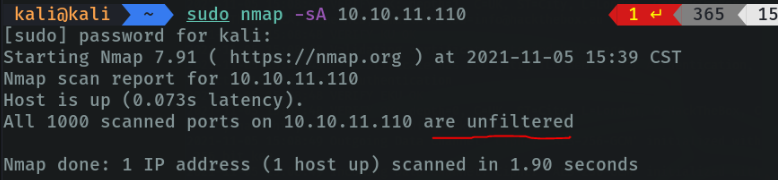
Scan a host to detect if the machine uses packet filters or firewall. In my case it is not filtered.
To view all active hosts within the subnet, this command allows you to ping all hosts on the subnet.
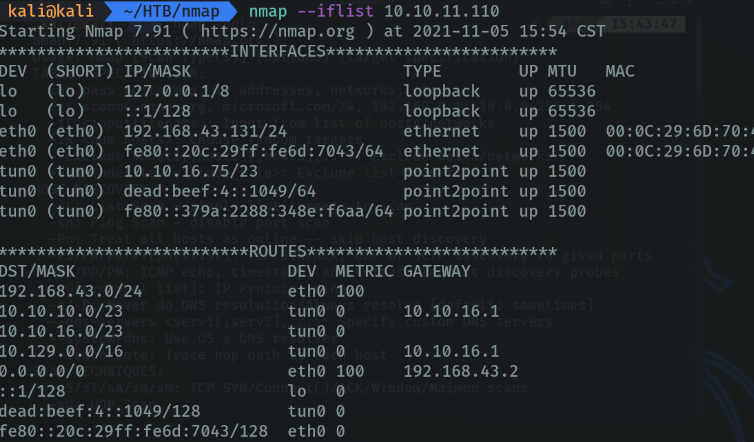
Print hotspot interfaces and routes to the terminal. You can find out the host interface and route information with nmap by using the “-iflist” option.
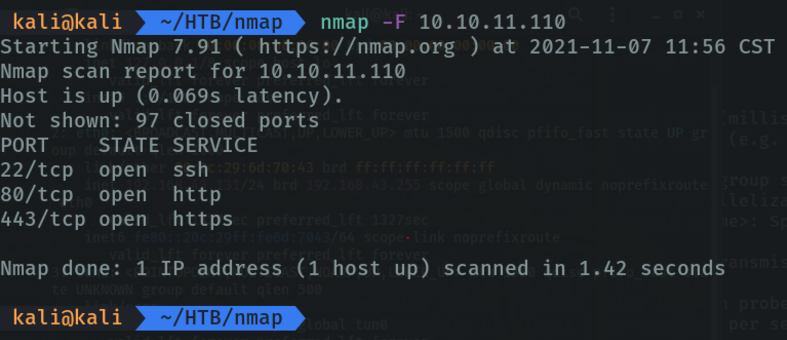
With the “-F” parameter we indicate that we want a fast scan, but I don’t recommend to use this option as I will show better options for fast scanning below.
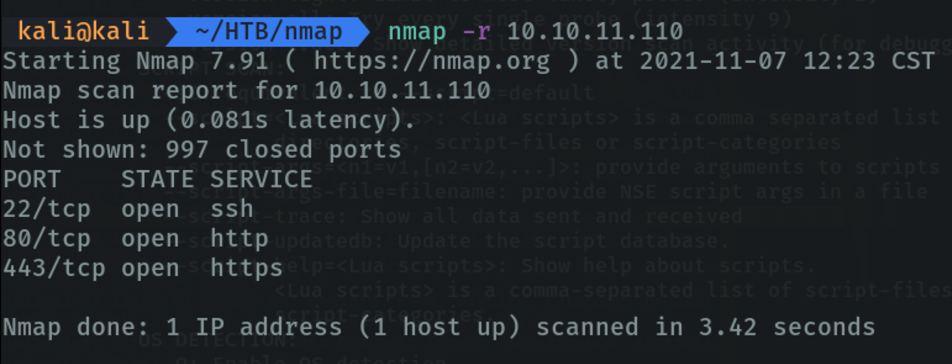
Scan ports consecutively with the “-r (Scan ports consecutively, do not randomize)” parameter.
Scan udp port

Scan and view the versions of different services running on each port.

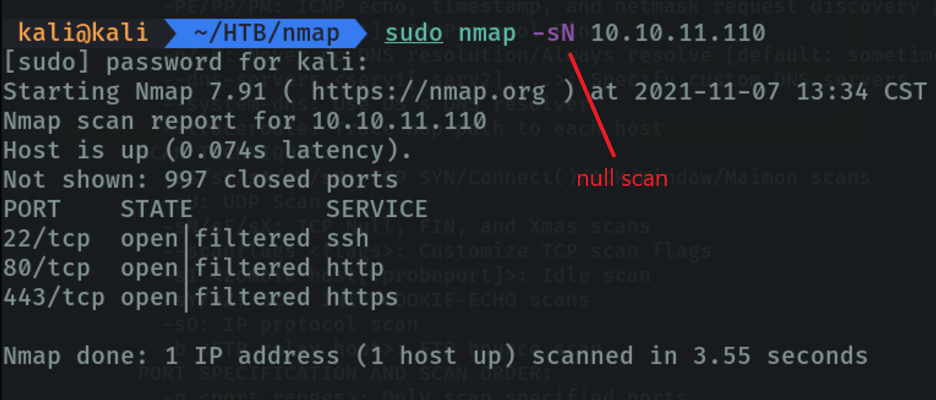
With the “-sN” parameter we do a null scan via tcp to fool the firewall. And it reports us by consala if the ports are filtered or not, by the firewall.
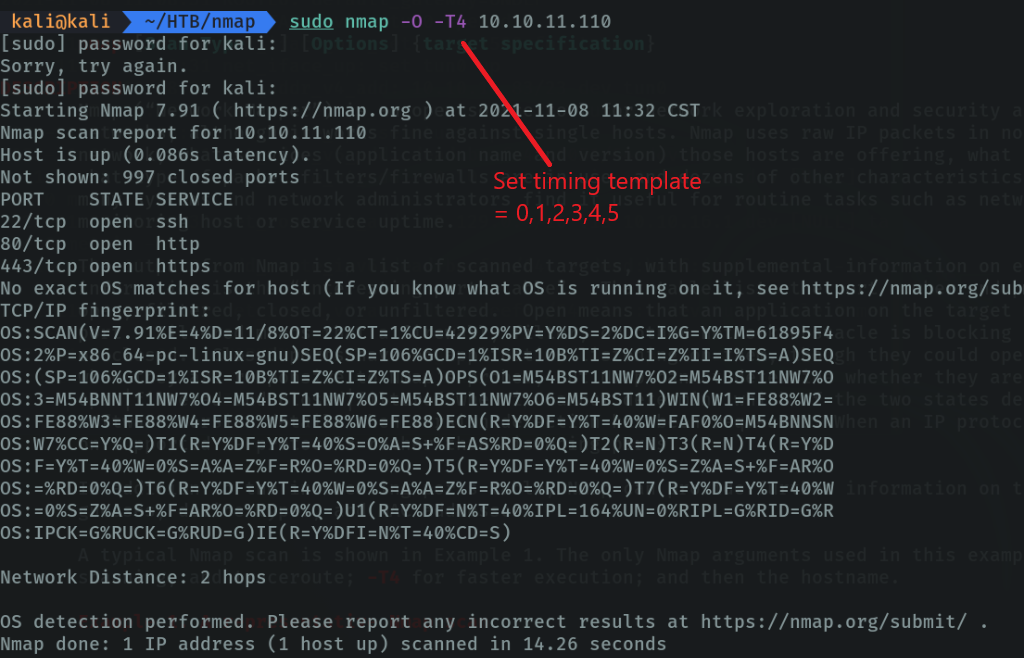
We can specify if we want the scan to go faster by setting a timer templet “-T4”. The maximum is 5 but obviously if we want to go faster we will make more noise on the network.
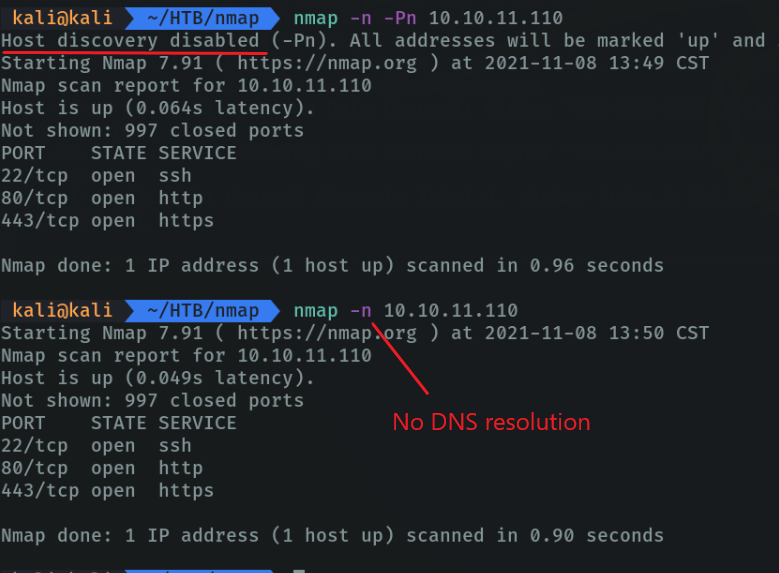
With the parameter “-n” we indicate that we do not want dns resolution, by default nmap applies the dns resolution and that is why we must specify it because there are times that the dns resolution takes more than 1 min and this makes the scan take longer.
With the parameter “-Pn (no ping)” we indicate that we do not want to discover hosts, in case we are only interested in the ports that are open, and this helps us to speed up the scanning process.
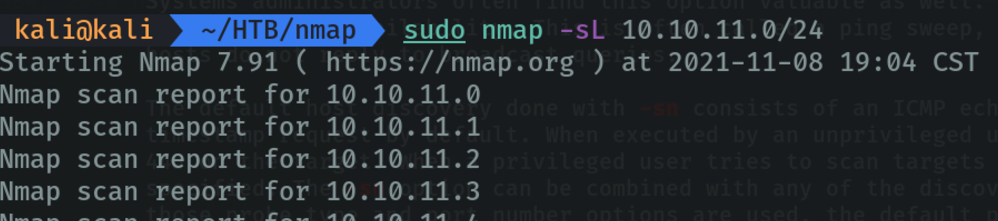
With the “-sL (list scan)” parameter, simply list the targets to scan.
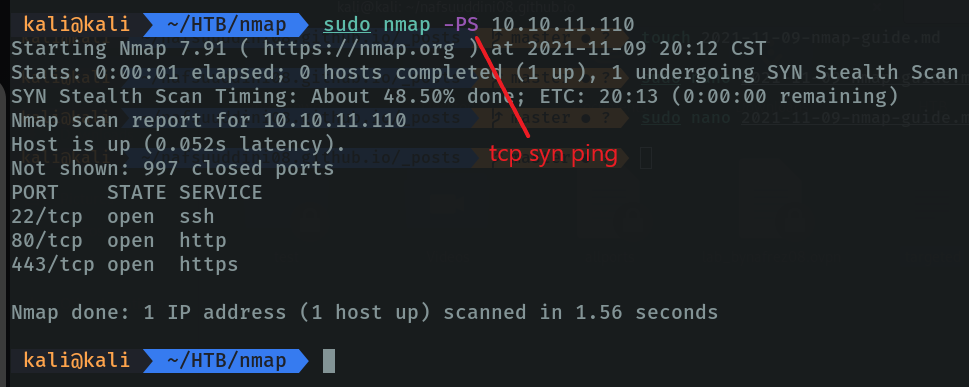
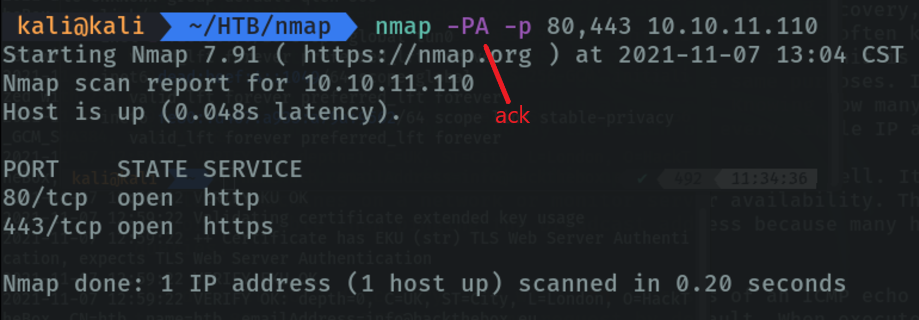
Scan remote hosts using TCP ACK (TA) and TCP SYN (TS). These types of parameters are used when the firewall blocks standard ICMP ping requests, in which case you can use these two methods to scan remote hotspots.
The same with the “-PA” paremeter of “ack” to port spool hosts by specifying the ports, but sending “ack” packet.
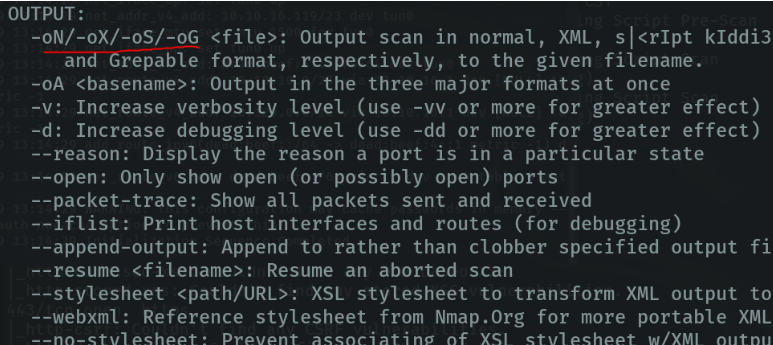
Also nmap allows us to export the evidences in a file with certain parameters, depending on the parameter we use it has certain formats. We have to indicate these parameters after indicating the ip address and put the name of the file from where we want to export the evidences.
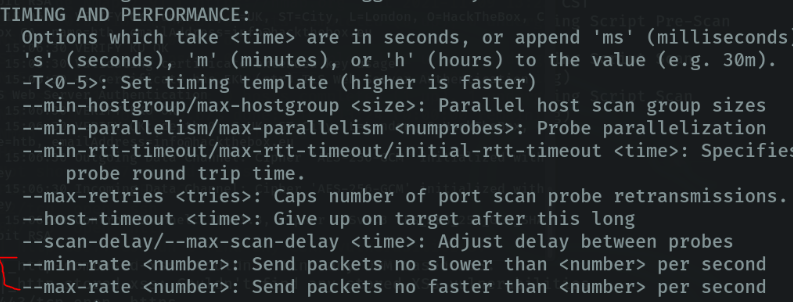
As we have seen above we can specify the scan time. But we also have another option that can optimize the scanning process even more. For example the parameter “–min-rate” we can indicate how many packets we want to emit per second.
There are several parameters that I have not mentioned but that can be useful in certain situations.
Difference between TCP connect scan and SYN scan
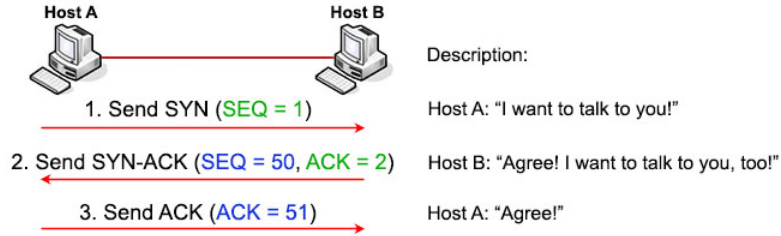
Before using these types of scanning we must know how the TCP protocol works, the TCP protocol (Transmission Control Protocol) for example if we want to access a web site from our computer to the server where the web site is hosted, tcp allows how we must start the communication and how we can access that page. the rules that the tcp protocol uses to start a communication is with “3 wey handshake”. first the client sends a request called “syn”, the server resive the request and responds by sending the client a packet called “syn ack” and then the client sends another packet called “ack” so that the server receives the message that the client is successfully communicating with the server.
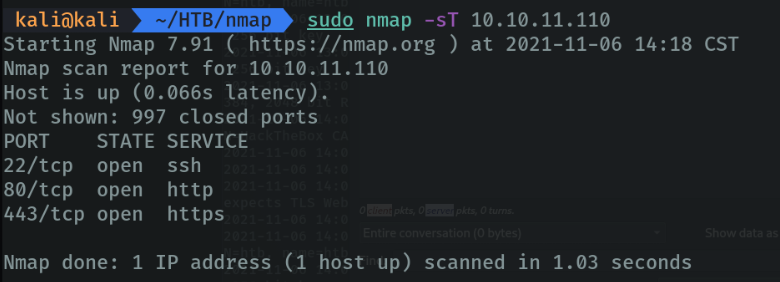
Scan specific ports on the subnet to see if any hosts within the subnet have open ports 80 and 443 via tcp. With the “-sT” parameter we specify that we are going to use the full TCP connection (full open scan), and the magic of this is with the TCP protocol using the “3 way handshake”. using the 3 wey handshake nmap can find out if the ports are open or not.
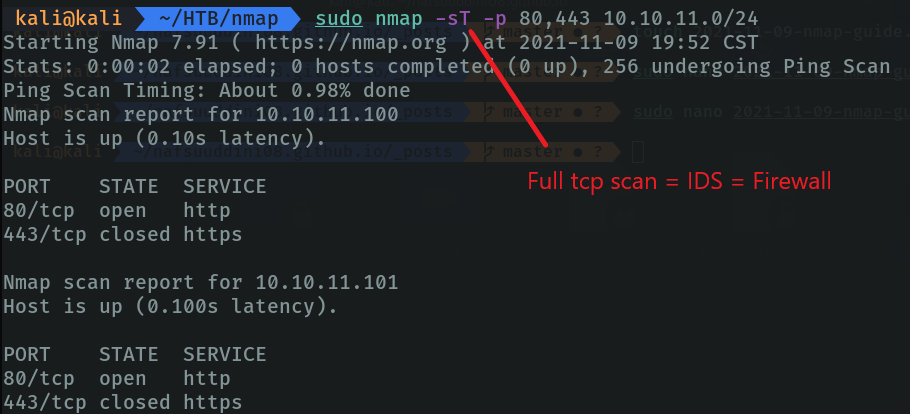
The problem with parameter types such as “-sT” is that we are indicating that we want to tcp the connection, and this can cause a lot of noise in the network and be detected by IDS.
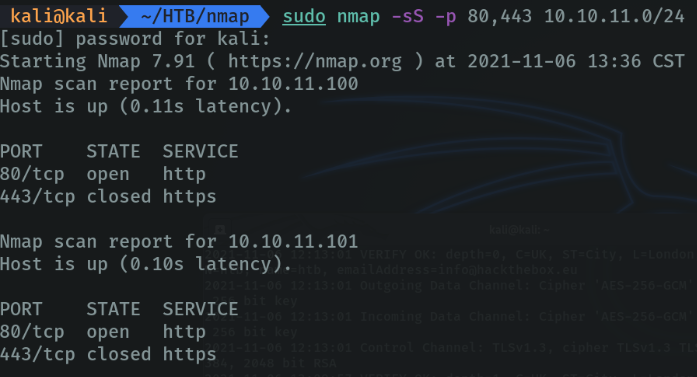
To avoid this type of problems we are going to use the same command but with the parameter “-sS”, this parameter comes from “stealthy” this type of scanning is known as “syn scan” or “half-open scan”. with this parameter we indicate that we do not want the whole process of communication with tcp, as we have seen to communicate through tcp we have to complete the “3 way handshake” to establish the connection, if it does not complete these three processes there will be no connection. But still if the server has well configured firewall we can be detected, but with this parameter at least we avoid that problem a little.
We are going to use these two commands again, but we are going to look at the traffic using wireshark.
Let’s use the “-sT” parameter to indicate all tcp scanning. If we do not specify the ports nothing happens, since by default if you do not specify it nmap scans the 1000 most common ports.
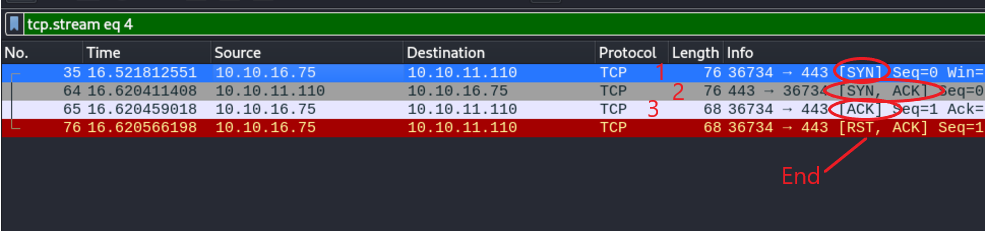
Campturing the packages in wireshark:
First I send a “syn” packet, then the server sends me back a “syn ack” packet (to tell the client that it can communicate with port 443) and once the client receives it, it sends another “ack” packet (to tell the server that it can communicate perfectly). And the “rst, ack” means that this is the end of the communication. As we can see, the “3 wey handshake” has been successfully completed.
Now let’s try with the parameter “-sS”.
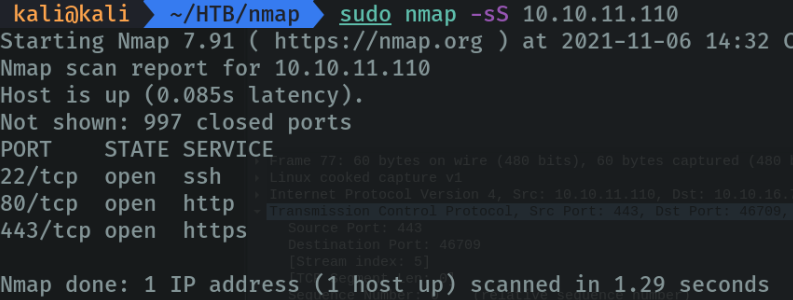
Campturing the packages in wireshark:
First the client sends a “syn” packet, the server replies with “syn. Ack” (telling the client that it can communicate in the port 443), and the communication is finished. In this case it does not comply with the “3 wey handshake” rule because the client does not send the “ack” packet to verify it. And with this we more or less avoid making a lot of noise on the network and being discovered by the firewall.

we are going to use a parametor that is a bit similar “-sS”. With the parameter “-D (Cover up a scan with decoys)”, allows us to cover our traffic to not be discovered easily. As I said before if we are attackers and we are scanning a network and we are sending all that traffic we will make a lot of noise in the network, combining with the parameter “-sS”.
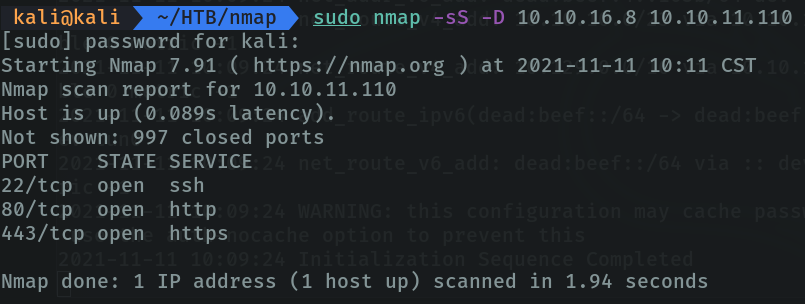
What we have done with the previous command is to send a packet of “syn (-sS)”, but what we do is that there is another host that sends the same packet at the same time changing the ip which in this case is 10.10.16.8, and if someone is looking at the network traffic will see many hots sending that packet and will not know who is sending all those packets over the network, and this as an attacker helps us to cover up.

In wireshark we can see that the packet has been sent at the same time with a duplicate, in my case I have added only one ip, but if we want we can specify ip ranges and more hosts would appear sending the same packet and it would be more difficult to find which computer is sending that traffic.

Nmap script
We can run custom scripts in nmap to find vulnerabilities in certain services. For example with the “-sC” parameter we can launch basic port scanning scripts, etc. If we go to the scripting section in the nmap documentation we can see the options we have.

From the official nmap site there are many categories of scripting that can help us a lot when doing some kind of audit. For example in the “vuln (vulnerabilities)” section we can scan a host and see which ports are open or filtered and report us through the console if some of the ports that run certain services are vulnerable that we can exploit.
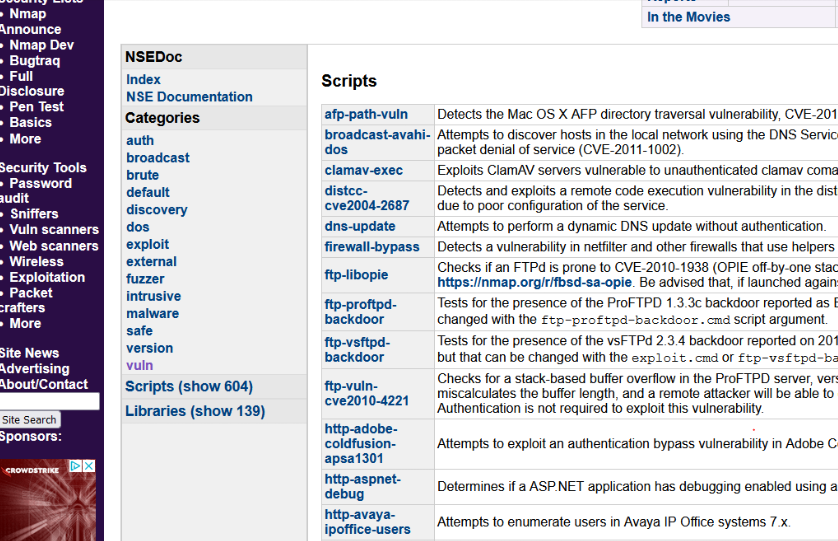
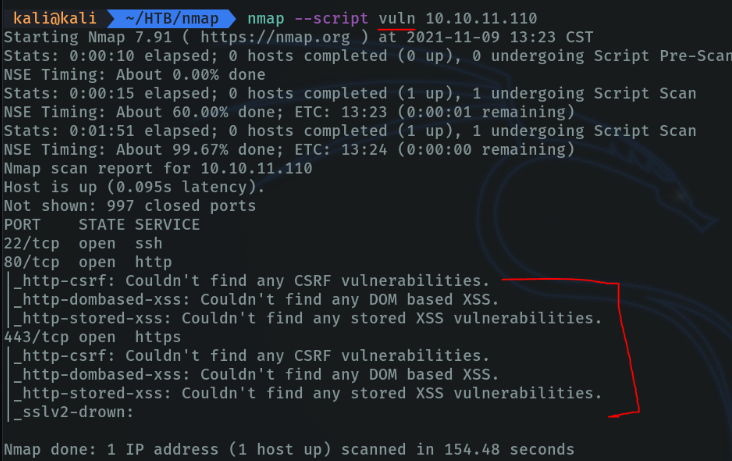
With the parameter “-script” we are going to specify which script we are going to use, in my case I have put “vuln” with this I specify that it uses all the scripts of the vuln category, but with this it takes more time the scanning and it tends to make noise in the network. But we can specify script that you need and we will go even faster. As we can see it has reported me in the terminal the vulnerability that we can exploit in the ports that has been scanned.
If we see that there is an open http port with nmap we can apply fuzzing along with an nmap dictionary of possible routes. There are several better tools for fuzzing, but nmap also has a built-in script for this task even if it is not very useful.

Useful set of parameters
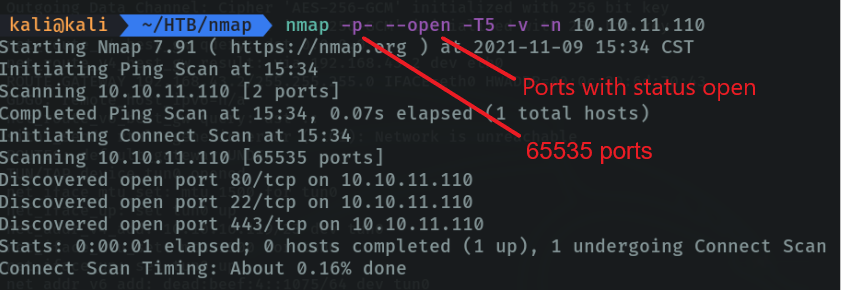
First of all, I have used the parameter “-p-“ to scan all the existing port ranges, which are 65535 ports in total, with this parameter is a way to indicate it. We can use the other option of this parameter which is “-p1-65535”.
And the parameter “–open” is to indicate that we want to report in the terminal the ports that are in open status not filtered in the tcp protocol.
With the parameter “-T” is to control the timing and the performance of our scan, as I said before the faster we want our scan to go the more noise we are going to generate in the network.
And the “-v” parameter of verbose indicates that we want to report information during the scanning process.
And the parameter “-n” we specify that we don’t want dns resolution, if we don’t indicate it there are occasions that the dns resolution takes more than 1 min.
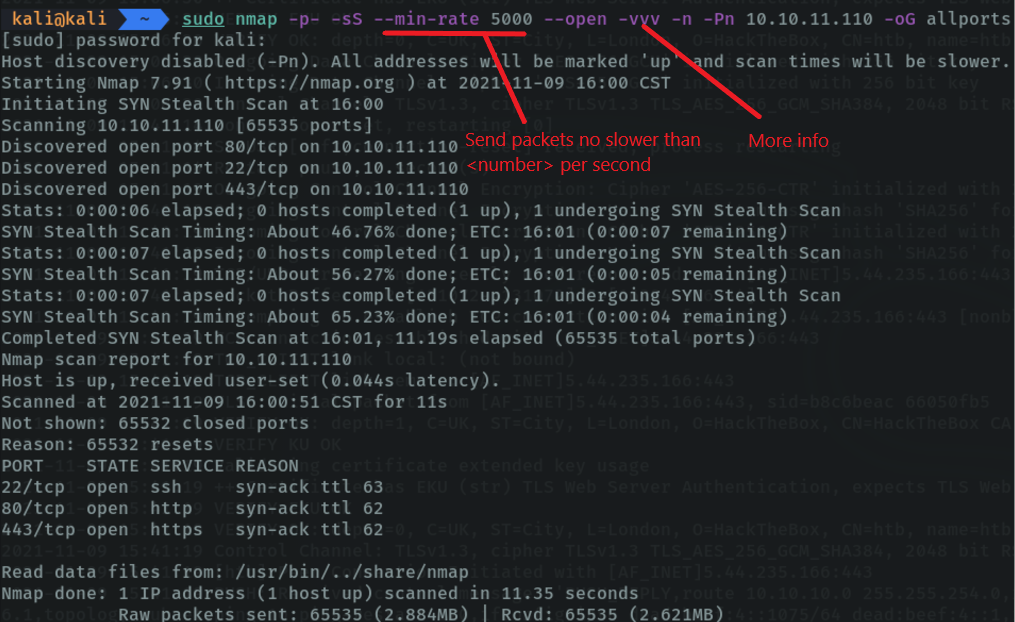
If we want to go even faster and speed up the scanning process we can use the following parameters. With the “-sS” parameter we indicate a “tcp syn port scan” as I have already indicated what this parameter deos. And with the parameter “–min-rate [number of packets]” to indicate that I want to send packets no slower than 5000 packets per second, with this we get that our scan goes faster and with this combination we don’t need to use the parameter “-T”.
With the parameter “-vvv (verbose)” I am indicating that I want more information. And with the parameter “-Pn” we indicate that we don’t want host discovery through the arp address resolution protocol. And with the parameter “-oG” we indicate in which format we want to save the evidences and the file name.
If we do a “cat” to the file we can see that the nmap capture is saved.

In this case I used this format because I have a utility in the “~/.zshrc” file that shows me the available ports and ip in a more elegant way and copies the range of ports to the clipboard.
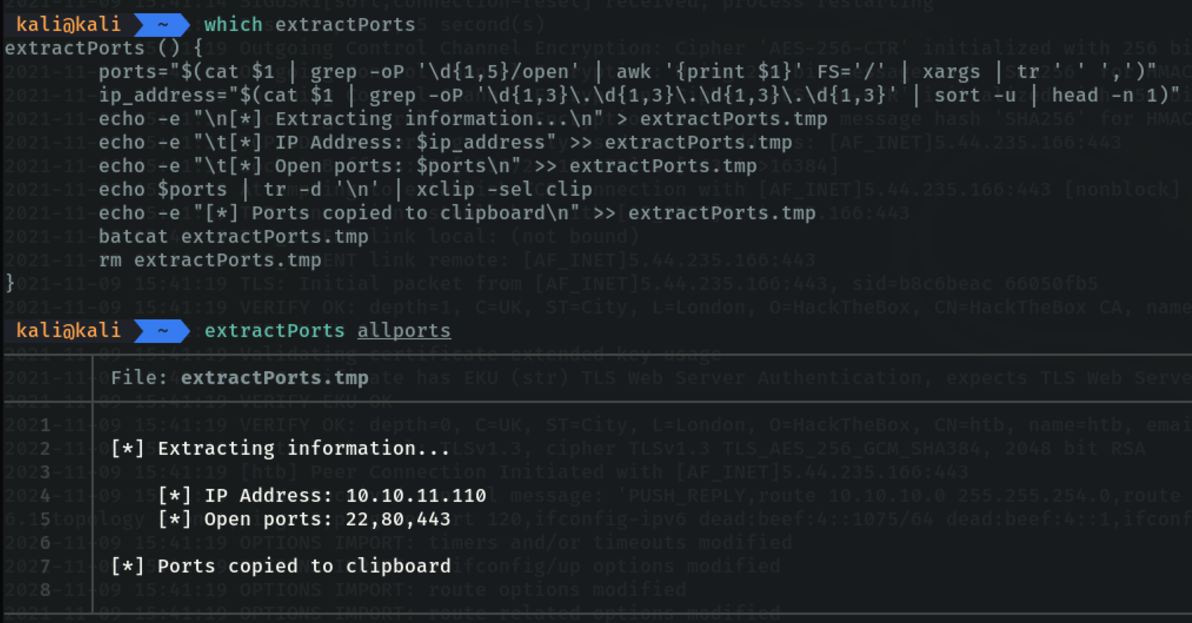
To copy the function:
#!/bin/bash

function extractPorts(){
        ports="$(cat $1 | grep -oP '\d{1,5}/open' | awk '{print $1}' FS='/' | xargs | tr ' ' ',')"
        ip_address="$(cat $1 | grep -oP '\d{1,3}\.\d{1,3}\.\d{1,3}\.\d{1,3}' | sort -u | head -n 1)"
        echo -e "\n[*] Extracting information...\n" > extractPorts.tmp
        echo -e "\t[*] IP Address: $ip_address"  >> extractPorts.tmp
        echo -e "\t[*] Open ports: $ports\n"  >> extractPorts.tmp
        echo $ports | tr -d '\n' | xclip -sel clip
        echo -e "[*] Ports copied to clipboard\n"  >> extractPorts.tmp
        cat extractPorts.tmp; rm extractPorts.tmp
}
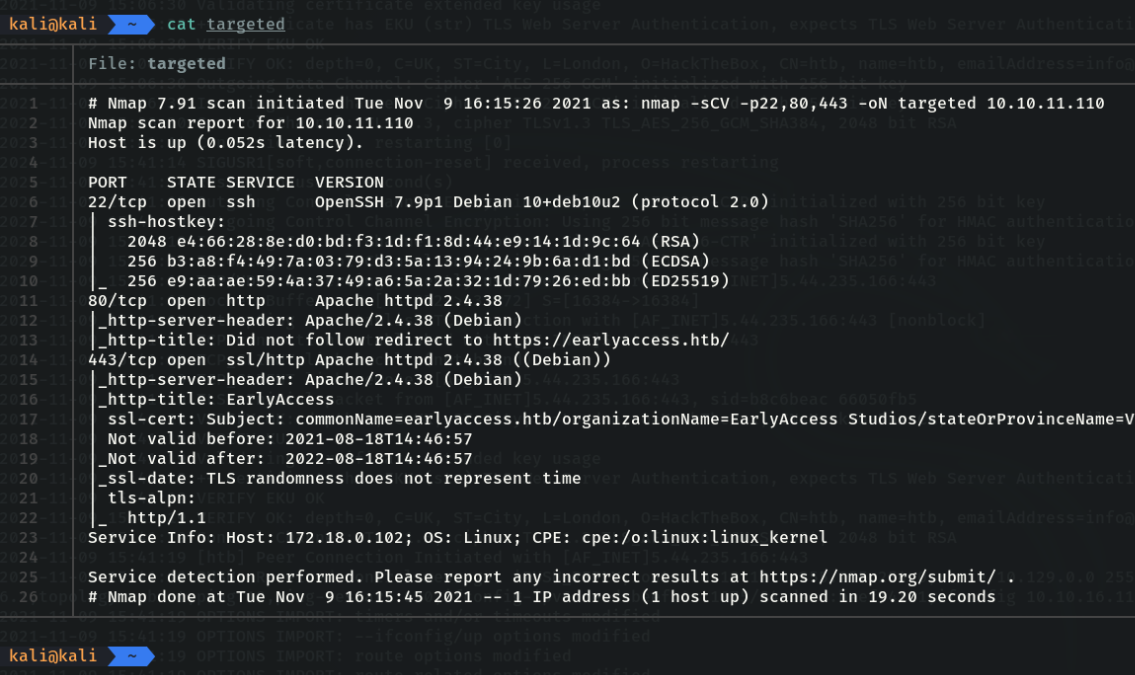
With the “-sC” parameter we tell it to run some basic recon scripts. With the “-sV” parameter, we tell it to report the version of the services, this parameter can be used with the other “-sCV” to speed up the process even more. I indicate the ports that I have just discovered and I want to save the evidence with the nmap format “-oN” to the targeted file.
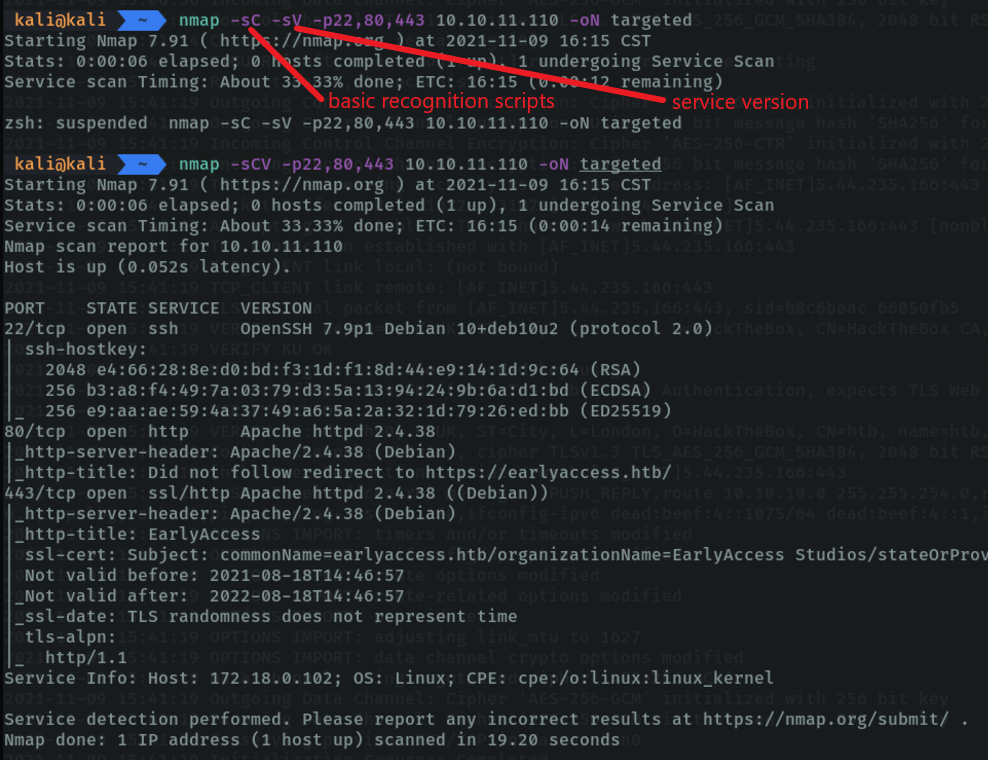
And as we can see, the evidence has been saved correctly.