Azure - Appservice
We are going to learn how the app service works and the possibilities it offers us to manage the hosting since the app service is still a hosting but the difference is that we can manage it.
In this article we are going to learn:
- What is app service and azure concepts
- How to create a resource group
- Create an App service plan
- Creat a appservice in azure
- Deploy our web app in the multiple ways:
- Deploying with ftp
- Deploying with our github repository
- Deploying with bitbuket
- Deploying with git local
- Deploying with azure repo
- Deploying with vs code 2019
- Push our repo in github in vs code 2019
- Deploying with vs code
- Create appservice with azure start devops
- Some azure CLI commands
- Create an app service inside a container
- Create an webhook
Sorry for the screenshots that are in Spanish, I have not been able to make the guide again since my azure subscription has expired. But the process is the same.
What is app service?
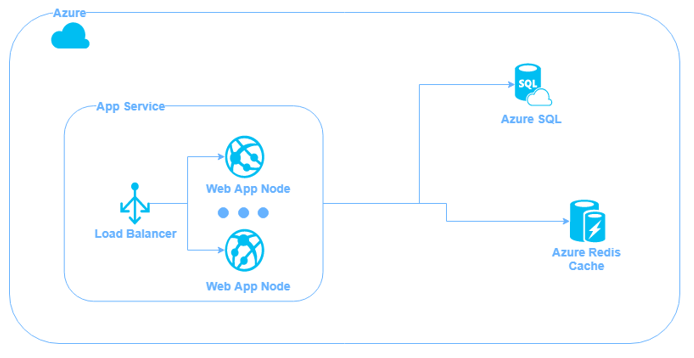
App service is a fully managed web hosting service for building web applications, services and RESTful APIs. The service offers a variety of plans to meet the needs of any application, from small web sites to worldwide web applications.
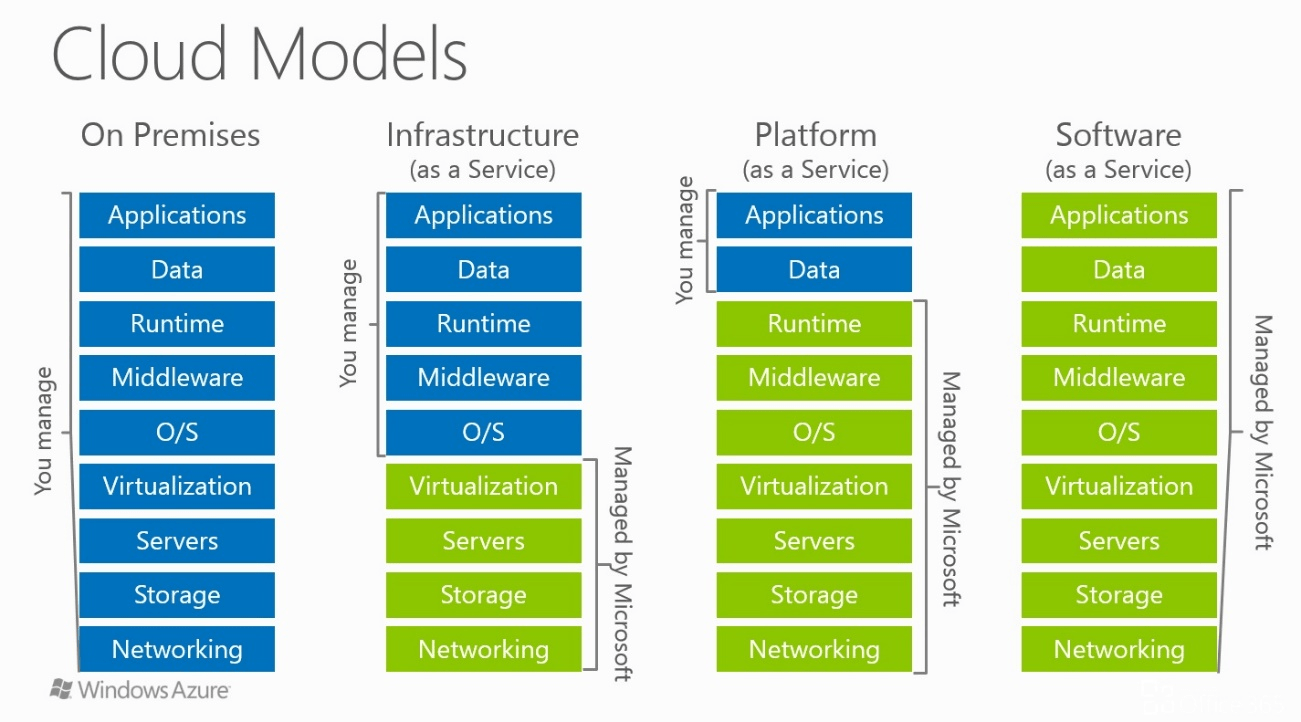
In azure there are three models of cloud computing offered to us as a service, and each one covers some degree of management and this includes other cloud providers, which is the iaaS, PaaS and SaaS.
iaaS: this service manage virtual machines and storage in the cloud.
PaaS: It provides operating systems, databases, etc. that you can raise, modify and shut down with a few clicks.
SaaS: Allows users to connect to applications that are in the cloud over the Internet and use them (hosting, outlook, google docs).
There is one important thing we have to keep in mind when using azure is that it charges us for reading data and this includes with other providers.
How to create resource group
A resource group allows us to manage resources in a flexible and simple way (vm, web app, databases, networks, etc.) The resource group can include all the resources of the solution or only those that you want to manage as group.

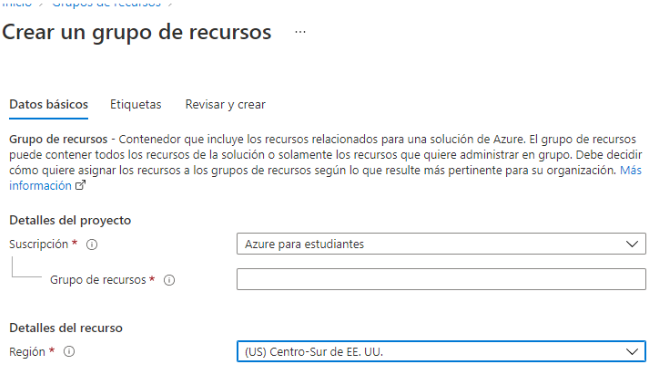
To create a group of resources, we go to the azure portal and click on the three stripes that appear in the upper left. And then we select a resource group and click on “create” .

In case we have other types of azure subscriptions we will select it, and we gon a put name our resource group. It is important to check which region we choose, because depending on the region, there are different costs. And click on “review + finish”.
Create an app service plan
We are going to create a plan for our app service, and when we are going to create a new app service we can select this plan.
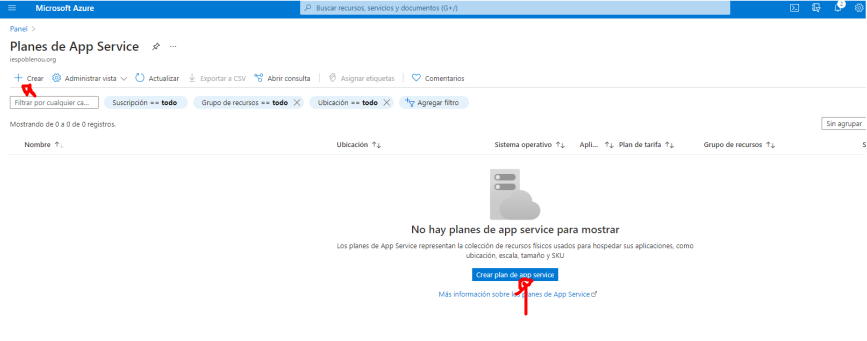
So to create a app service plan, we are going to search “app service plans” in the azure portal navegation bar. Here we are gon a click in “create”.
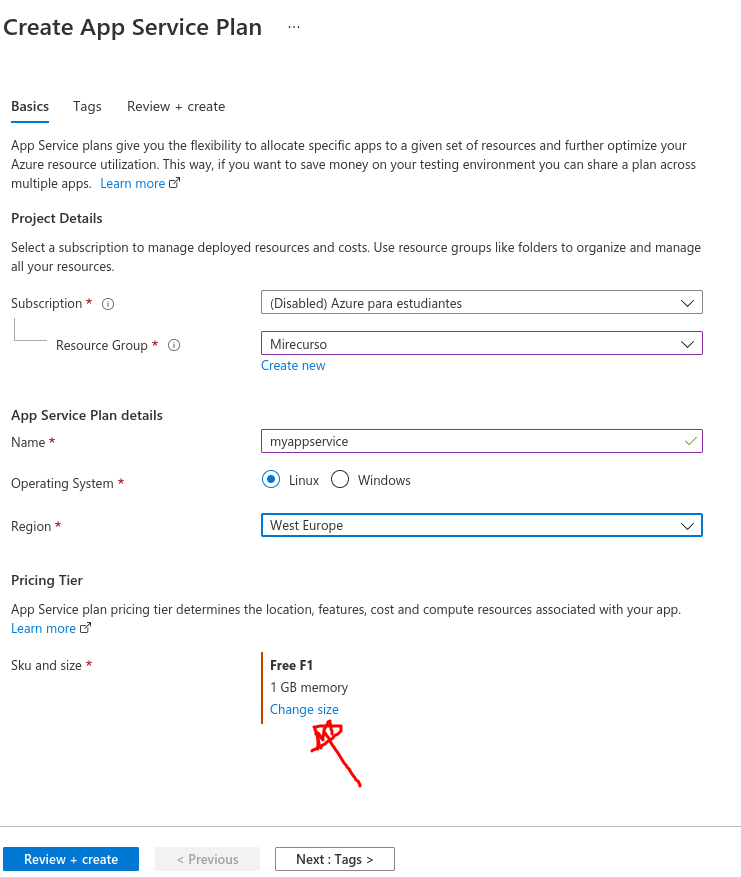
Here we are going to select our resource group that we have just created, we put the name of our plan, we will choose an operating system this is important since each operating system offers us different functionalities in the app service, we choose a region (it is important to select the region where we are located) and finally we will choose the price plan, there are two price plans that are for testing, which is f1 (which is free) and b2 (which is paid and with more capacity) there are other price plans but we’ll see later.
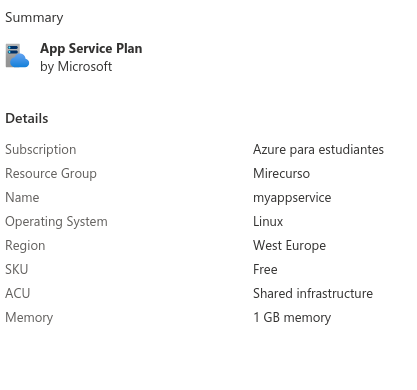
After selecting the sku, we click on “create and review” and a summary of the configuration that we have put in our app service plan will appear. and we click “create” to finish.
Create an app service
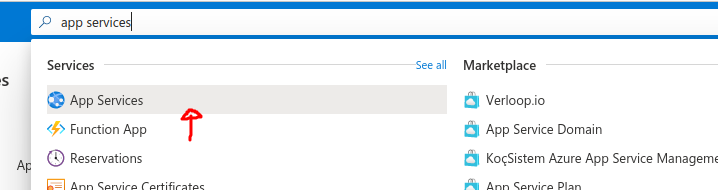
We will type “app service” in the search engine of the azure portal and click on app service.
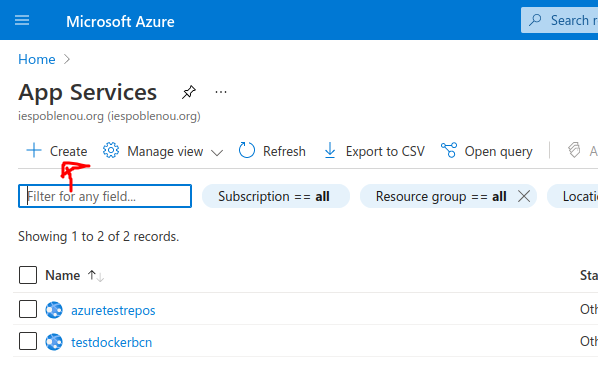
Here in the app service panel we are going to click on “create”.
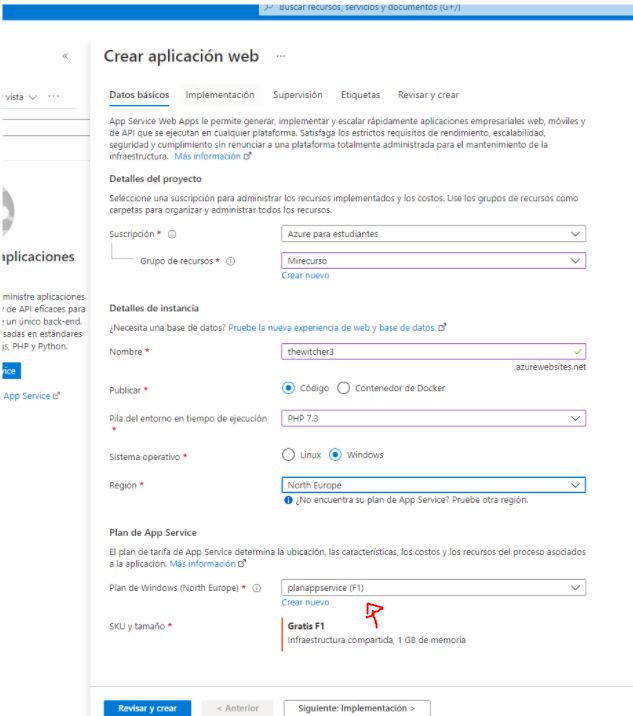
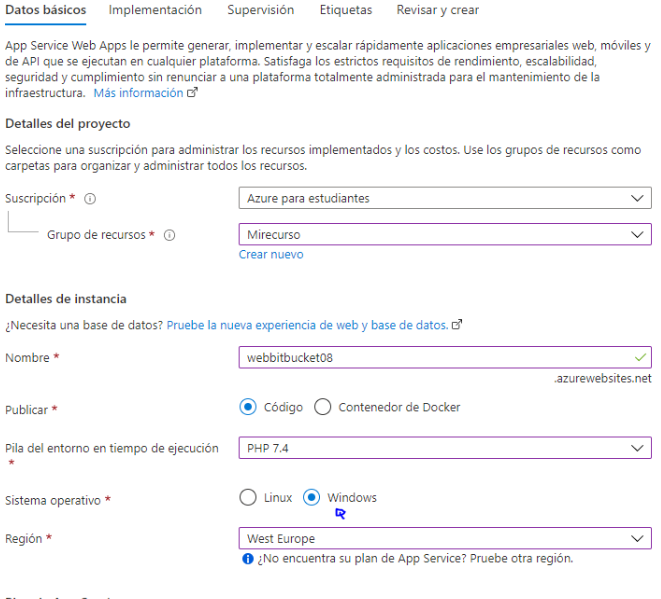
First we are going to select the group of resources that we have created previously, and then we will put a domain name for our web app. In “publish” we are going to select code, since the second option is if we want our app service to be published within a docker container, but we will see that later.
Where it says “runtime stack” defines the technology stack used to develop the application, in my case I will choose php 7.3. We choose an OS as I said before, it is important that we select a suitable one for our needs since each OS offers different features in app service.
We choose a region closer to where we are located and in “plan” we will choose the plan that we created previously, in this case I put another app service plan since the plan that I created previously put the Linux OS. or if we want we can create a plan directly from here by clicking on “creat new”. And to finish we click on “review and finish”.
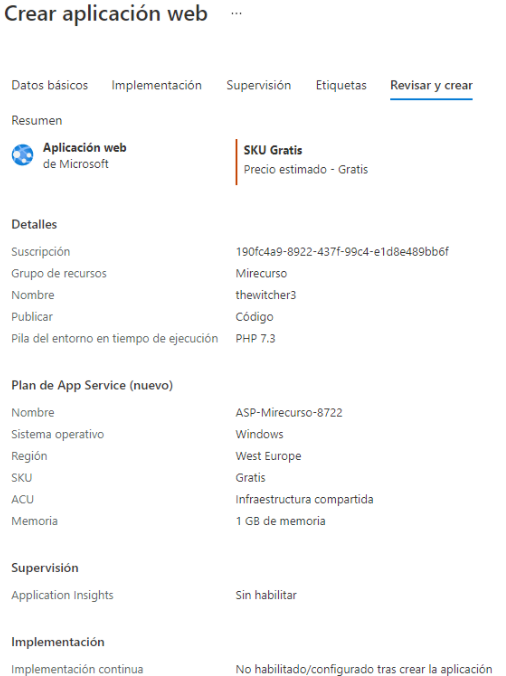
And here we can see the summary of the configuration that we put to create the app service (if we see any wrong configuration we can go back) and we click on “create” to finish the process.
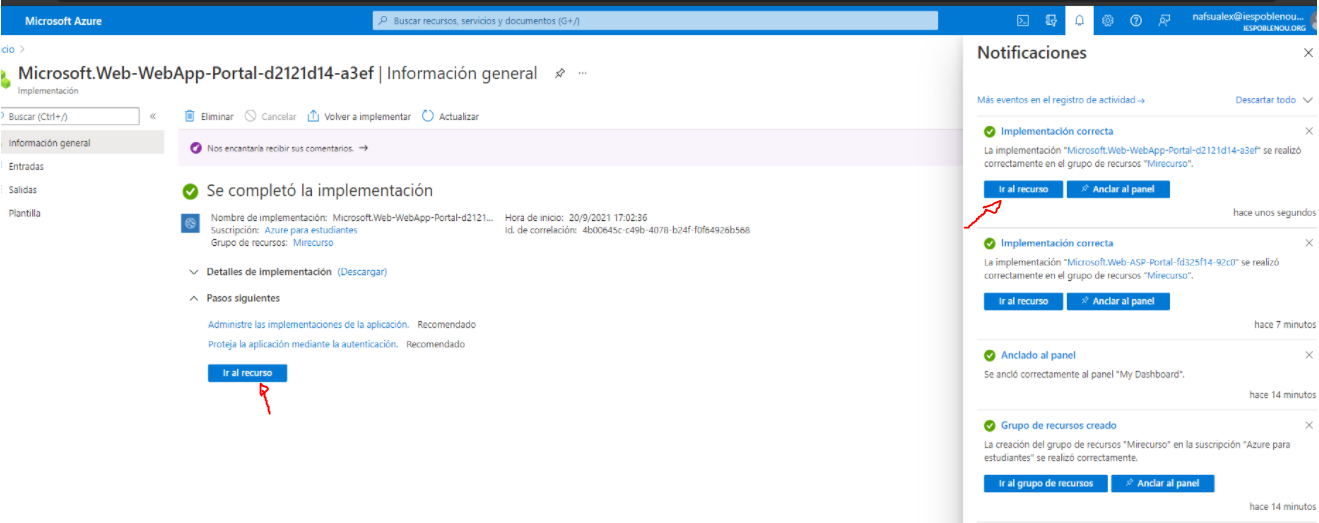
We are going to wait for the implementation process of our app service to finish. And once it is finished we click on the notification bell and we click on “go to resource” or from the same panel where it is being deployed.
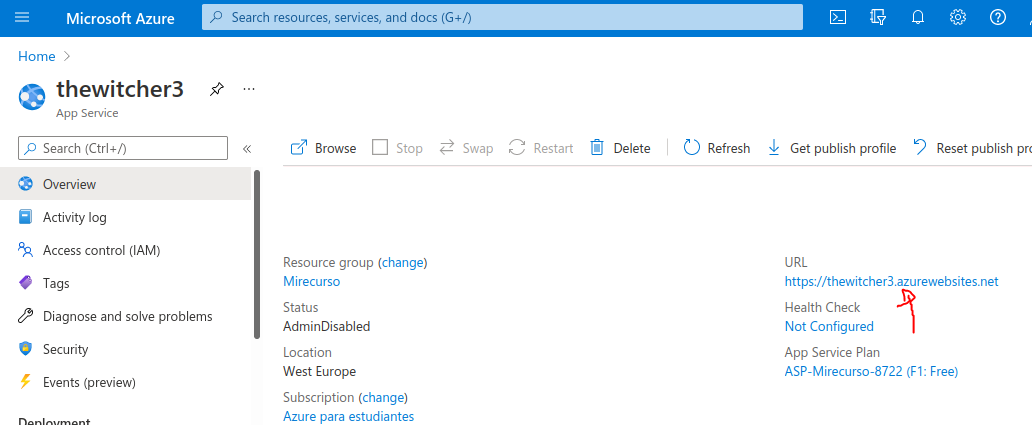
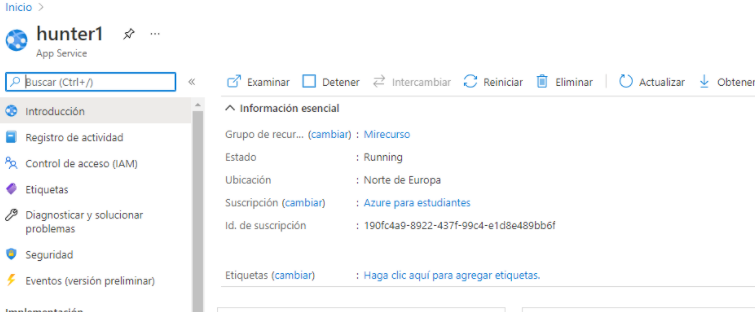
We are in the overview section of our app service. And we can see we have the domain that we put for our app service, in case if we click on the url the default azure page will appear.
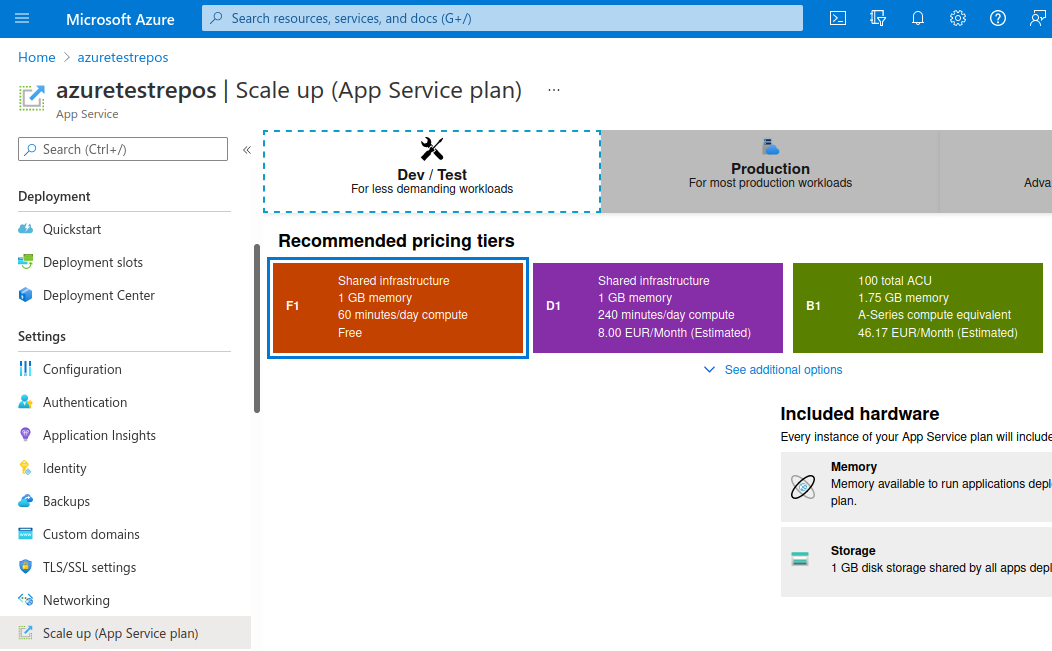
If we go to “Scale up” here we can change our contract plan for our app service.
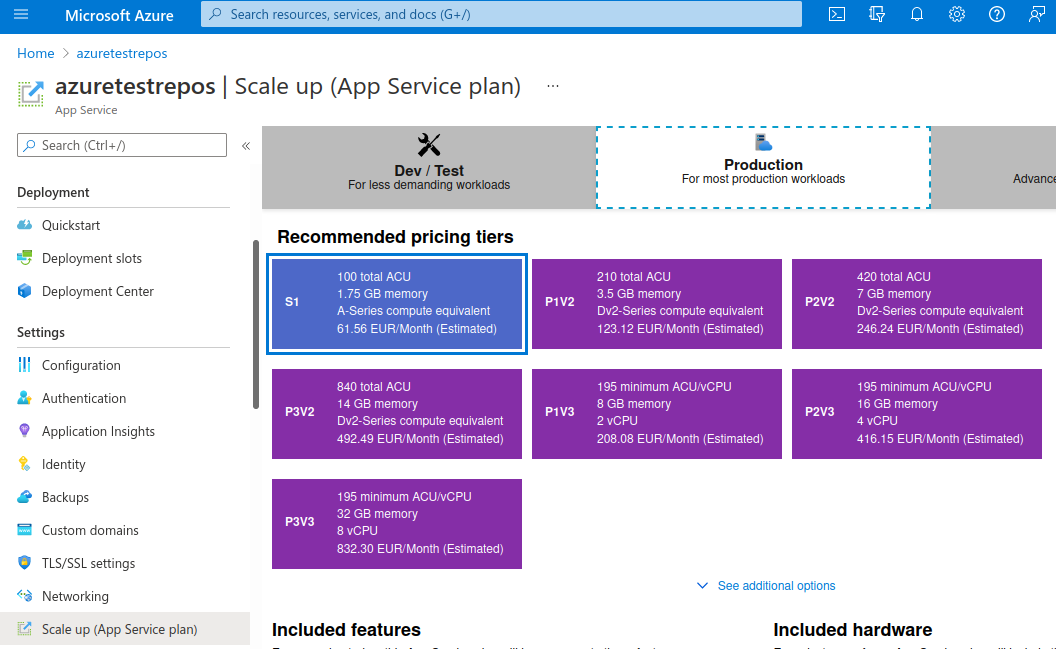
If we want to upload our app service in production we have other types of plans.
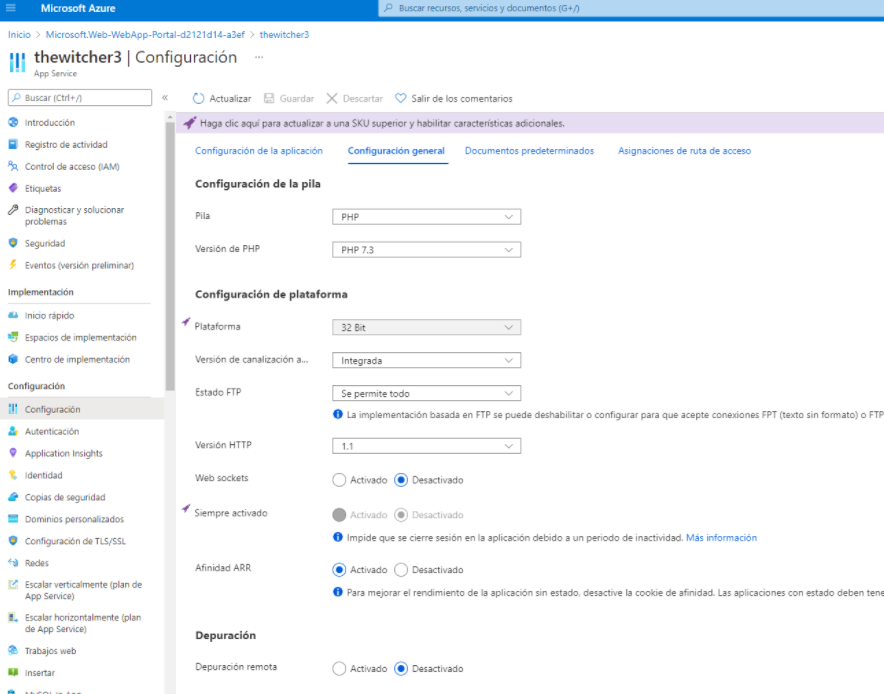
If we go to the configuration of our app service, in “general settings” we can change some settings of our app service in the event that when creating the app service we put some configuration that we didn’t want.
Deploy our web app in the multiple ways:
Deploying with ftp:
In this case, to deploy our web app we are going to use an ftp client, in this case I am going to use filezilla. but if we want we can use the terminal.
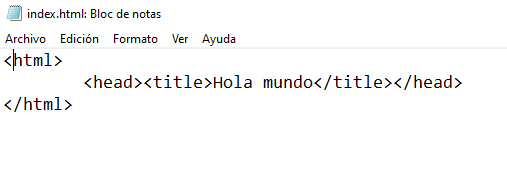
In my case I am going to upload an html file that I just created.
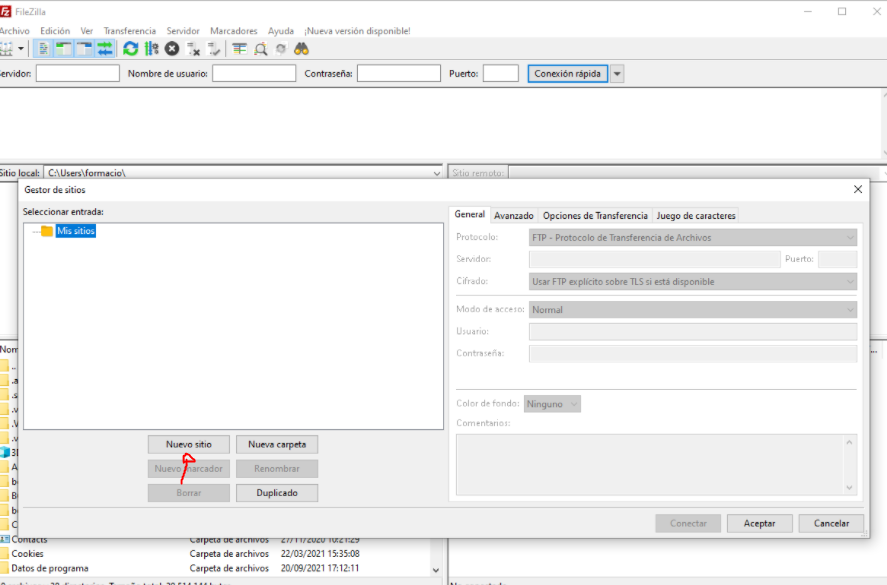
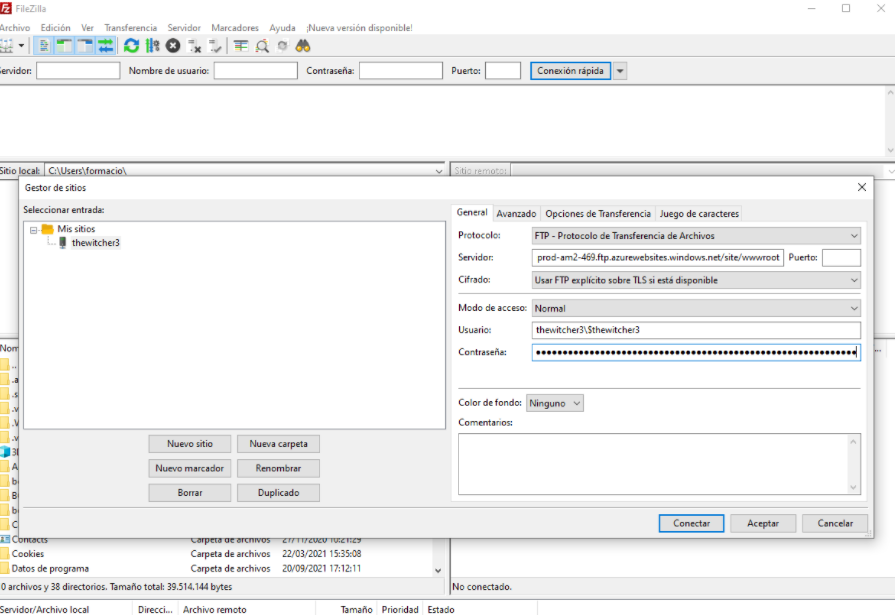
What we are going to do is connect the server to our ftp client. If in your case you are using filezilla, what we are going to do is go to “archives” and click on “site manager”. and we click on “new site” and in this case we are going to put the name of our app service that we just created.
In the ftp client it will ask us for the name of our server, username and password. for this we go to our app service and we will go where it says “Deployment center” and click on “ftps credentials”.
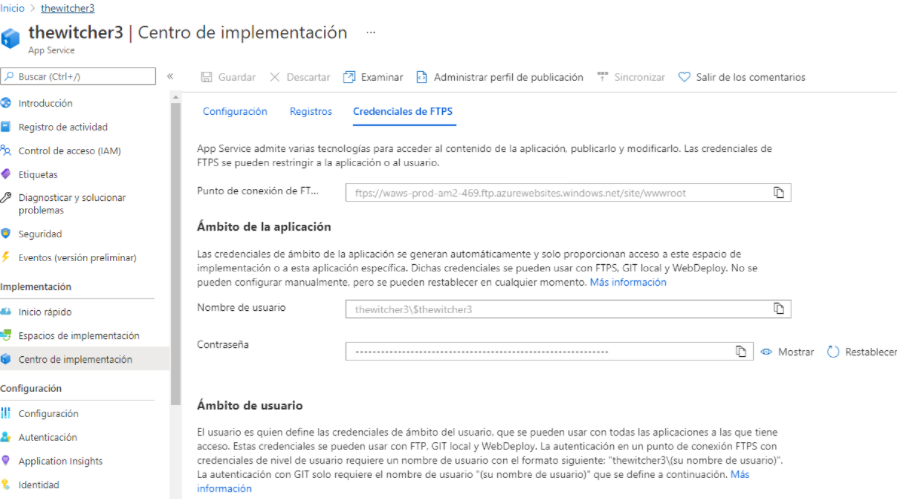
In the filezilla will are going to copy and paste “ftps endpoint”, copy the username and password and paste in filezilla. and click in “connect”.
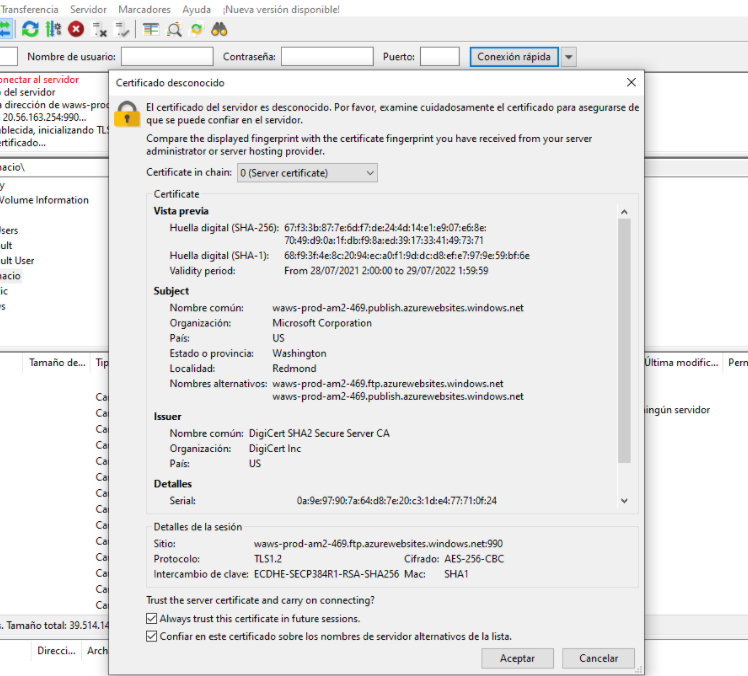
If everyting is all right we should get a popup of the ftp certificate that we are using, when we click in “connect”. And click “accept”.
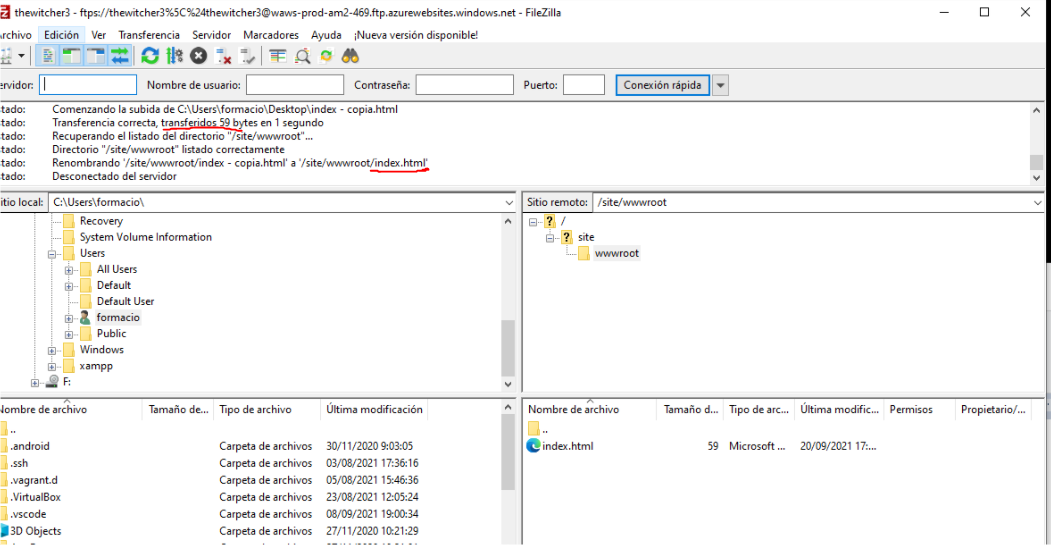
To deploy our web app just where it says “remote site” we go to the path “/site/wwwroot” and here we drag the folder where we have developed our web app. in my case I am just going to upload the html file that I created before.
where it says “status” we can see if our files have been uploaded correctly to the server.
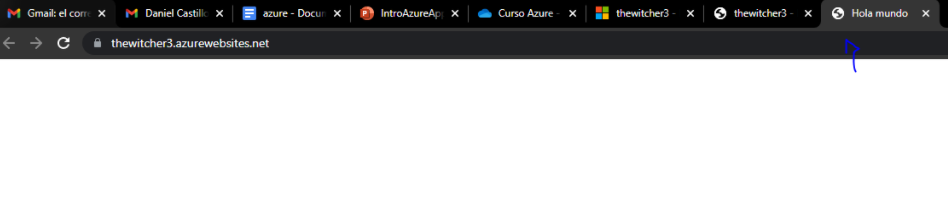
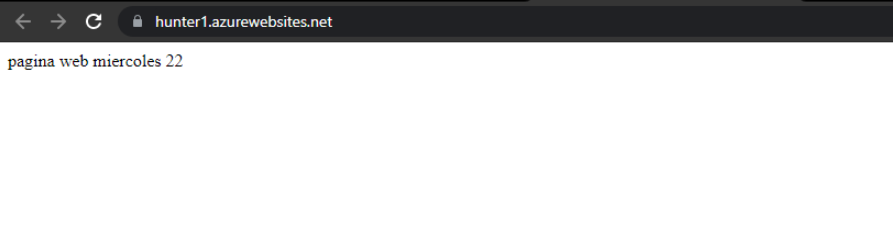
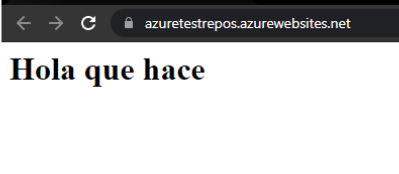
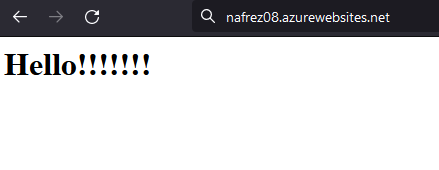
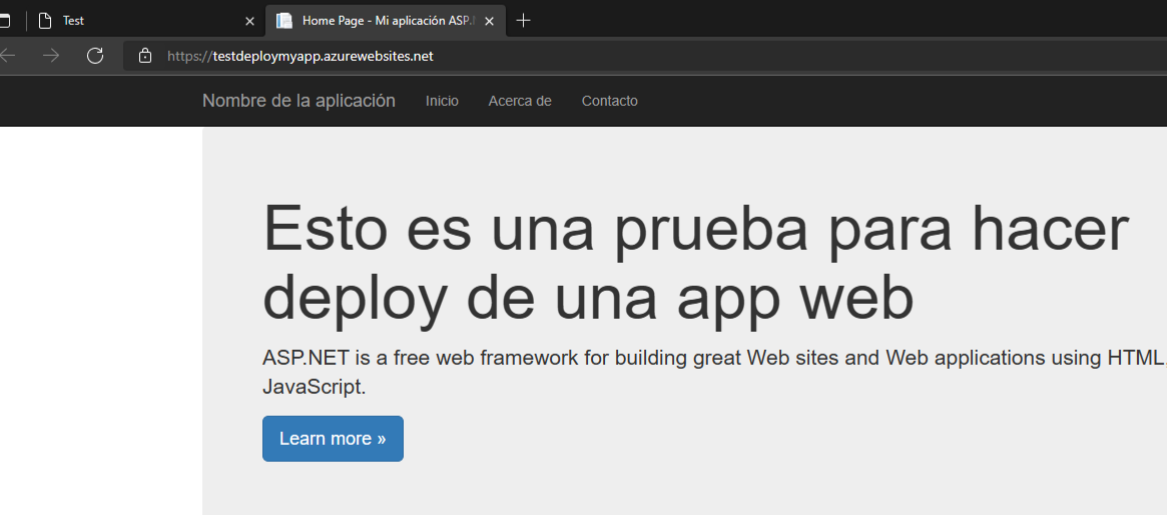
If I go to the domain of my app service we can see that the deploy has been done correctly.
Deploying with our github repository:
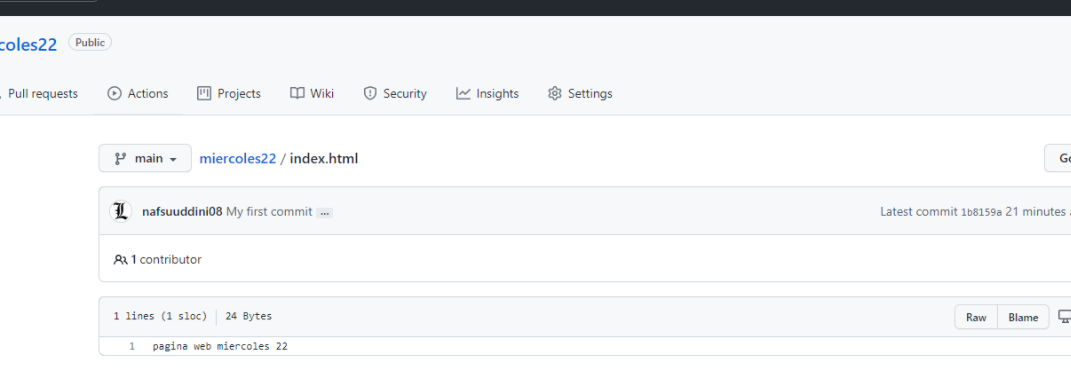
In my case i have created an repository in my github account, and in that repository i add an html file.
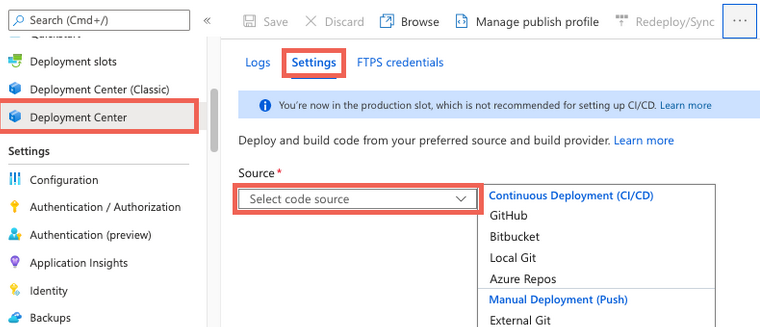
Now what we are going to do is to connect our github account and the repository. for this I am going to use the app service that I have created in azure CLI. To do this we go to our app service, and in “deployment center” -> “settings” -> “source” -> “continuous deployment” we select github.
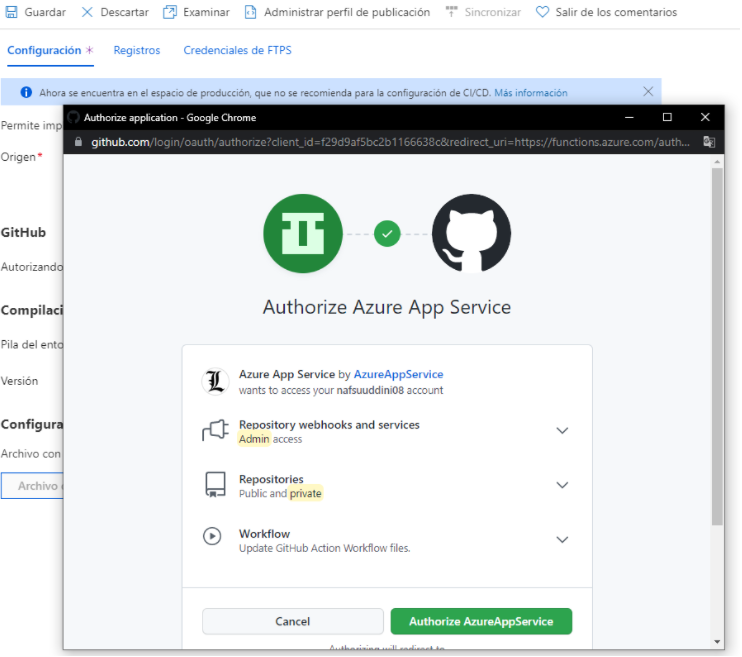
Then a popup will appear and we will log in to our github account (in case we are not logged in) and click on “Authorize app service”. And we will have already connected our github account to our app service.
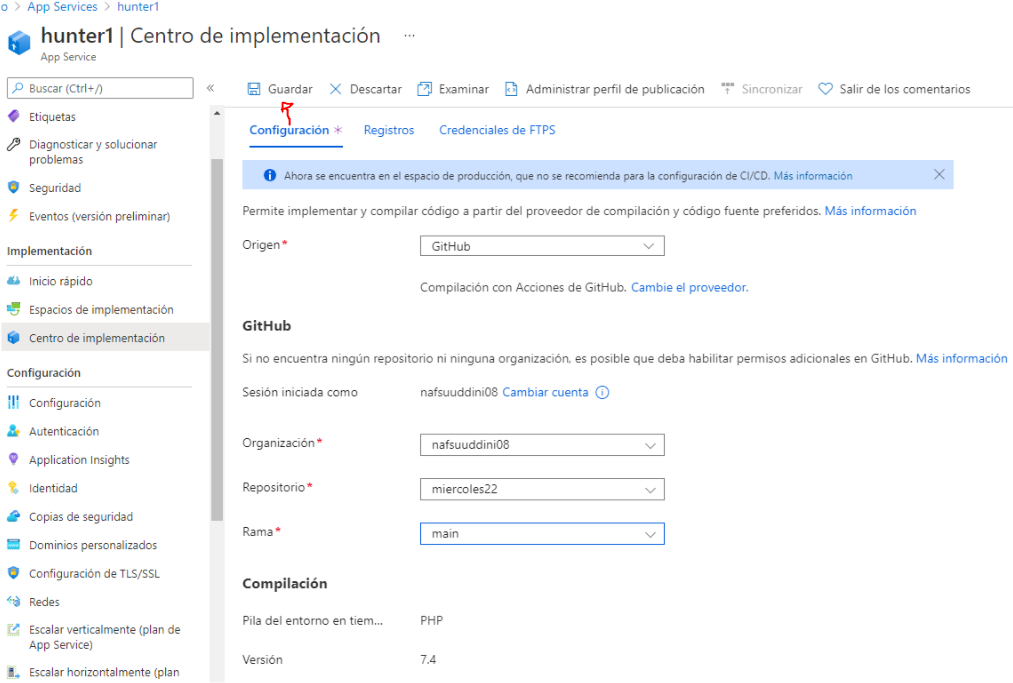
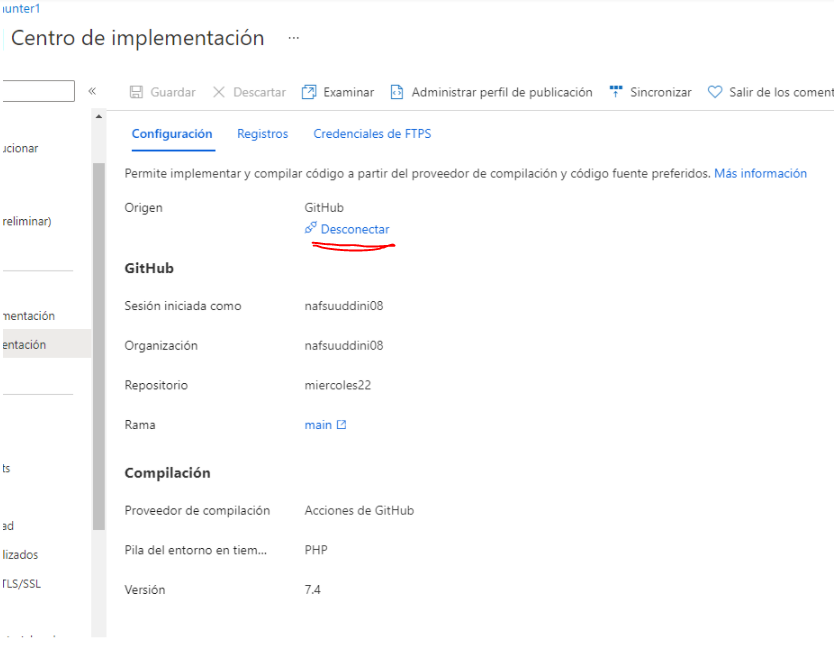
In organization we are going to select an organization that we have created in github, in my case I don’t have one so I am going to select the name of my account. In “repository” we are going to select the repo where we have uploaded our web app. And select the branch we want, in this case I have selected the “main” branch. And finally we click on “save”.
And as we can see, it has been deployed correctly.
If in case we want another repo in our app service or disconnect our repo. We go to “deployment center” and click on “disconnect”.
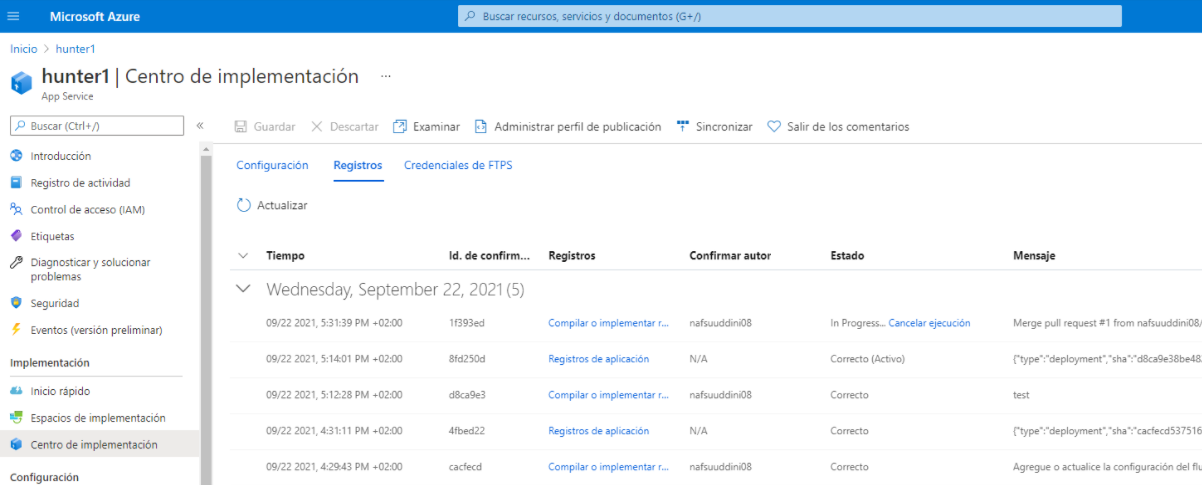
If we go to “deployment center” it notifies us and tells us the date and time and the user who made a pull request or any modification in the repository (it’s the same feature we have in github).
Deploying with bitbucket:
In bitbucket it is the same process we have done in github to deploy our web app.
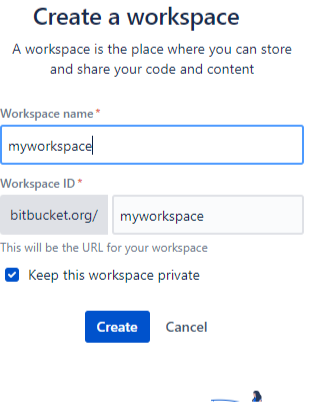
The first thing I have done in bitbucket is create a workspace.
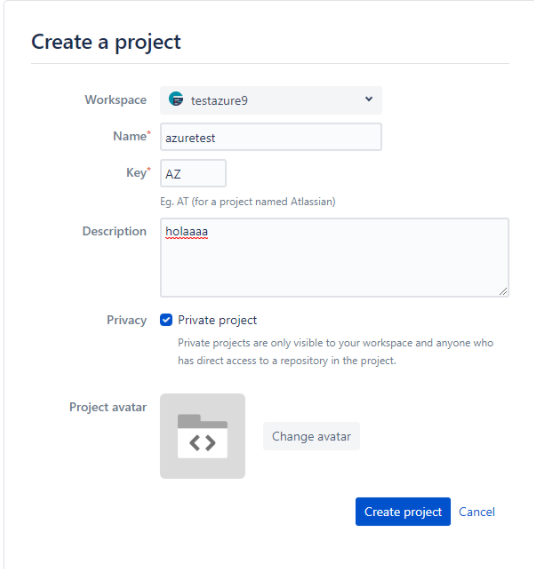
Then i create a project.
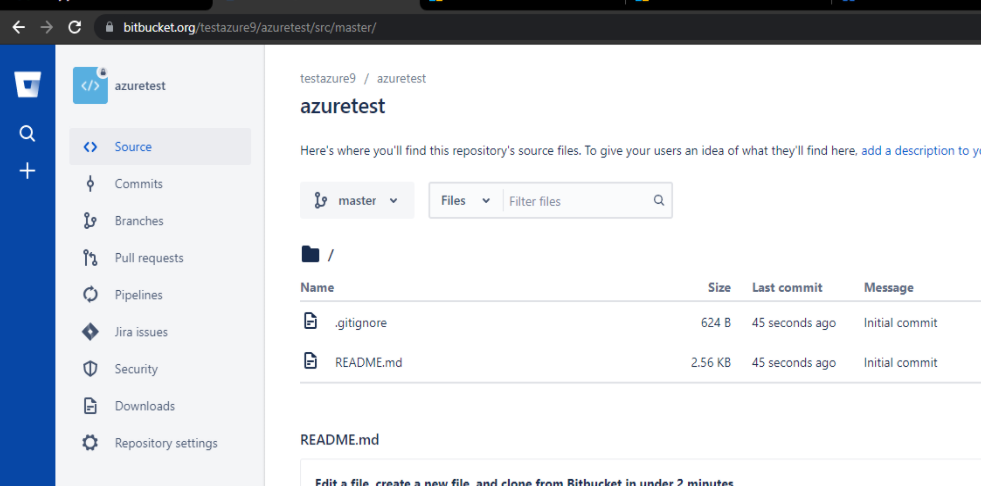
And then i create a repository in bitbucket.
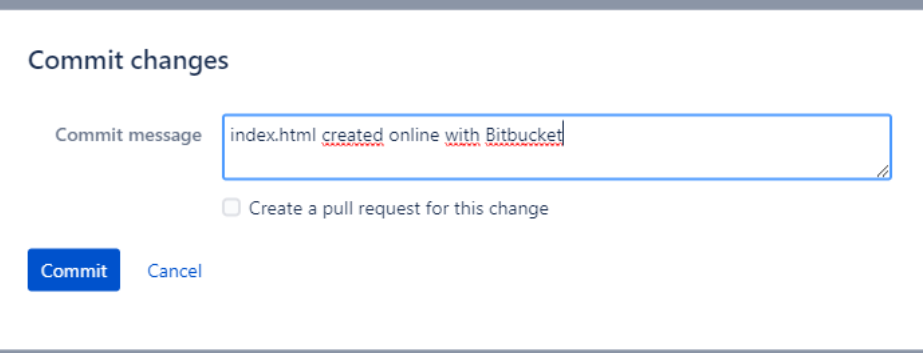
Inside the repository I have created an index.html file with the following content.

Once I finished I made a commit of the changes.
In this case I have created another app service for this time.
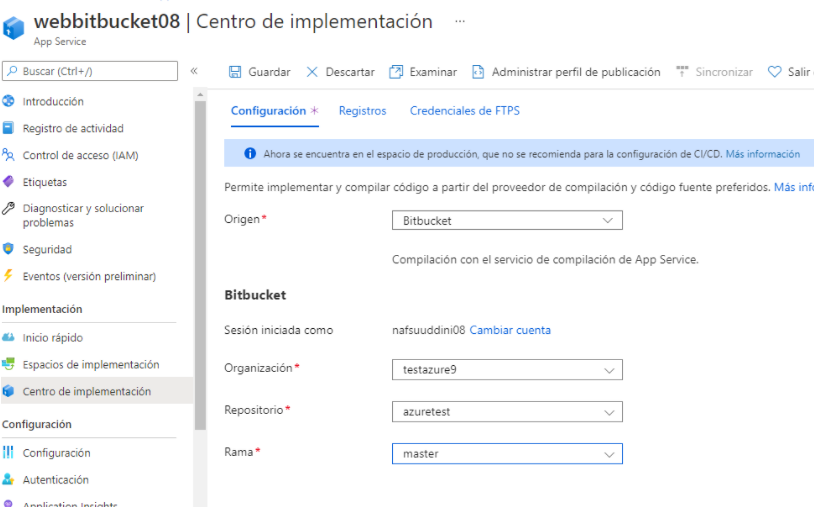
To deploy our web app in the app service we go to “deployment center” and in “source” we choose “bitbucket” (we can use the app service that we have created before and disconnect it and instead of github put bitbucket). we put the organization that we have created in bitbucket, in my case I have created one called “testazure9”, we select the repository and the branch, and we click on save.
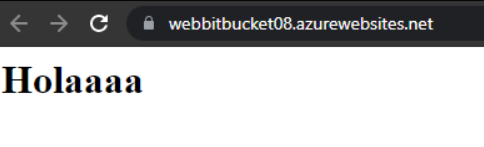
And as we can see that the deploy has been done correctly.
Deploying with Azure repo:
To deploy our web app in azure repos is the same process we did in bitbucket and github.
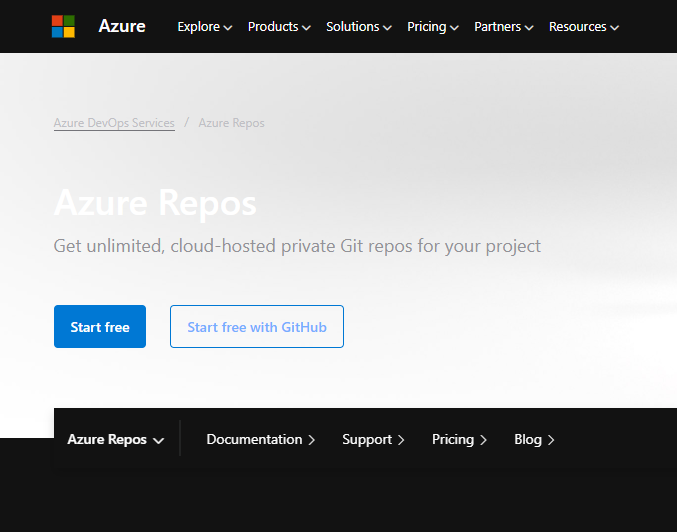
The first thing we will do is go to the azure repo page and click on “start” to configure azure repo or just go to the azure portal and search for “azure devops”.
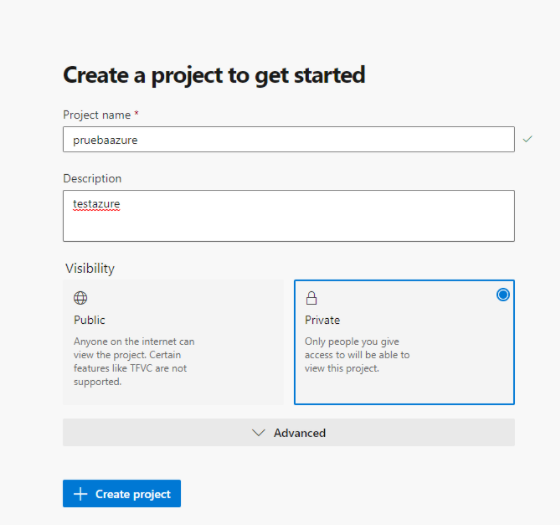
Now we are going to name our project, choose whether we want it to be private or public and select the region. And click on “continue”.

And now put the project name and clic in “create project”
And as we can see we have already created a workspace and an organization. Now let’s create a repository.
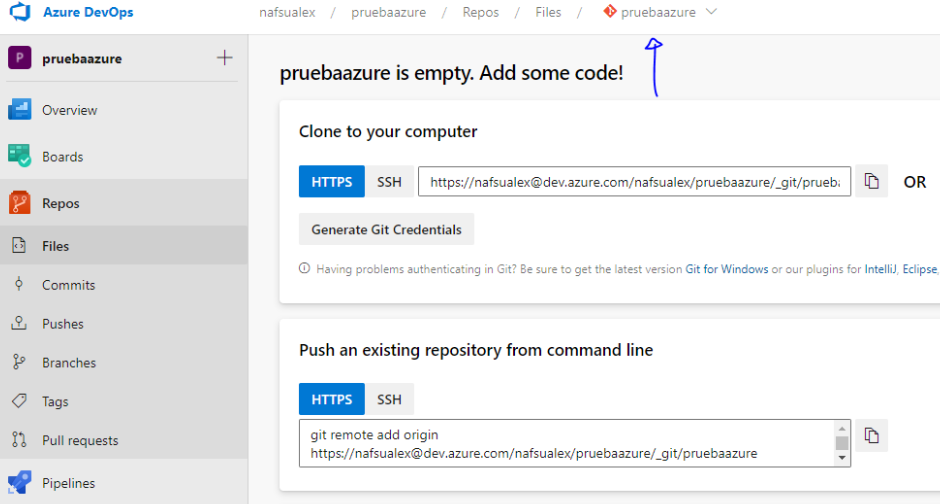
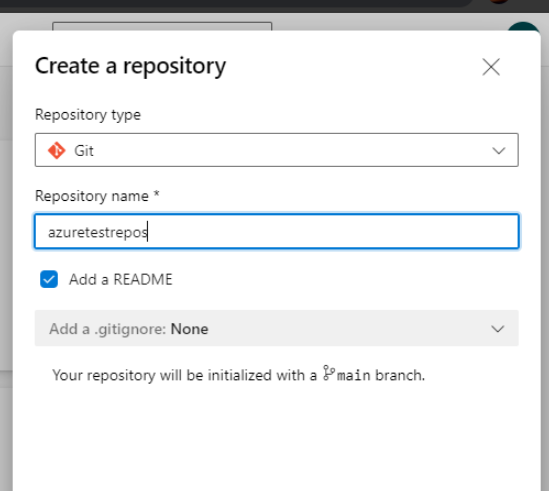
To create the repository we click on the arrow indicated in the previous image and click on “new repository”, here we select git and put a name for the repository.
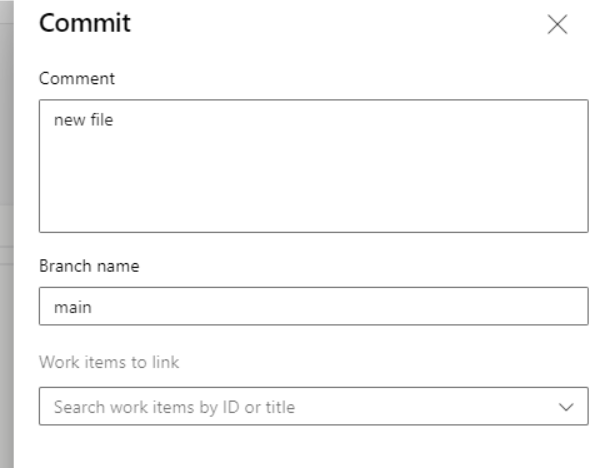
Inside the repository I have added an index.html file with the following content:

And click on “commit” to commit the changes we have made.
In my case I will create another app service to deploy (as I said before, we can go to the app service we have created and in “deployment centre” we disconnect the previous repo and in “source” we can select “Azure repo”).

To deploy we go to “deployment center” -> “settings” in source we select “Azure repo” and in the “organization” select the organization that you have, and select the project we just created and the repo where we have our web app. And click on “save”.
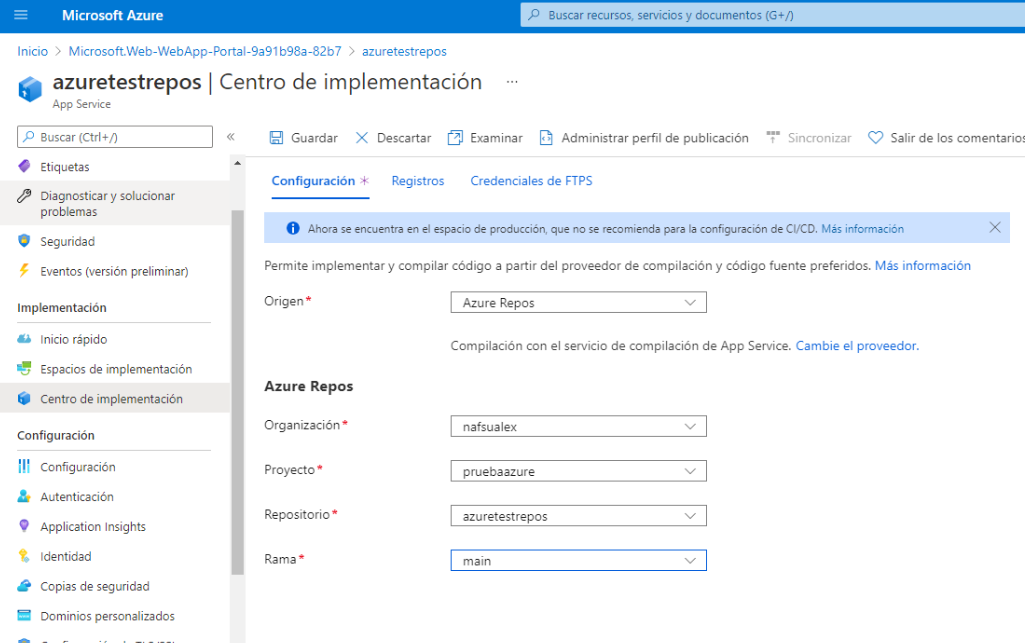
And we can see that the deploy has been done correctly and the changes have been applied correctly.
Deploying with git local:
I have created another app service for this demonstration (but as I said before we can go to “deployment center” and disconnect and in “source” change the implementation).
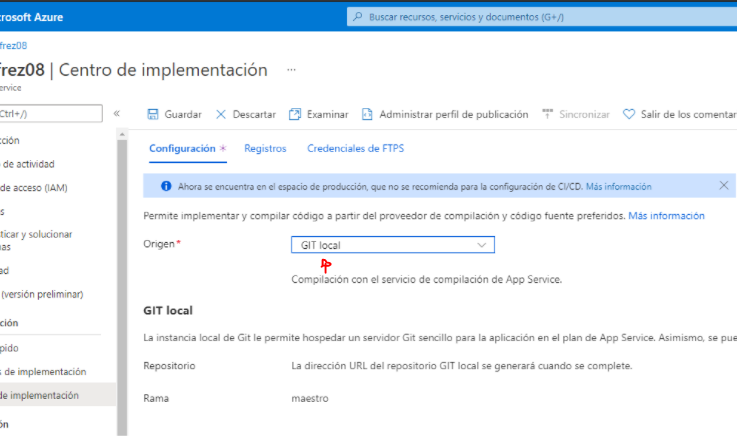
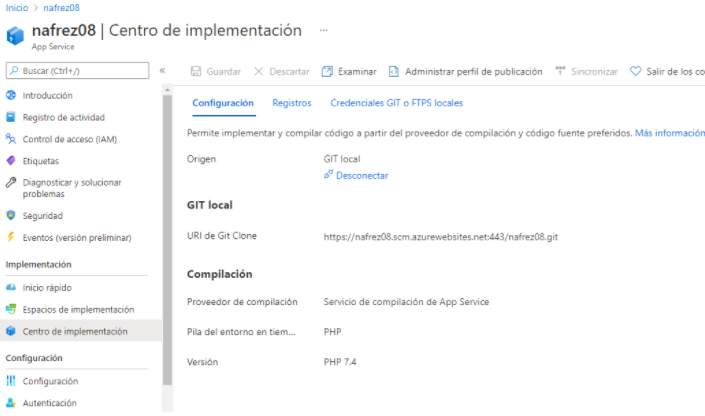
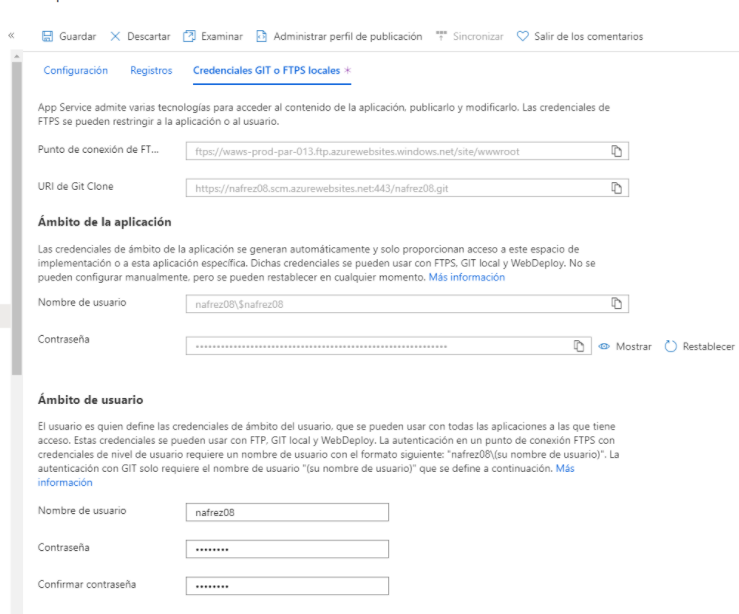
Once we have selected “git local” we click on “save”. because this time it won’t ask for the repository and branch. Copy the link to clone the repository.
When cloning the repository we will be asked for the username and password, the same will happen if we want to push the repo.
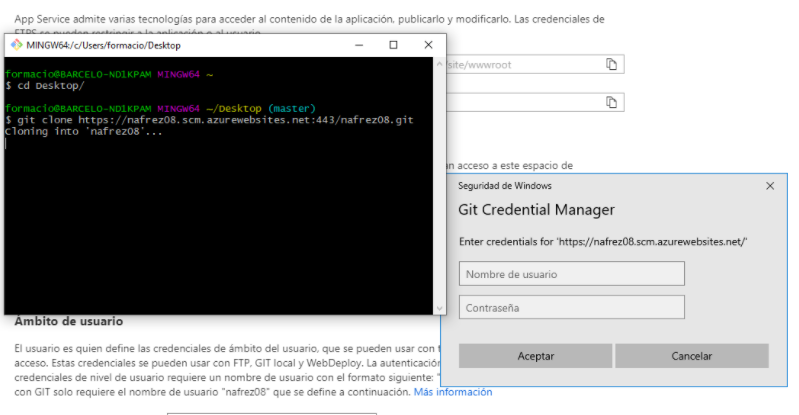
To find the username and password, in the same “deployment center” in the section where it says “Local GIT or FTP credentials”, copy the username and password and paste it to clone the repo.
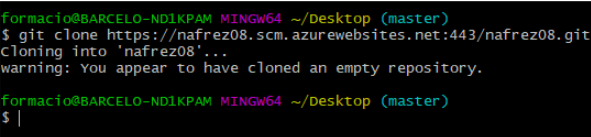
Obviously when cloning the repo it tells us that there is no file as we have just created the app service and deployed it.
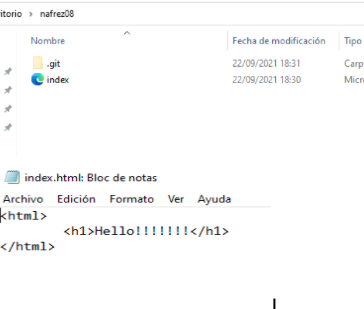
In my case I have added an html file in the cloned folder with the following content.
we push the repository with the link that appears in the “deployment centre”.
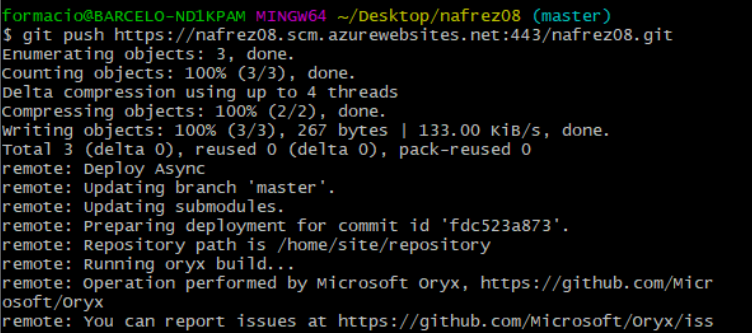
as we can see that the deploy has been successful and the changes have been applied, when we have done the push.
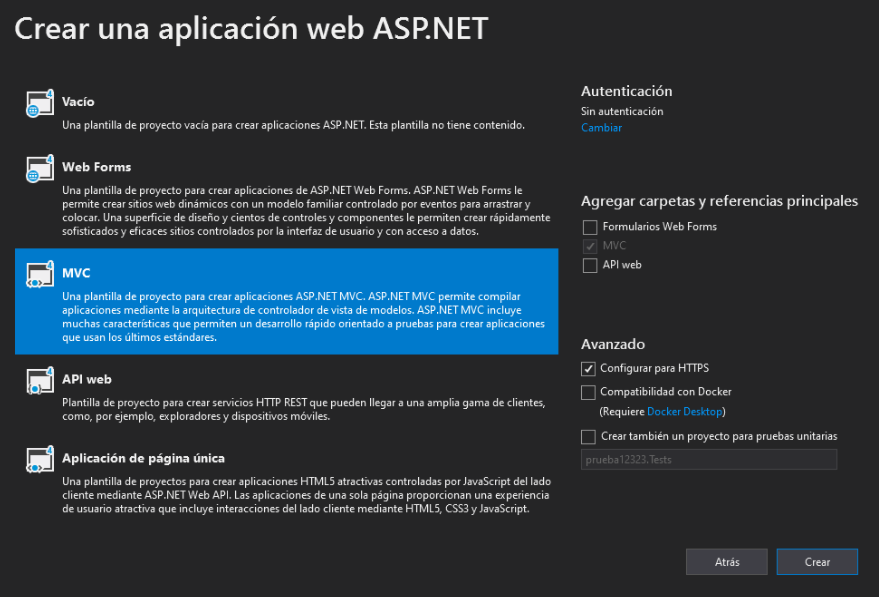
Deploying with vs code 2019:
In this case the IDE I am using is the community version, but this applied to the pro version.
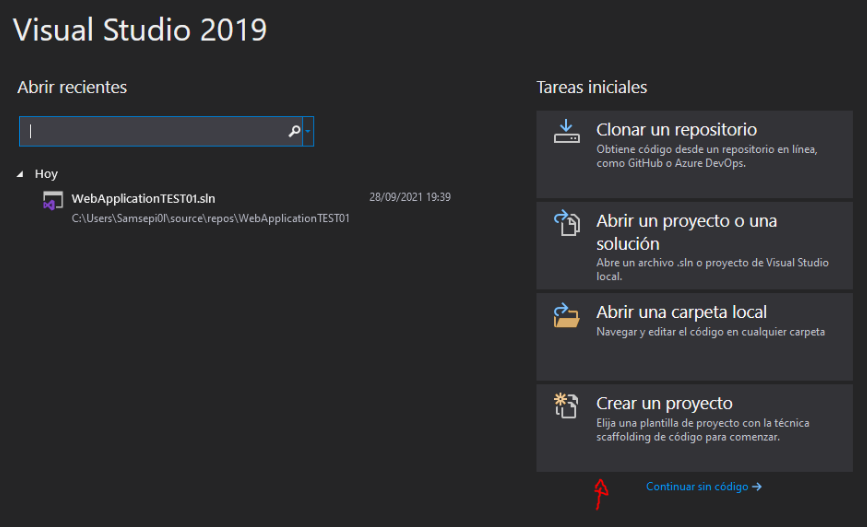
We open the vs elbow 2019 and we will create a project.
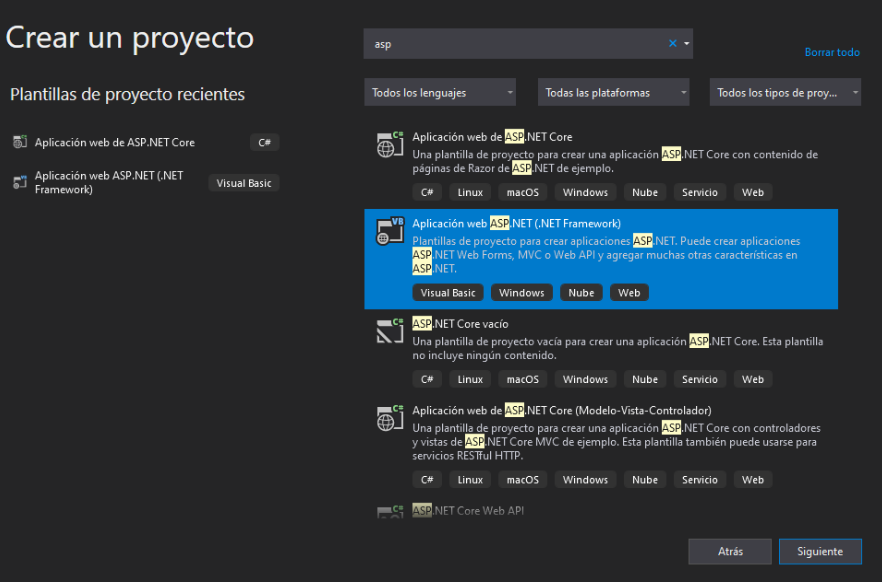
Now we are going to choose one of the extensions we want, in this case as we are going to deploy a web app we are going to choose the following extension shown on the screen.
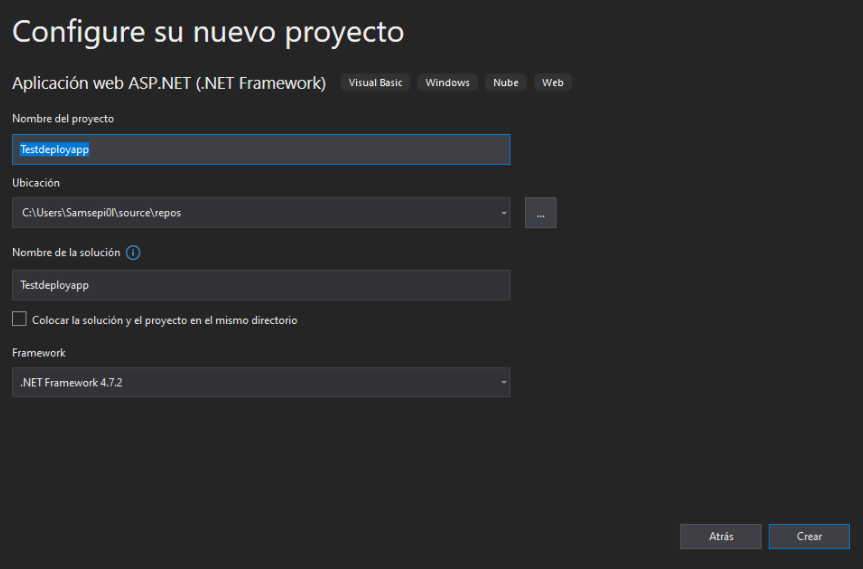
We will name the project and choose a framework for .NET.
We choose what type of template we are going to make for our web application and then we click on “create”.
For this demo I am going to modify the default index.html file in vs code 2019.
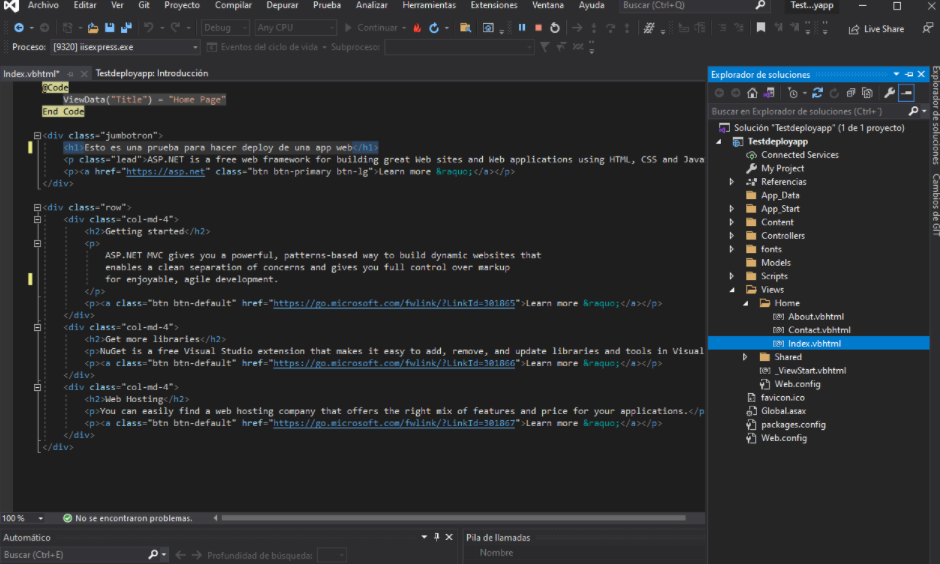
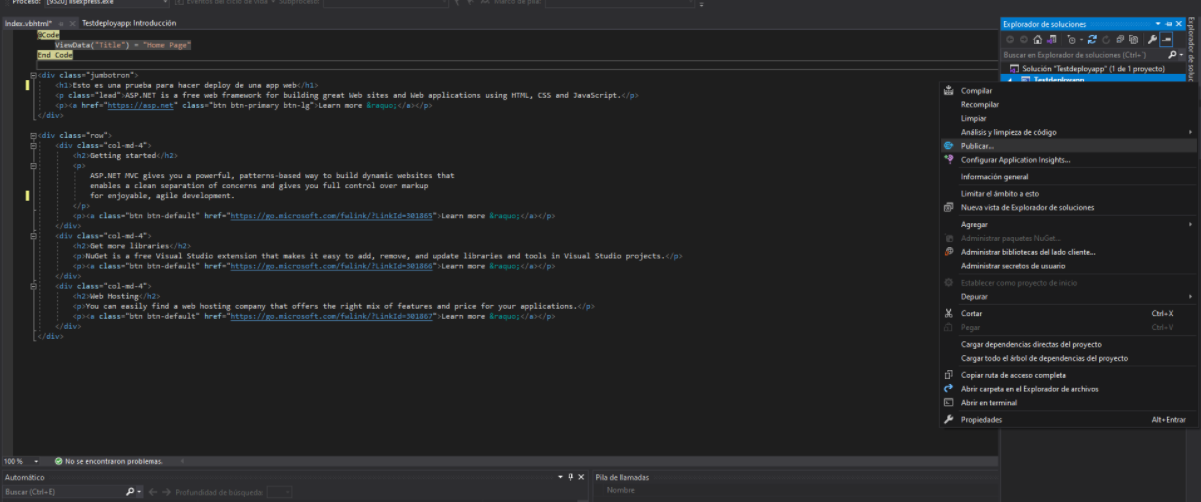
Now we are going to deploy our project in the app service we have created. To do this we are going to right click on the “explorer” of our project and click on “publish”.
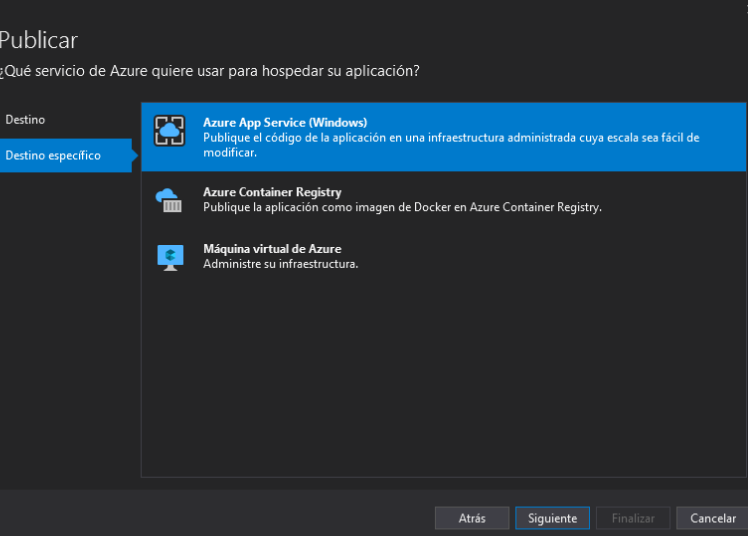
We will see a popup of which way we want to publish our project. In this case we will select “azure”.
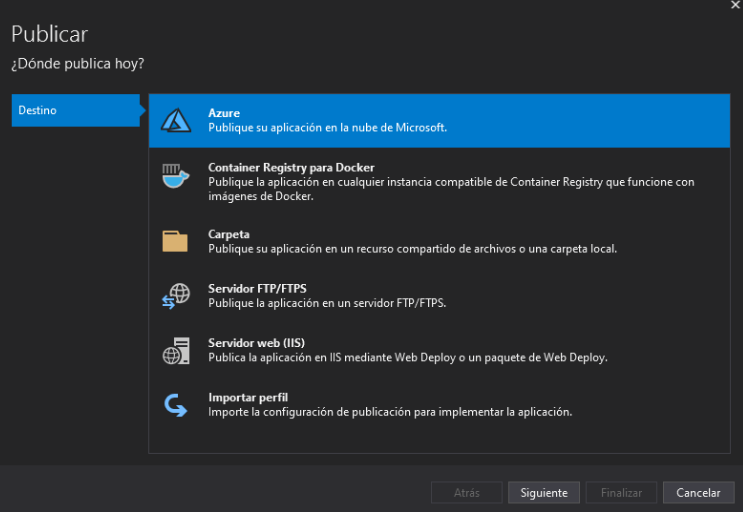
And in this case we will choose the app service option and click “next”. But we can see that we have other options to deploy.
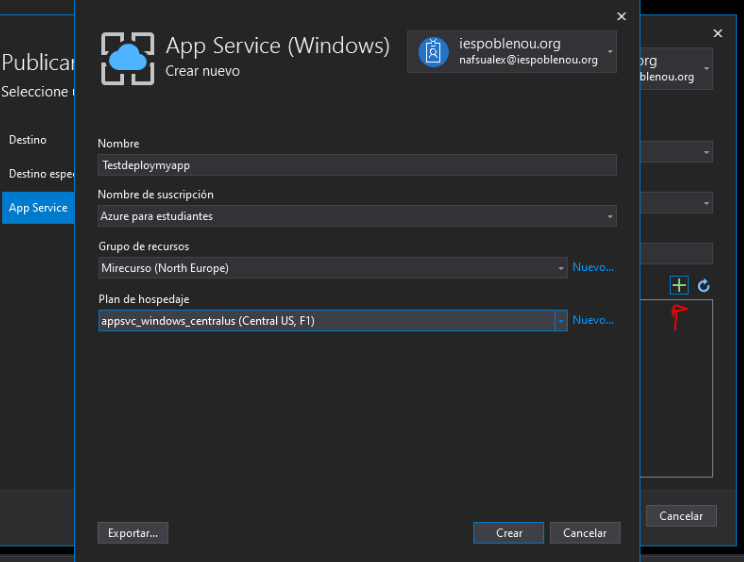
Now if we want to create a new app service in vs code 2019 we click on the following icon that is displayed on the screen, and fill in the following options. and click on “create” (Being the first time we may be asked to log in with our azure account).
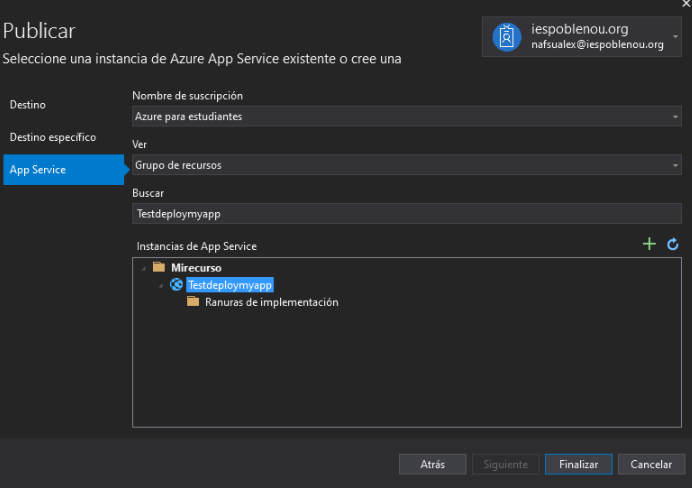
Once the app service has been created, we select the app service we have just created and click on “finish”.
Once we have clicked on “finish”, we will see a summary of the app service we have just created. Finally we click on “publish” to finish the deploy process.
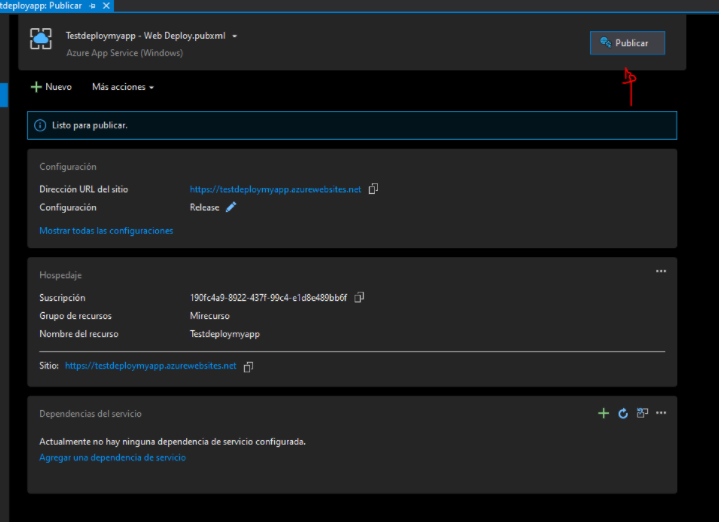
And as we can see our web app has been published correctly with the changes I have added.
Push our repo in github in vs code 2019:
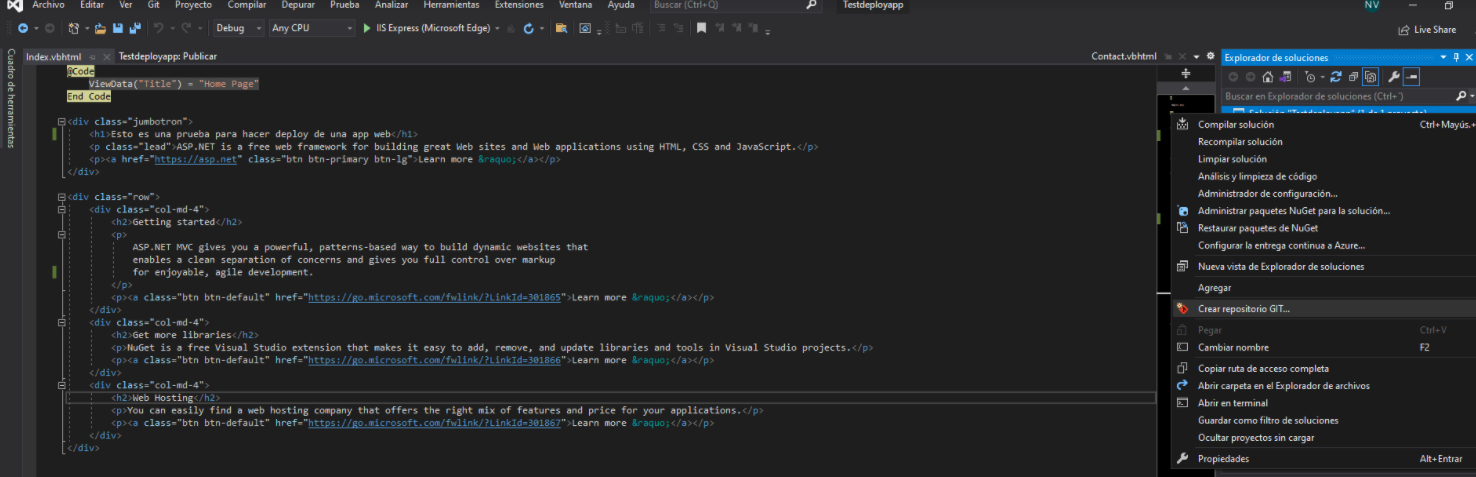
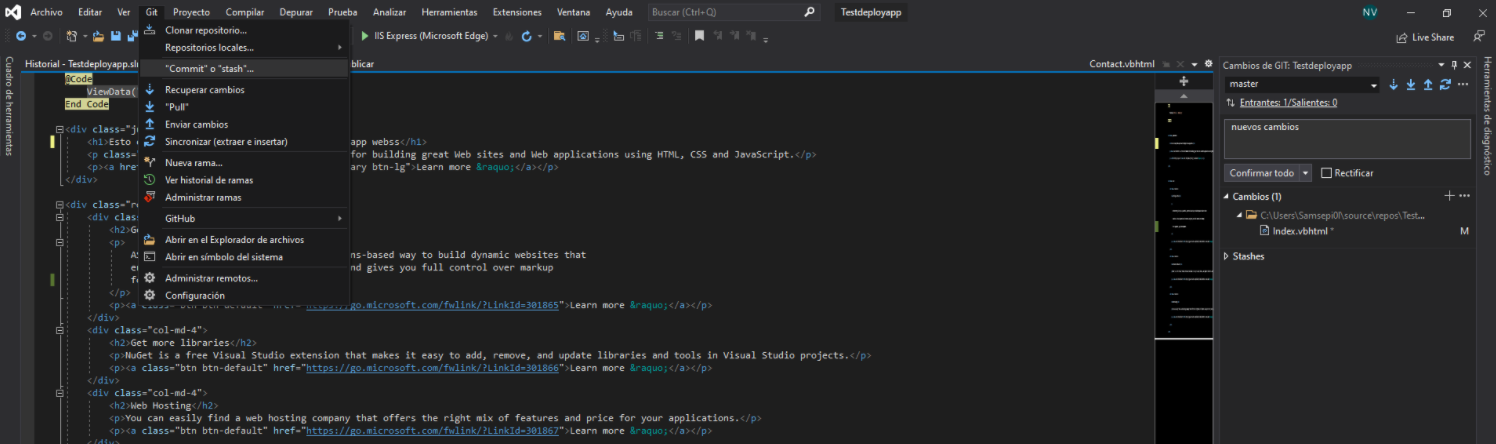
let’s create a remote repo and upload it to our github account, right click on the project explorer and select the option “create a git repo”.
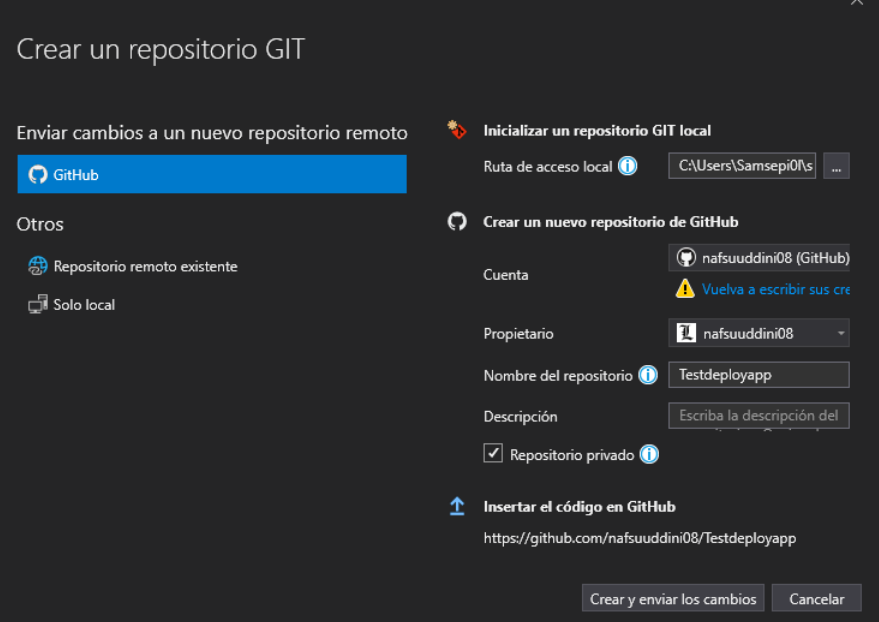
We select github and we will have to log in with our github account to upload the project. And we click on “create and submit changes” to upload our project in github.
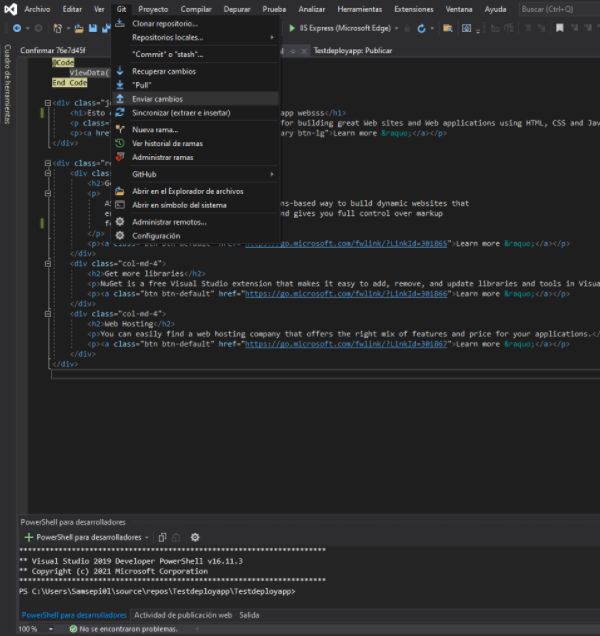
to verify that the project has been push, wright click on the project explorer and in git select the option “view history (we can view the logs history)”.

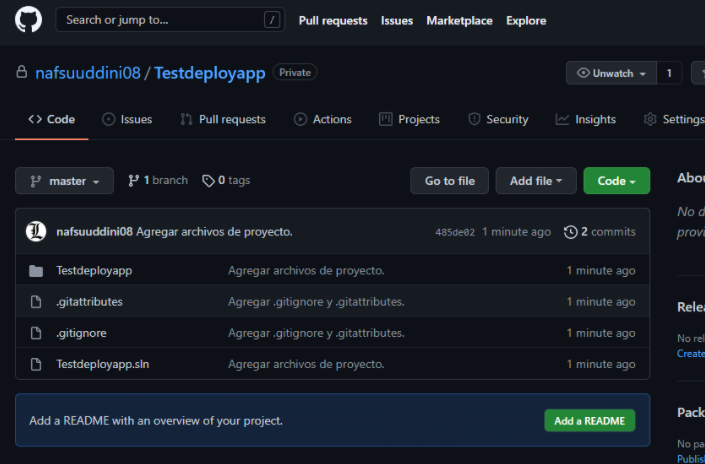
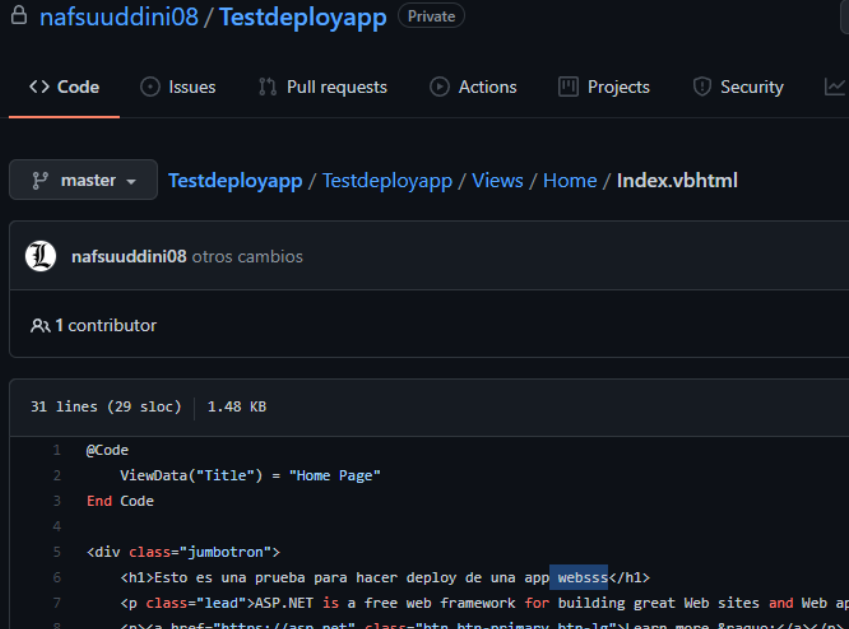
And as we can see the repository is uploaded in my github account.
And to commit the changes, simply select the “git” option, and it will be appear the commit option.
And to compare the old version of the code with the new version, we simply click on the warning that will appear when committing.
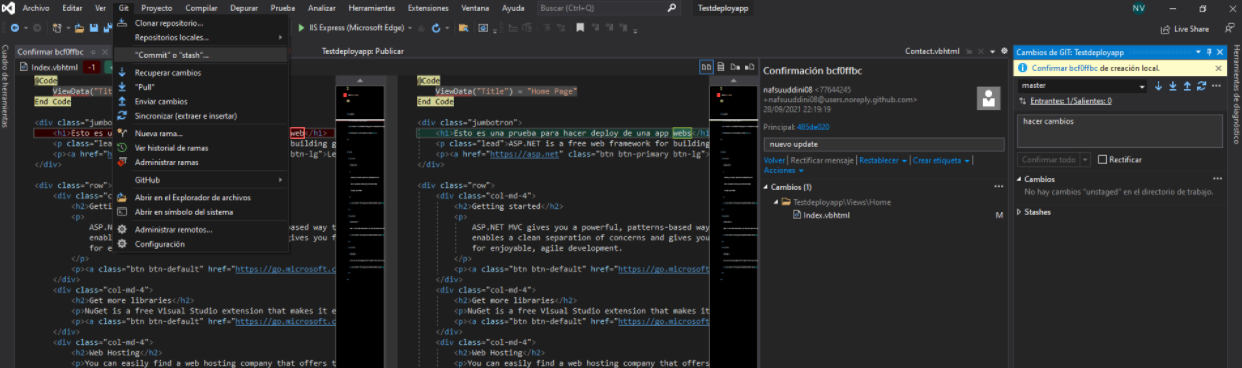
And to push the changes in github simply in the same option we select “submit changes” and an alert will appear below that the changes are being push in our github repo.
And as we can see the changes have been push (in my case I added three “s” in the h1).
Deploying with vs code:
Now we are going to learn how to create an app service and deploy our web app in vs code.
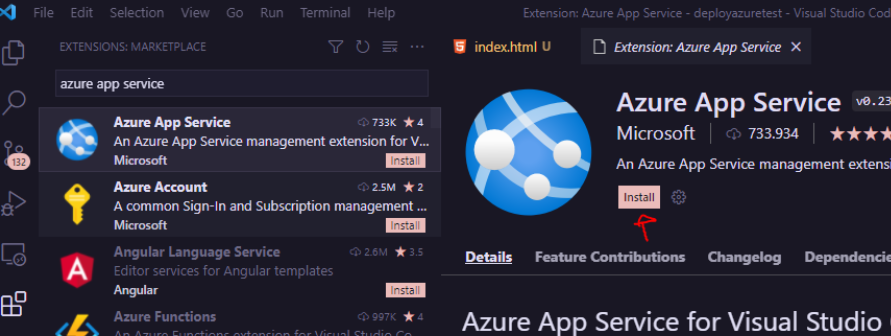
First we will go to the extensions section for vs code, and search for app service and install it.
For the first time we will be asked to log in with our azure account, to create the app service we simply click on “+”.

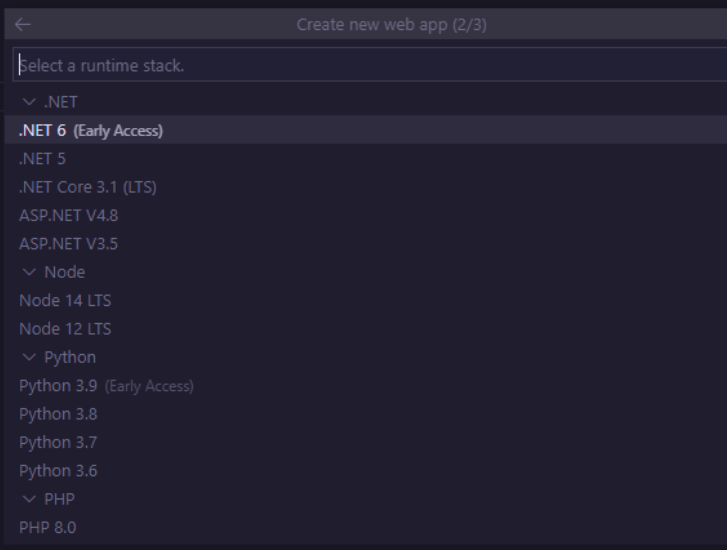
It will ask us to name the app service and then we will choose a language for the runtime stack.
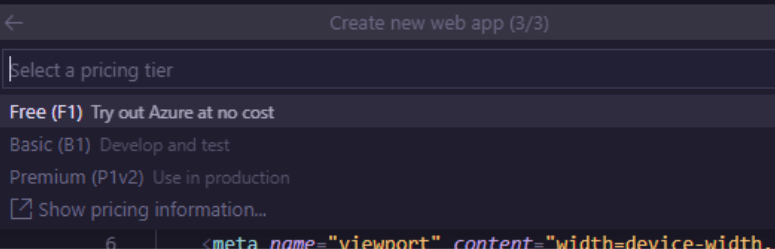
It will ask us to choose a plan for our app service. (if we already have a plan created we select it or we can create another plan).
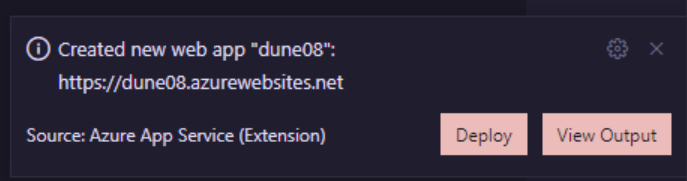
After selecting the plan, you will be notified that the app service has been created successfully.
Now once we have created the app service, we are going to deploy our web app.
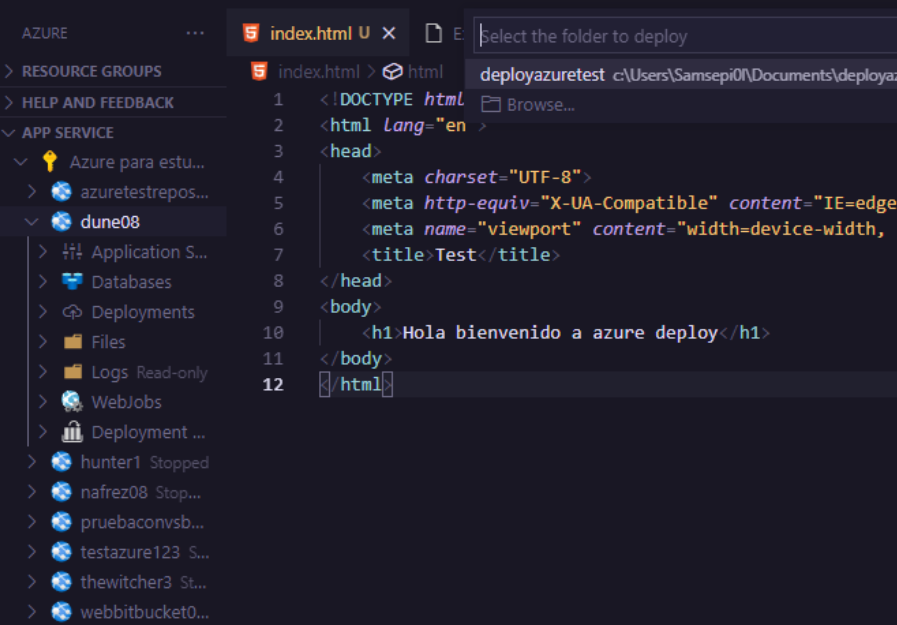
For this demo i have created a html file with the he following content shown in the image. To deploy, right click on the app service and select the option “deploy” and select the folder where we have all the code of our app.
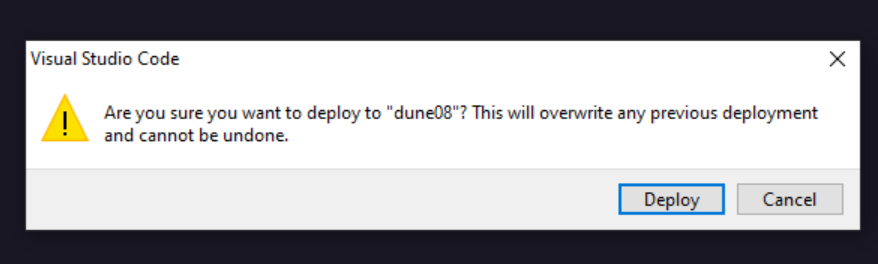
We will get a warning if we are sure to deploy. Click on “deploy” to finish the process.
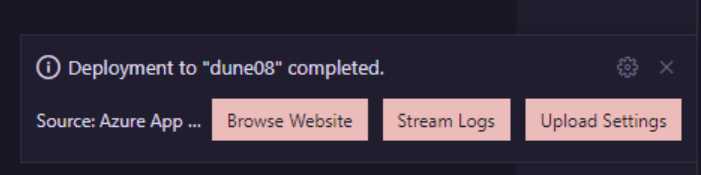
If the deploy has been done correctly, we will see a warning that the deploy is being done. click on “browser website” to open the browser.
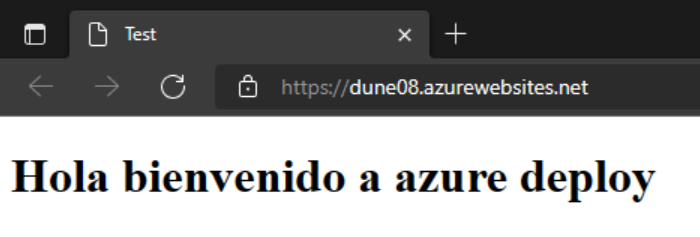
And as we can see the deploy has been done correctly and the changes have been applied.
Create appservice with azure start devops
Devops started creates a web app in azure devops. DevOps Starter configures everything we need to develop, deploy and monitor our application.
The first thing we are going to do is from the azure portal look for “Devops starter”, and here we are going to choose a framework or language that we are going to use for our web app.
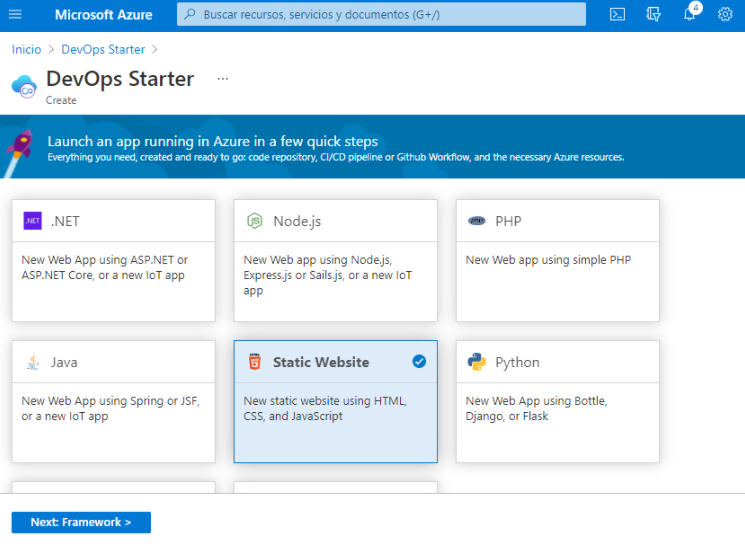
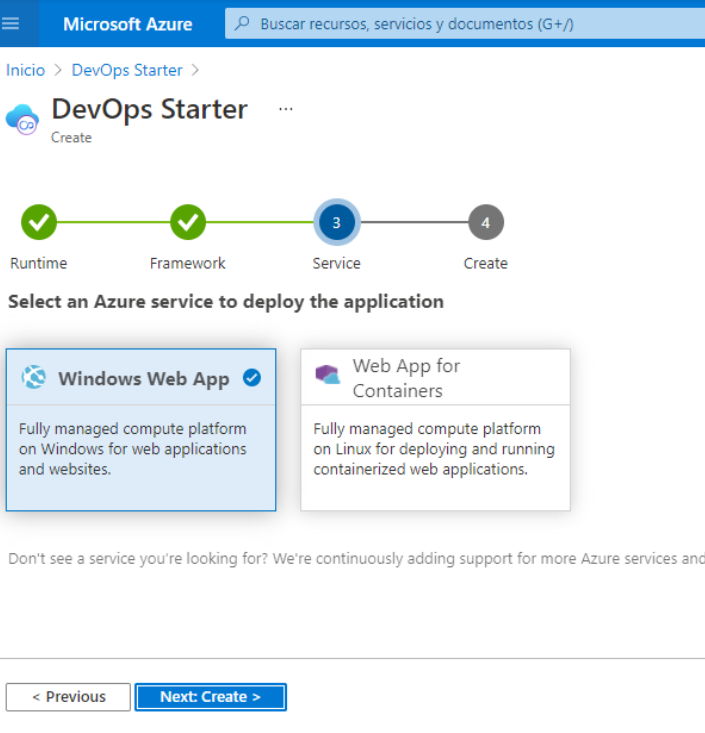
Then you must choose two options, the first one is to create an app service running on windows, and the second one if we want our web app to be inside a container. in my case I will choose the first option, because the second option we will see it in a different way later. Click on “next” to continue
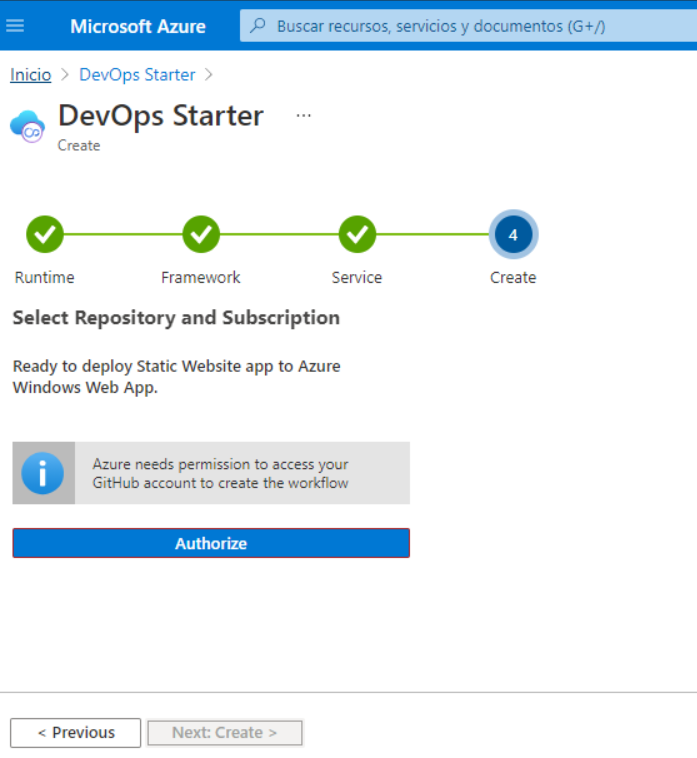
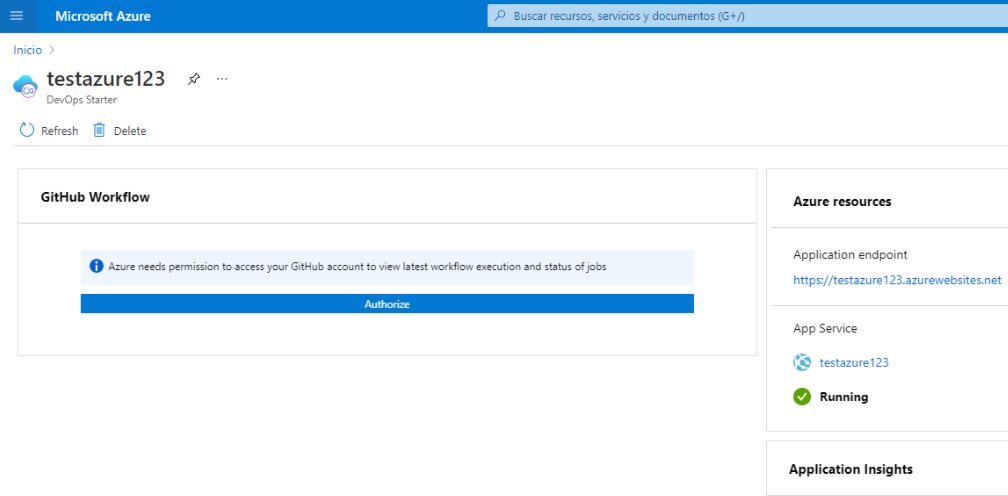
In this option we will be asked to give permissions with our github account. And this will create a workflow in our repo.
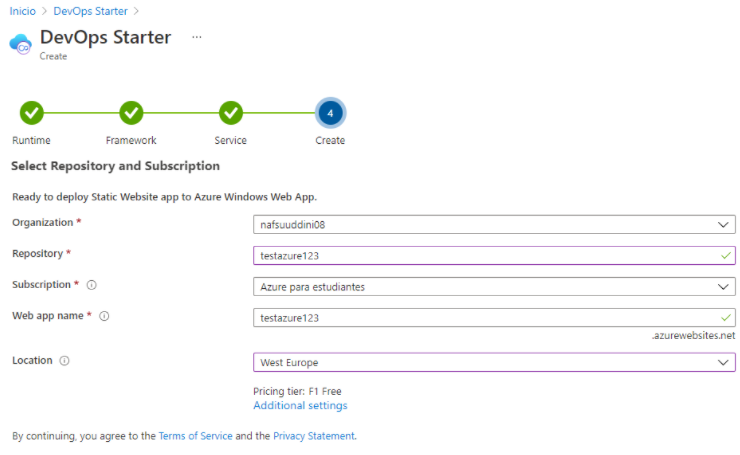
Now we will select the organisation, the repository and the branch. We will choose a region and the service plan we want to apply.
Once we have clicked on “create”, we wait for the process to finish and click on “authorize” so that it can deploy.
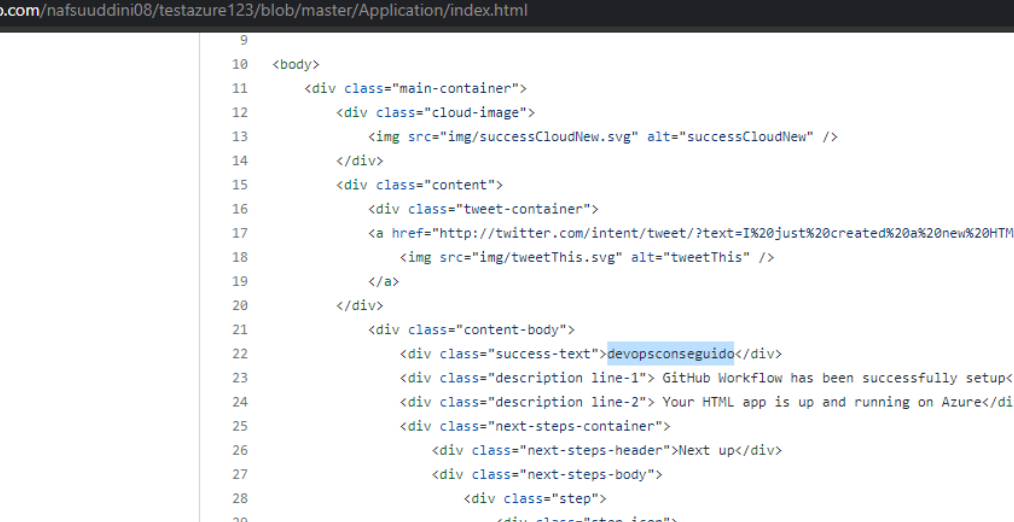
To do a test, I am going to go to the repository where the workflow has been created, and go to the “armtemplete” folder to modify a bit the default template.

In this case I have modified the default index.html file a bit, and we commit to save the changes.
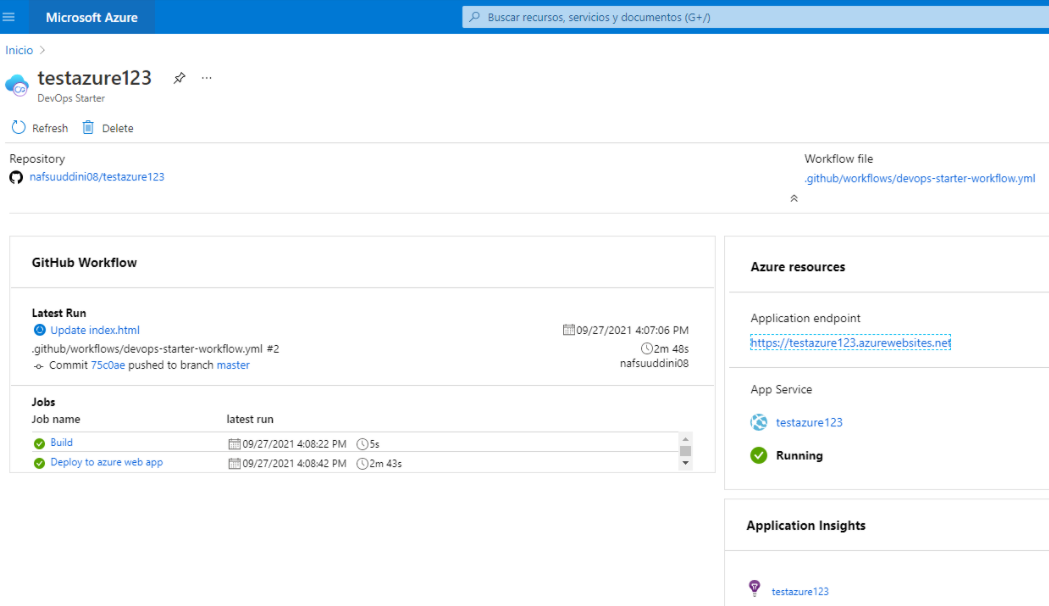
we go back to devops starter, we will see that we will see that we have modified the repo and the commit we have just done, we also have the “yml” file which is where we have all the configuration we have done of devops starter.
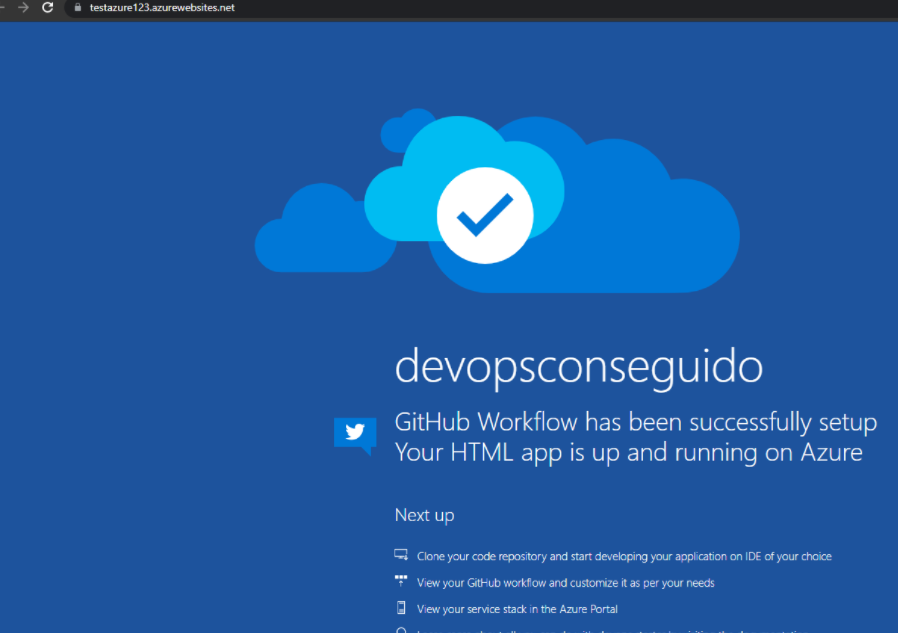
And as we can see the changes have been applied correctly. The good thing about this is that it applies the changes quickly and we don’t have to restart any kind of service.
Azure CLI commands
All the steps we have done, we can also be done from the azure cli command line in a much faster way. in this case we are going to use some of the azure cli commands.
There are two ways to use the azure cli command line, the first is from the azure portal by opening the cloud shell, and the second option if you are on windows is to download the azure cli .exe to be able to use the commands in the cmd.
All azure CLI commands start with “az”.
if we use the azure cli from your computer, we have to use the following command to log in with our azure account. with this command we will jump to the browser to log in.
az login
If we want to login in our azure account in the terminal. (I don’t recommend this option because it is insecure.)
az login -u username -p pass
command to list all the resource groups we have created.
az group list
see all available regions.
az account list-locations
Create a resource group.
az group create --name yourresourcegroupname --location westeurope
Delete resource groups.
az group delete --name resourcegroupname
Create an app service plan.
az appservice plan create -g resourgroupname -n namaoftheplan
List all the plans we have created in our azure account.
az appservice plan list
Create an app service.
az webapp create --resource-group yourresourgroupname --plan theplanname --name nameoftheappservice --runtime "PHP|7.4"
As we can see, the app service has been created correctly.
logout our azure account in the terminal.
az logout
Create an app service inside a container
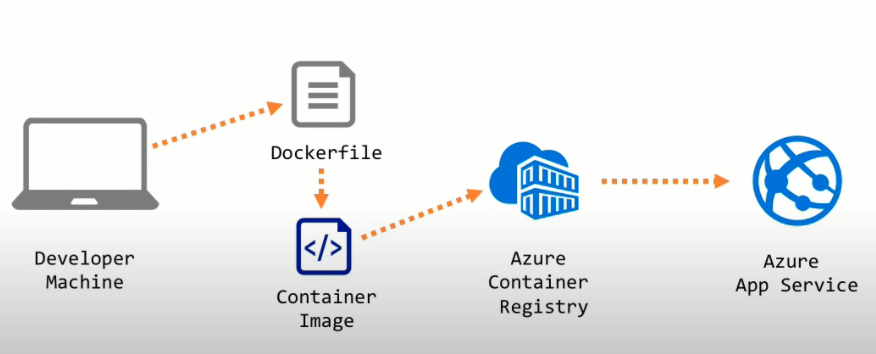
What we are going to do is first create a dockerfile in our web app folder and with that create a container from our local machine, then we are going to use the acr service to deploy the container and create an app service from the container we have created.
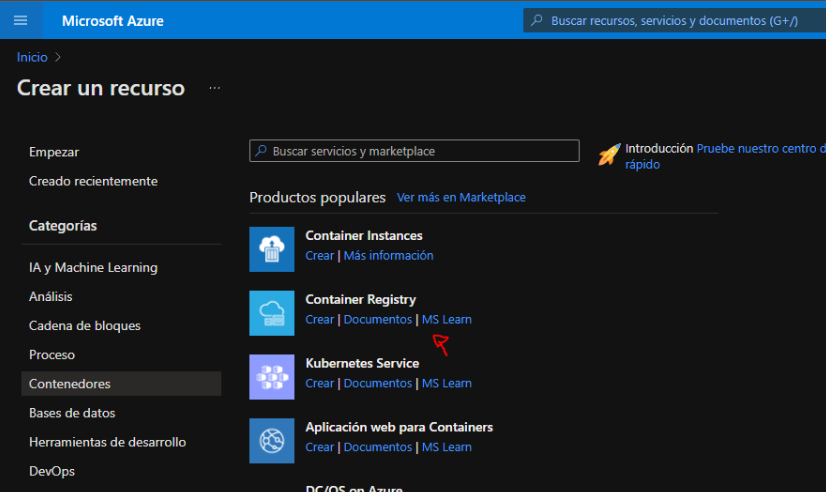
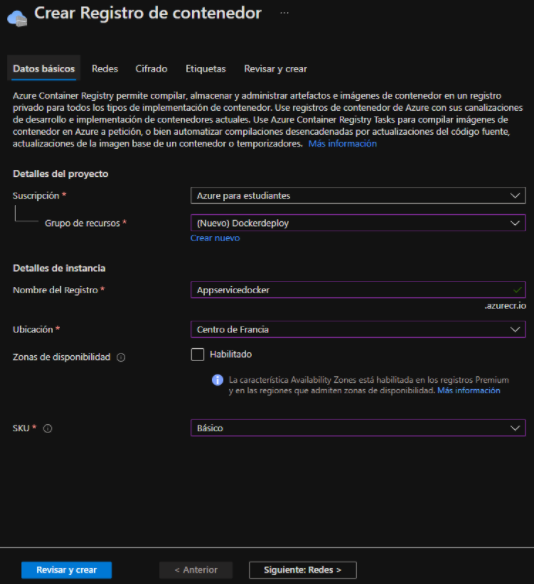
The first thing we are going to do is inside the azure portal we are going to create a registry of our containers (ACR). To do this we go to the search menu and in containers we click on “container registry”, or you can search for “acr” in the search bar from the azure portal.
Now we will select the resource group, put the name of your acr, and we will choose the region and finally in SKU we are going to select a plan. And click on “review and create”.
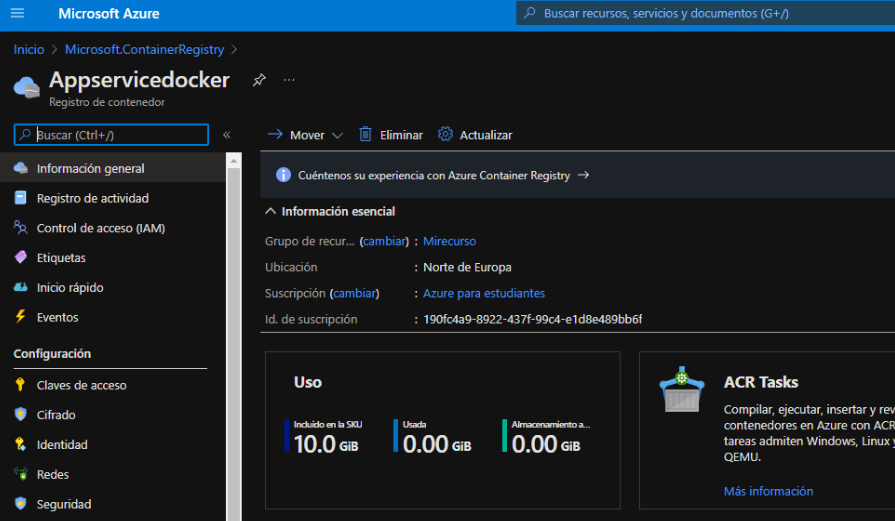
As we can see we have successfully created our ACR.
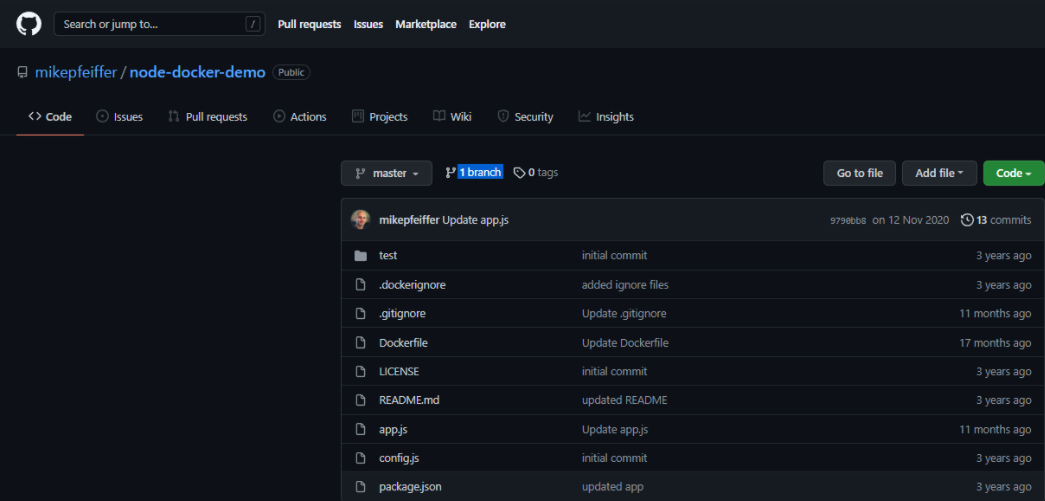
For this demo, I will use a simple node project.
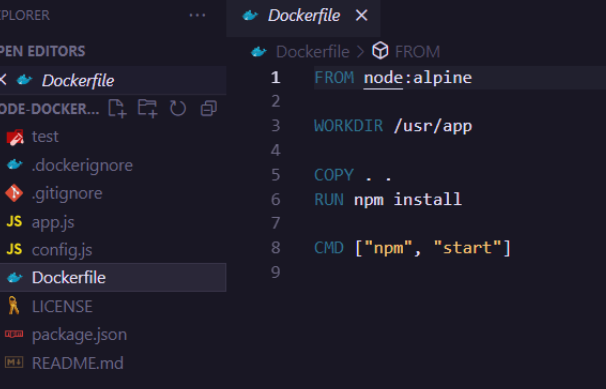
In the project folder I have created an simple dockerfile with the following instructions. in “FORM” I have indicated which image I am going to use for my container in this case I have indicated “node”, in “WORK DIR” the path where my web app will be running, and with the command “COPY” and “RUN” I am indicating that I copy all the code of my web app, and with the “run” I indicate to install the dependencies and with this I will always update the container, and finally the parameter “CMD” I indicate that when my container runs I execute the command “nmp start”.
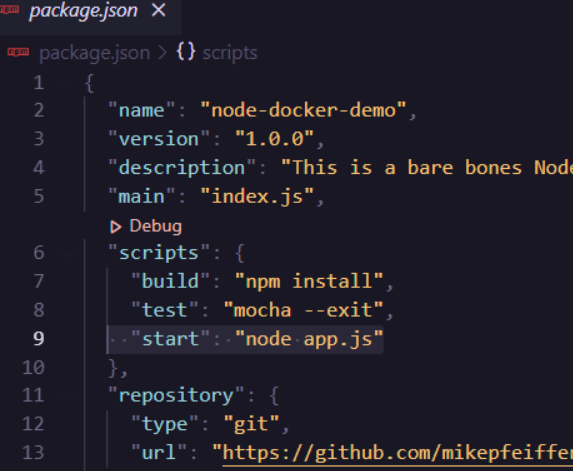
So in my package.json file yo can see the startup script simply just runs node app.js.
So in my app.js file i simply idicate the following message.
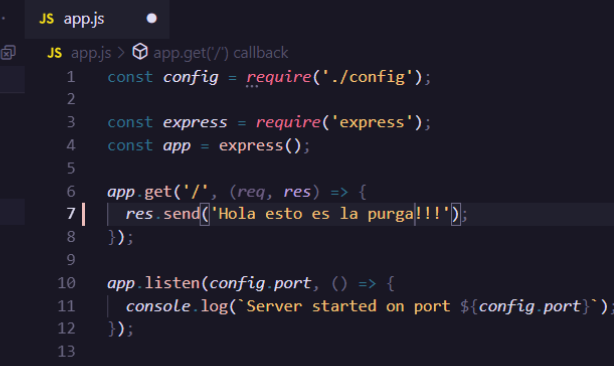
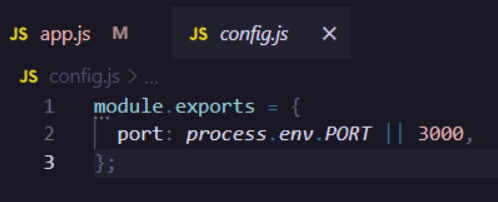
And in the app.js file i indicate to run “app.listen” to specify a port thats exported in that configuration to listening on the port 3000 by defualt.
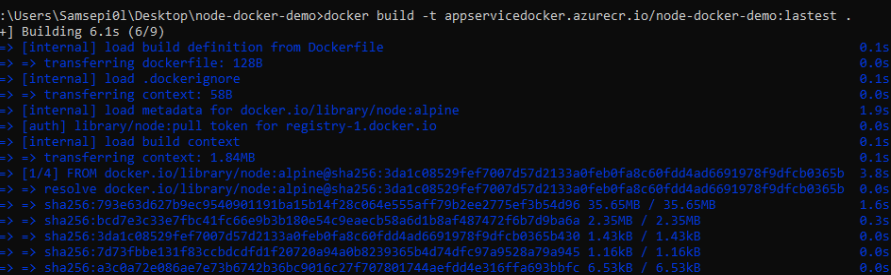
We are going to create a docker image of our web app. for this we are going to use the command:
docker built -t acrname.azurecr.io/your-webapp-name:lastest .
In the last paremeter we are going to use “lastest” so that in our container is always the last version of our web app.
Once the image build process is finished, we are going to use “docker images” command to check if the image has been created correctly.
And then with the command:
docker run -d -p 8080:3000 IMAGE ID
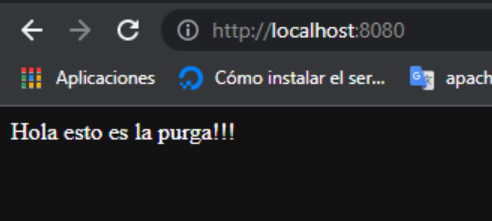
To run the container from local to see if our app is working correctly. The “-p” parameter specifies the port I want my web app to run.

And as we can see our web app is working correctly inside the container.
Now we are going to publish the container image we have just created in ACR. To do this we will use the command:
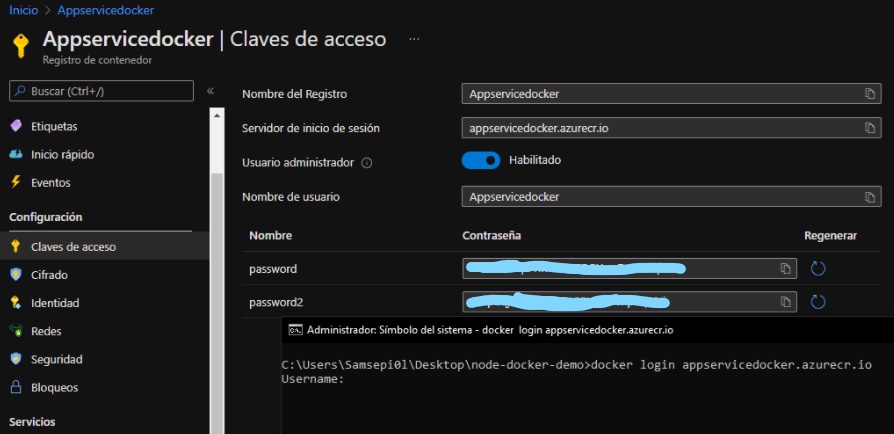
docker login yourACRname.azurecr.io
Now let’s log into our ACR to deploy our container image, it will ask us for the user and password. To do this we are going to go to your ACR => Access key. Copy and paste the username and password into the terminal.
Now we are going to deploy our container image in ACR. for this we are going to use the command:
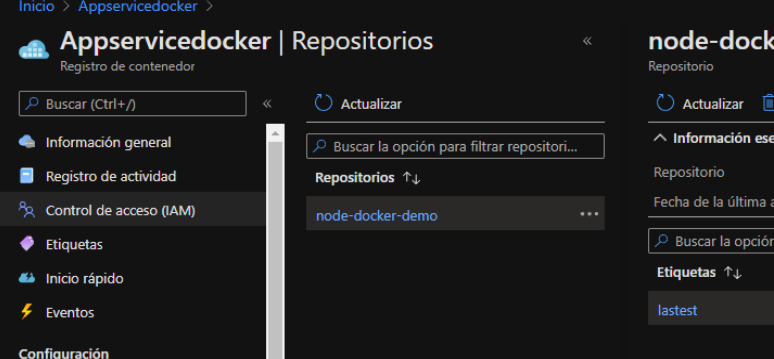
docker push name-of-the-image:lastest

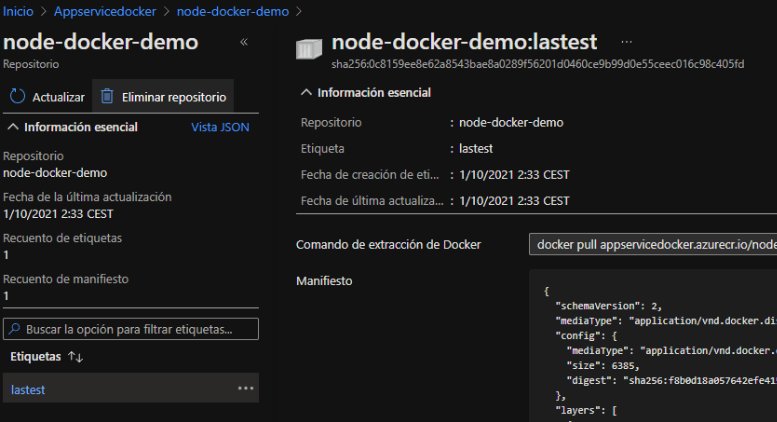
And once we have finished the deploy process we are going to check it. for this we will go to: ACR => repository. And as we can see that the image has been published correctly.
If we click on the image we can see what the latest version is and the date when we made the push.
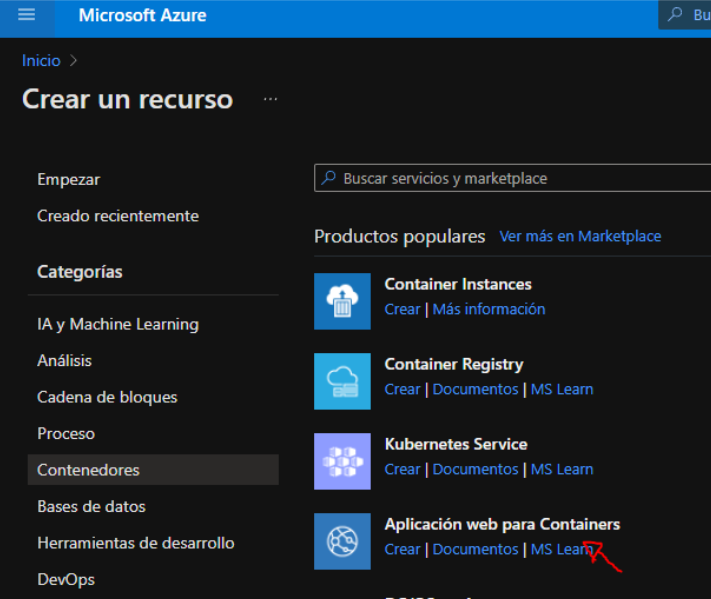
Now we are going to connect our container that we have uploaded and we are going to connect it with the app service, for this we will go to: Create a resource => containers => Web App for containers.
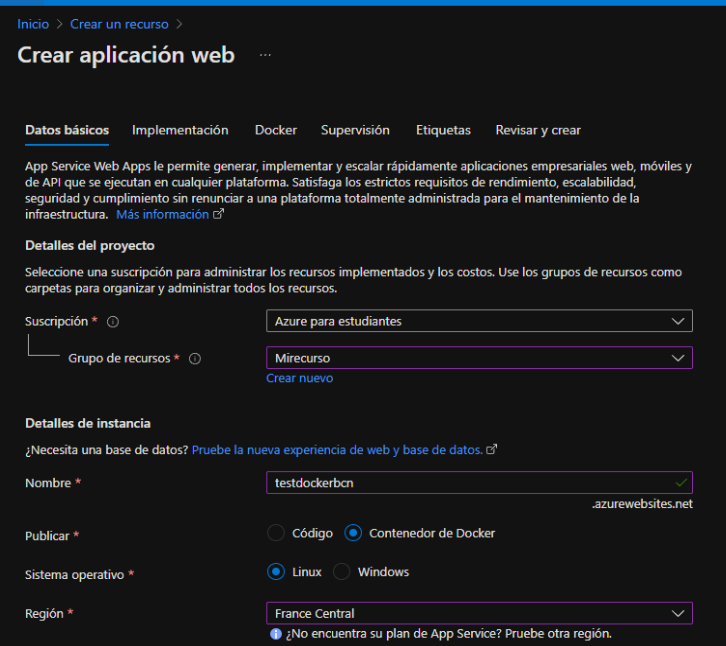
Now select the resource group, name our app service, under “publish” it is important that we select the option “docker container”, choose the OS and the region. And click on “Next”.
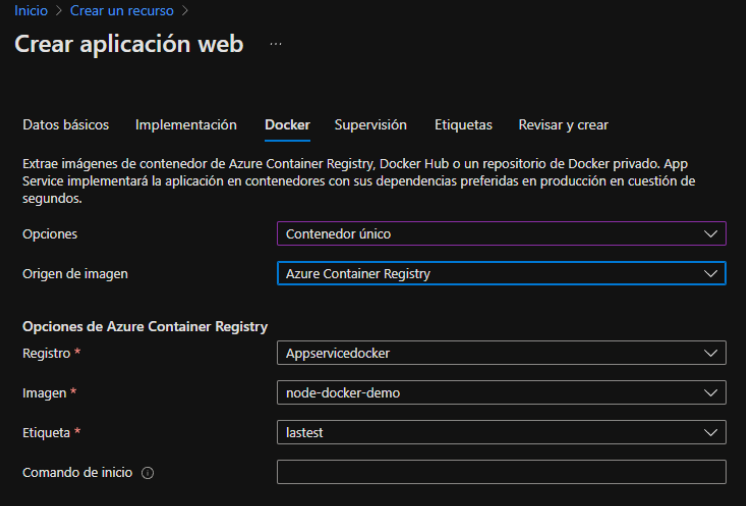
In the docker section it is important that where it says “Image source” we select the ACR, and in registry we are going to select the name of our ACR, and in where says “image” select the docker image that we have deploy, and in label we are going to put “lastest” to indicate that we want the latest version of the image. And click on “review and create”.
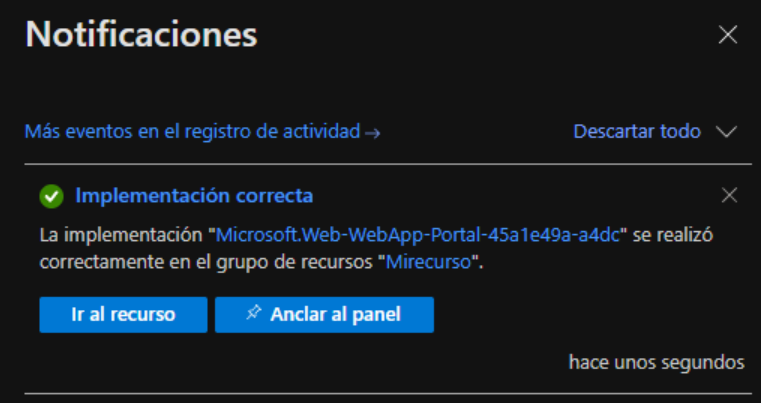
A notification will appear if it has been successfully created and we click on “go to resource”.
And as we can see that we have created our app service. now we have our app service inside a container.
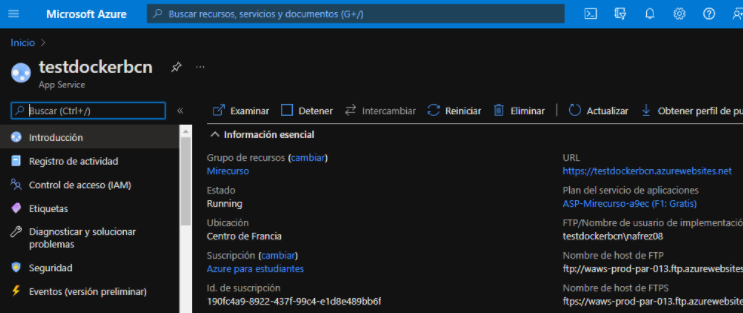
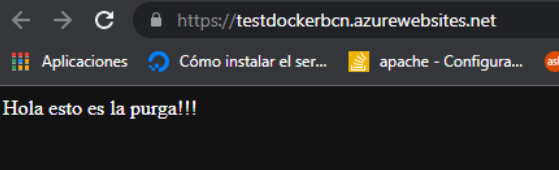
And we can see that my web app is working correctly.
Create an webhook:
Go to your app service => click where it says “Deployment center” => in settings you select the first option “container registry” (here your docker image that you have created will automatically appear) => select the option “On” in “Continuous deployment”.
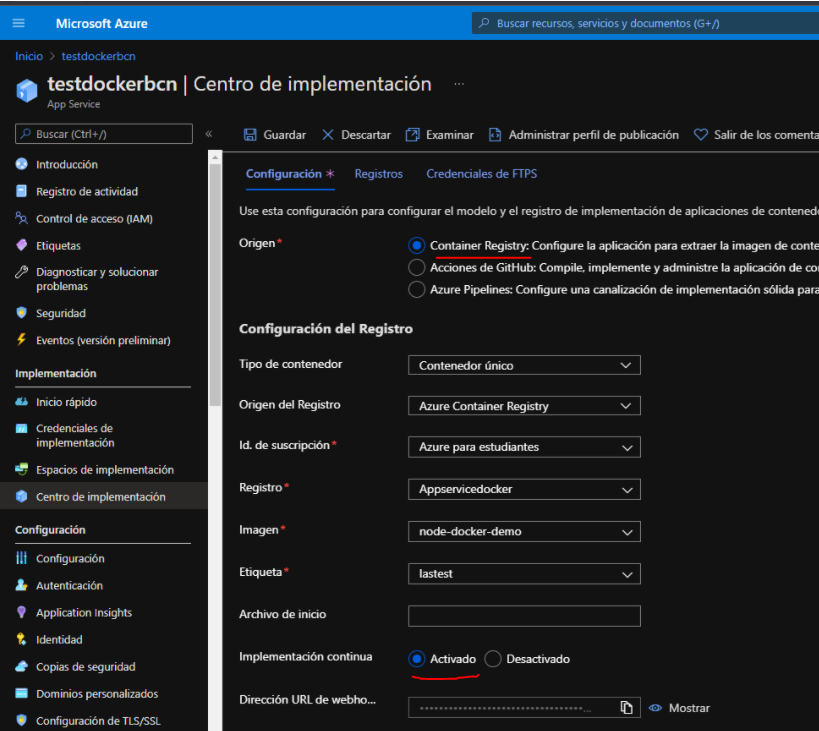
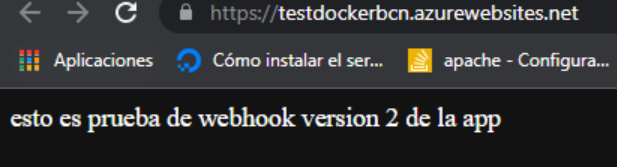
What this will do is it’ll create a webhook rosource that will fire whenever we push a new version to the docker container image in the ACR and it will actomatically kick off deployment.
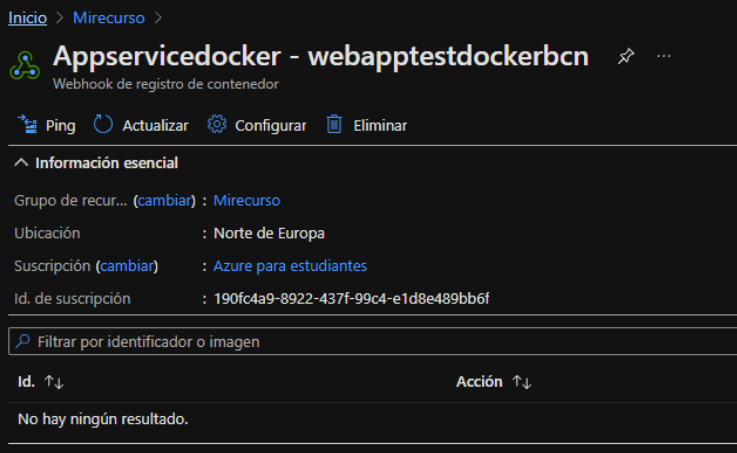
So go to the group of resources where we have created the app service, we can observe that the webhook has been created.
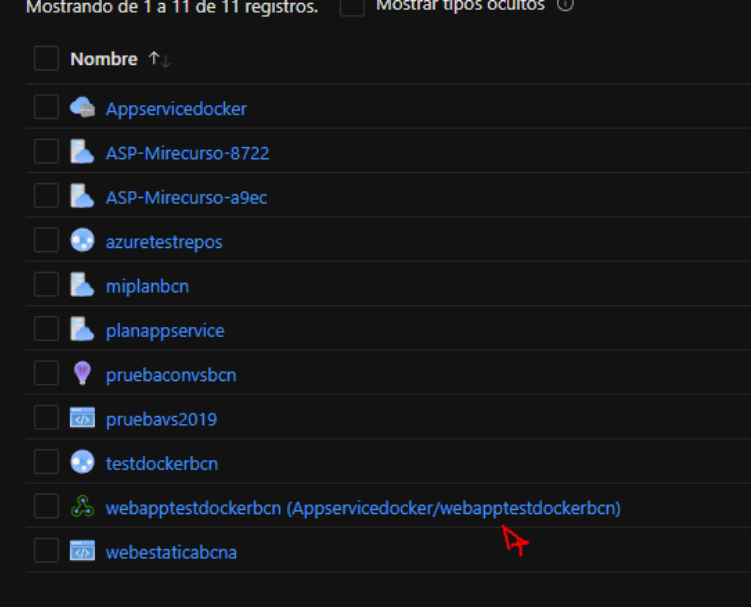
We click in the webhook, and we can see it’s never run yet but if we push a new version of the image to the registry it should fire, it should cause a deployment to take place and update our web app.
For this demo, I am going to make a modification of my web app.
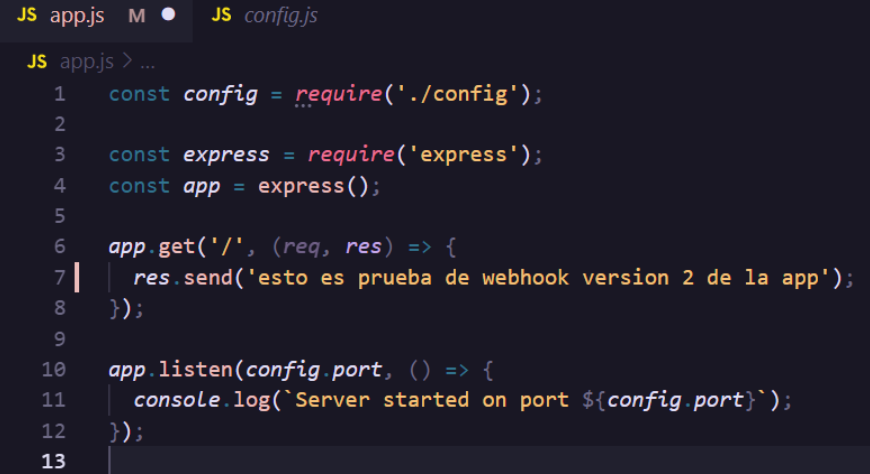
And I’m going to reassemble the image.

And I’m going to push the image again.

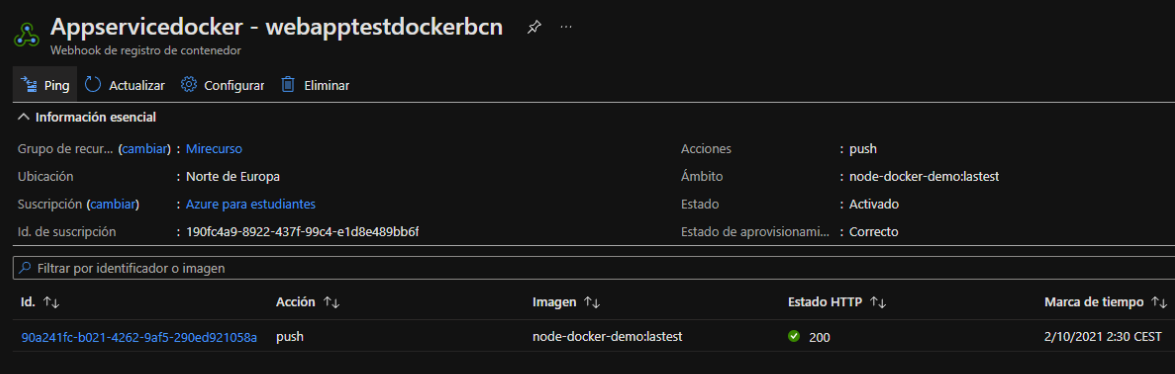
So going back to the portal heading over to the webhook rosource and click on “refresh”, we can see that we got a push action taking place.
And if we go to our app service in the “deployment center” section and select the log section, we can see the logs when we have published the image.
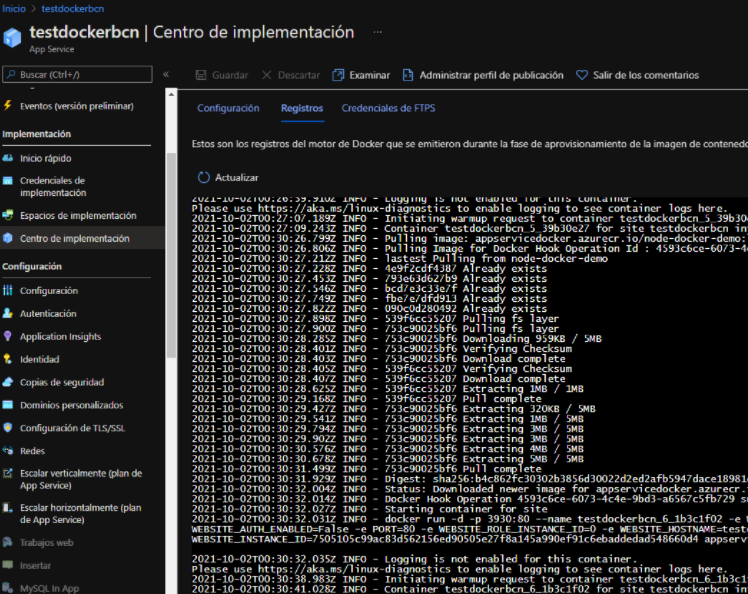
And as you can see the changes have been applied correctly in my web app.